Clean & Jerk: Improve Full-Body Coordination & Power
Clean & Jerk System Blueprint: Build Full-Body Power Safely

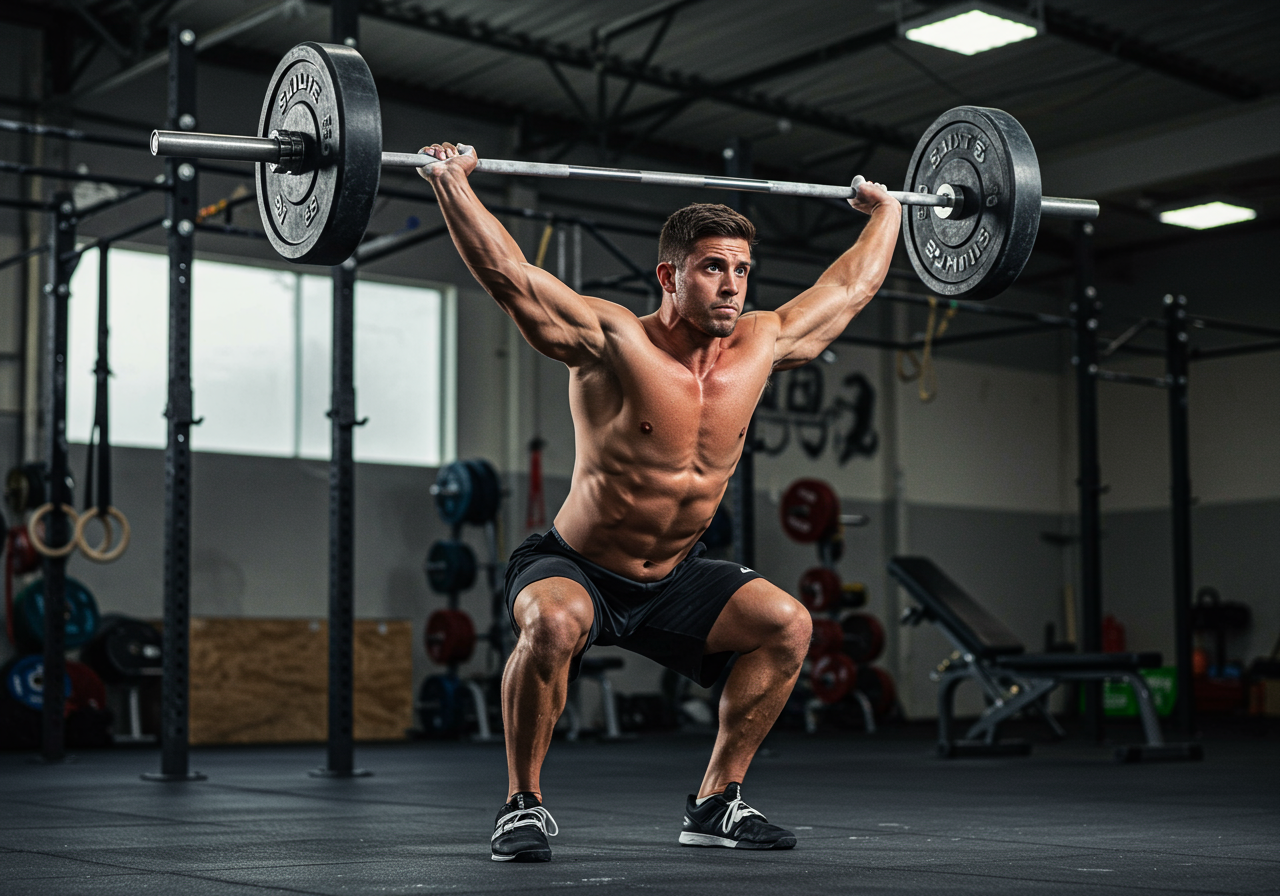
Develop full-body coordination and power with a clear clean and jerk blueprint
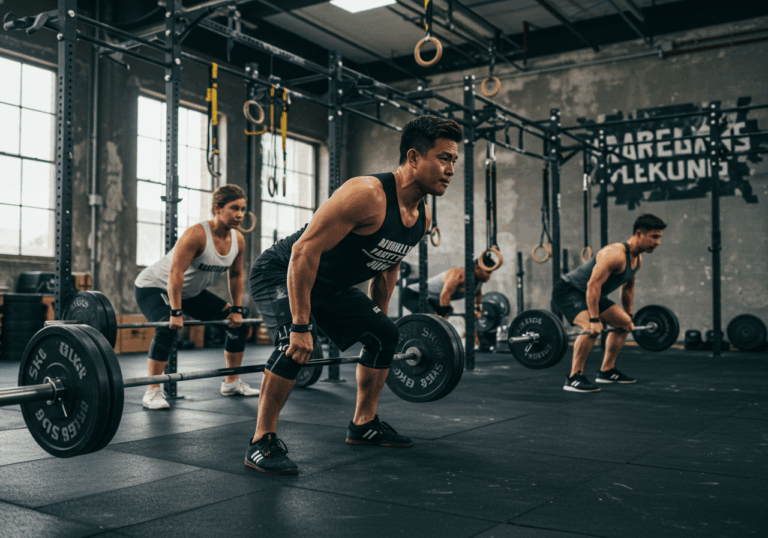
This plan builds explosive strength and safe mechanics. I teach beginners daily, and I lift myself weekly. The movement uses hips, legs, and shoulders together. You will learn timing, balance, and bracing first.
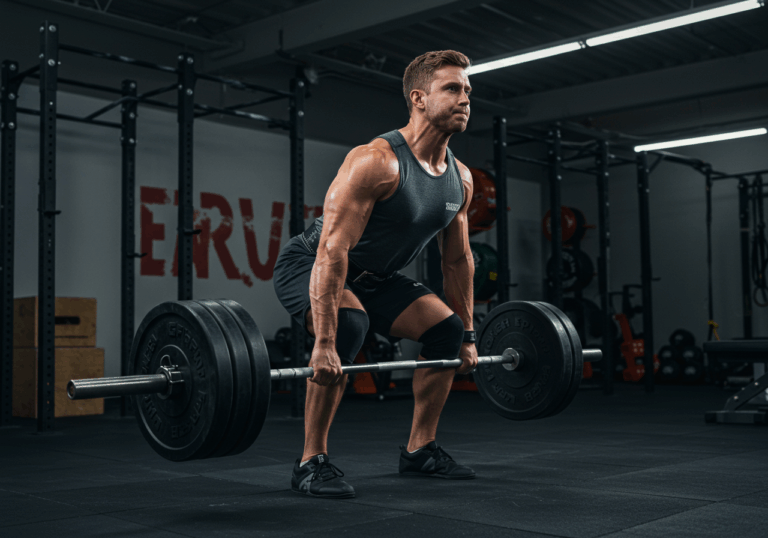
- Keep the bar close for efficient leverage and less stress.
- Drive through legs and hips before pulling with arms.
- Brace the trunk and keep the spine neutral.
- Move the feet fast during the catch and the jerk.
- Prioritize speed and precision over grinding reps.
- Stop sets if bar path drifts forward repeatedly.
Science note: the clean and jerk improves rate of force development. It trains the stretch-shortening cycle and neural coordination.
- 2 minutes bike or brisk walk.
- 5 rounds: 3 inchworms, 5 squat-to-stands, 10 band pull-aparts.
- 3 sets: 5 empty bar front squats, 5 press, 5 muscle cleans.
| Phase | Focus | Cues |
|---|---|---|
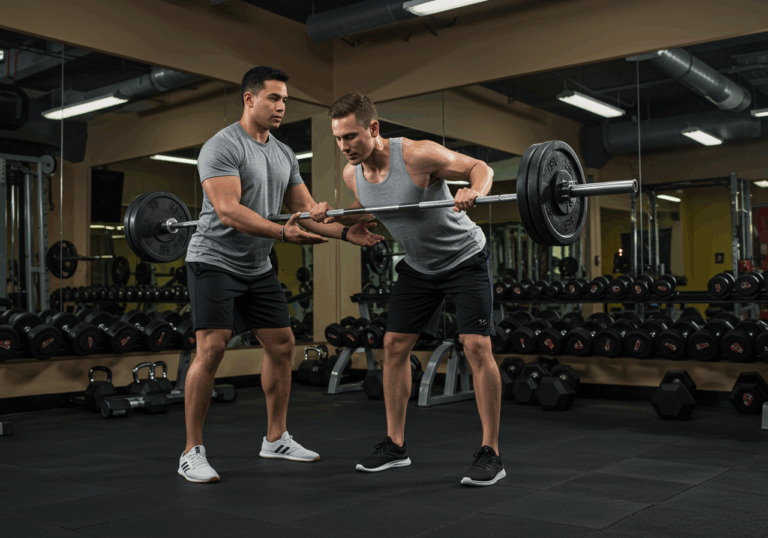
| Clean Pull | Leg drive | Push floor away, lats tight, bar to thighs. |
| Turnover | Fast elbows | Elbows through, catch on shoulders, soft knees. |
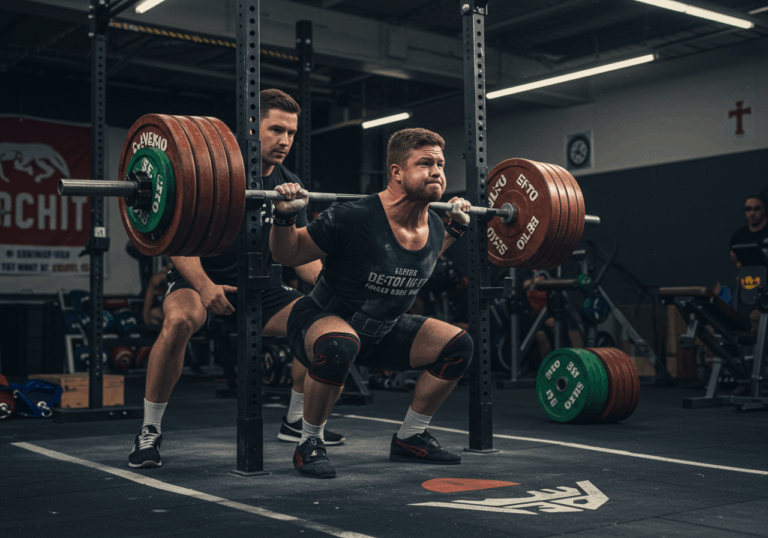
| Front Squat | Stable rack | Knees out, chest tall, heels down. |
| Jerk Dip/Drive | Vertical dip | Short dip, hard drive, split fast. |
- Use bumper plates and a platform when possible.
- Learn to bail forward safely on missed cleans.
- Wrists, shoulders, and low back need gradual loading.
My mistake: I once skipped my warm-up and strained my calf slightly. I never skip it now. I also learned to reduce load after three technical misses.
Progressive Overload: Sets, Reps, and Weekly Structure

Use smart progressions to build strength without sacrificing technique
Progress requires small weekly increases and consistent practice. I program volume to match skill level. You will progress from light doubles to heavier singles.
- Linear increases of 2.5–5% for beginners.
- Wave loading for intermediates: 70–80–75–85% patterns.
- EMOMs for technique density without fatigue spikes.
- Clusters for power: 1+1+1 with 20 seconds between reps.
- RPE guidance: stop cleans at RPE 8 to keep speed.
| Level | Main Lift | Volume | Accessory |
|---|---|---|---|
| Beginner Weeks 1–4 | Clean & Jerk 5×2 @ 60–70% | Rest 2–3 min | Front Squat 3×5, Press 3×5 |
| Intermediate Weeks 5–8 | Wave: 70/75/80% x 2 | Rest 2–3 min | Clean Pull 4×3, Jerk Dip 4×3 |
| Advanced Weeks 9–12 | Singles @ 82–92% | Rest 3–4 min | Front Squat 5×2 heavy |
- Warm-up: 10 minutes primer above.
- EMOM 10: 1 clean and jerk @ light load.
- Front squat 3×5 @ moderate pace.
- Cool-down: 5 minutes walk and stretch.
Track heart rate for EMOMs. Aim for Zone 2–3. My Garmin averages 125–140 bpm here.
| Day | Focus | Details |
|---|---|---|
| Mon | Technique + Squat | C&J 5×2, Front Squat 3×5, Core 3×10. |
| Wed | Pulls + Jerk | Clean Pull 4×3, Jerk 5×2, Back Ext 3×10. |
| Fri | C&J + EMOM | C&J 6×1 moderate, EMOM 10 minutes technique. |
| Sat | GPP Cardio | Zone 2 bike 30–40 minutes, HR 120–135 bpm. |
Drop weight if elbows slow or dip turns forward. Poor positions increase injury risk.
Recovery, Mobility, and Fuel: The Power Behind Progress

Recover better to lift better and stay consistent
Recovery supports technique and strength. I track sleep, steps, and soreness daily. Nutrition fuels better sessions and better learning.
- Sleep 7–9 hours nightly for neural recovery.
- Protein 1.6–2.2 g/kg body weight per day.
- Carbs 3–5 g/kg on normal days. 5–7 g/kg on heavy days.
- Hydrate with 3–4 liters daily. Add electrolytes in heat.
- Creatine 3–5 g daily supports power output.
| Routine | Drill | Time |
|---|---|---|
| Warm-up | Ankle rocks, goblet squat pries, band dislocates | 8 minutes |
| Between Sets | Breathing: 4-second inhale, 6-second exhale | 2 minutes |
| Cool-down | Thoracic extensions, calf stretch, hip flexor lunge | 6 minutes |
- 2×12 band face pulls.
- 2×8 behind-the-neck press with PVC.
- 2×10 serratus wall slides.
This routine reduced my jerk lockout wobble in two weeks.
I log food in MyFitnessPal to hit macros. I lift best at 2,600–2,800 calories on training days. My split stays near 30% protein, 45% carbs, 25% fat.
- Sharp wrist pain means adjust rack position immediately.
- Persistent low back pain needs technique review and rest.
- See a professional for numbness or radiating pain.
My best PRs followed three things. I slept eight hours, ate a carb-rich dinner, and reduced accessory volume.
Your 12-Week Roadmap, Tracking, and Real Session Examples

Follow a clear plan and track data to adapt quickly
This roadmap shows exactly what to do weekly. You will test, build, and peak safely. I include my real logs.
| Weeks | Focus | C&J Prescription | GPP / Cardio |
|---|---|---|---|
| 1–4 | Technique base | 5×2 @ 60–70%, stop at RPE 7–8 | Zone 2, 2×30 minutes, HR 120–135 |
| 5–8 | Strength build | Waves to 80–85%, doubles and singles | EMOM 12: 1 clean at 65–70% |
| 9–11 | Peaking | Singles @ 85–92%, low volume | Zone 2, 1×25 minutes, keep legs fresh |
| 12 | Test week | Work to best technical single | Light walk 20 minutes |
Use the Epley formula: 1RM ≈ weight x (1 + reps/30). Test with clean pulls first if nervous.
- Zone 2: conversational pace, 60–70% max HR.
- Technique EMOMs: 65–75% max HR.
- Long rests keep the nervous system fresh.
My recent log, tracked with a Garmin Forerunner:
| Date | Session | Load | HR Avg | Notes |
|---|---|---|---|---|
| Week 1 Mon | C&J 5×2 | 40 kg | 118 bpm | Bar close, easy speed. |
| Week 4 Fri | C&J 6×1 | 55 kg | 126 bpm | Fast elbows, stable rack. |
| Week 8 Wed | Wave doubles | 60–70 kg | 131 bpm | One miss, dropped load. |
| Week 12 Tue | Test single | 75 kg | 124 bpm | Clean PR, solid jerk. |
I track food in MyFitnessPal. I track HR and sessions using Garmin.
If sleep falls below six hours, reduce volume by 20% that week. Protect your nervous system.
Proof of Results, Client Wins, and long-term result interpretation

Measure outcomes, fix issues, and guide long-term result interpretation
I test progress using strength, speed, and conditioning data. Clients and I log each variable weekly. We adjust based on evidence.
- Clean and jerk improved from 90 kg to 97.5 kg.
- Front squat double improved from 125 kg to 130 kg.
- VO2 max increased by ~8% on Garmin, 52 to 56.
- Bodyweight stayed stable at 80 kg. Waist dropped 1.5 cm.
What worked: EMOM technique and clusters. What failed: heavy pulls after max singles.
| Client | Start | After 10 weeks | Notes |
|---|---|---|---|
| Ana, 32 | C&J 20 kg | C&J 45 kg, +6 cm vertical | Zone 2 helped recovery and sleep. |
| Mark, 41 | C&J 80 kg | C&J 88 kg, -3 kg fat | Clusters broke plateau, HIIT trimmed time. |
HIIT outperformed steady-state for time efficiency. However, Zone 2 improved readiness and stress resilience. I use both strategically.
- Plateau: reduce volume 30% for one week. Add speed pulls.
- Poor jerk lockout: increase push press and split stance holds.
- Early arm pull: lighter cleans and tall clean drills.
- Motivation dips: switch to EMOMs and celebrate small PRs.
- Overuse pain: swap barbell day for dumbbell push press.
| Issue | Likely Cause | Fix |
|---|---|---|
| Bar forward | Loose lats | Lats on, sweep bar in. |
| Soft catch | Slow elbows | Tall cleans and fast turnover. |
| Jerk press-out | Shallow dip | Vertical dip, deeper split, pause jerks. |
Nutrition note: Ana averaged 1,900 kcal with 120 g protein. Mark used 2,400 kcal with 180 g protein. Both logged food with MyFitnessPal and tracked HR with Garmin.
Maintain gains by rotating intensities every three weeks. Keep one technique day, one strength day, and one lighter EMOM weekly.