
Jump Rope HIIT: The 20-Minute Cardio Workout That Burns More Fat Than Running
Why I Threw Away My Gym Membership and Bought a $15 Rope
Three years ago I was paying $80 a month for a gym membership I used mainly for the treadmill. Twenty-five minutes of jogging, three times a week. My cardiovascular fitness was mediocre, my body composition was stuck, and I was spending 45 minutes round-trip commuting to stare at a screen while walking on a belt. Then a friend bet me I couldn’t skip rope for 10 minutes straight. I couldn’t. I wasn’t even close. But the attempt left me more breathless and more metabolically challenged than any treadmill session I’d done in months.
That embarrassment sent me down a research rabbit hole that eventually replaced my gym treadmill habit entirely. What I found: jump rope, when used for high-intensity interval training, is among the most calorie-dense and cardiovascular-demanding exercises available — more demanding per minute than moderate running, completely equipment-independent, and learnable by anyone willing to look foolish for about two weeks while they build the coordination.
This guide covers the science of why jump rope HIIT works so well, a complete beginner-to-advanced protocol progression, the technique foundations that make the work efficient, and the specific mistakes that keep most people from realizing jump rope’s full potential. The rope costs $15. The results are disproportionate to the investment.
The Science Behind Jump Rope and Fat Loss
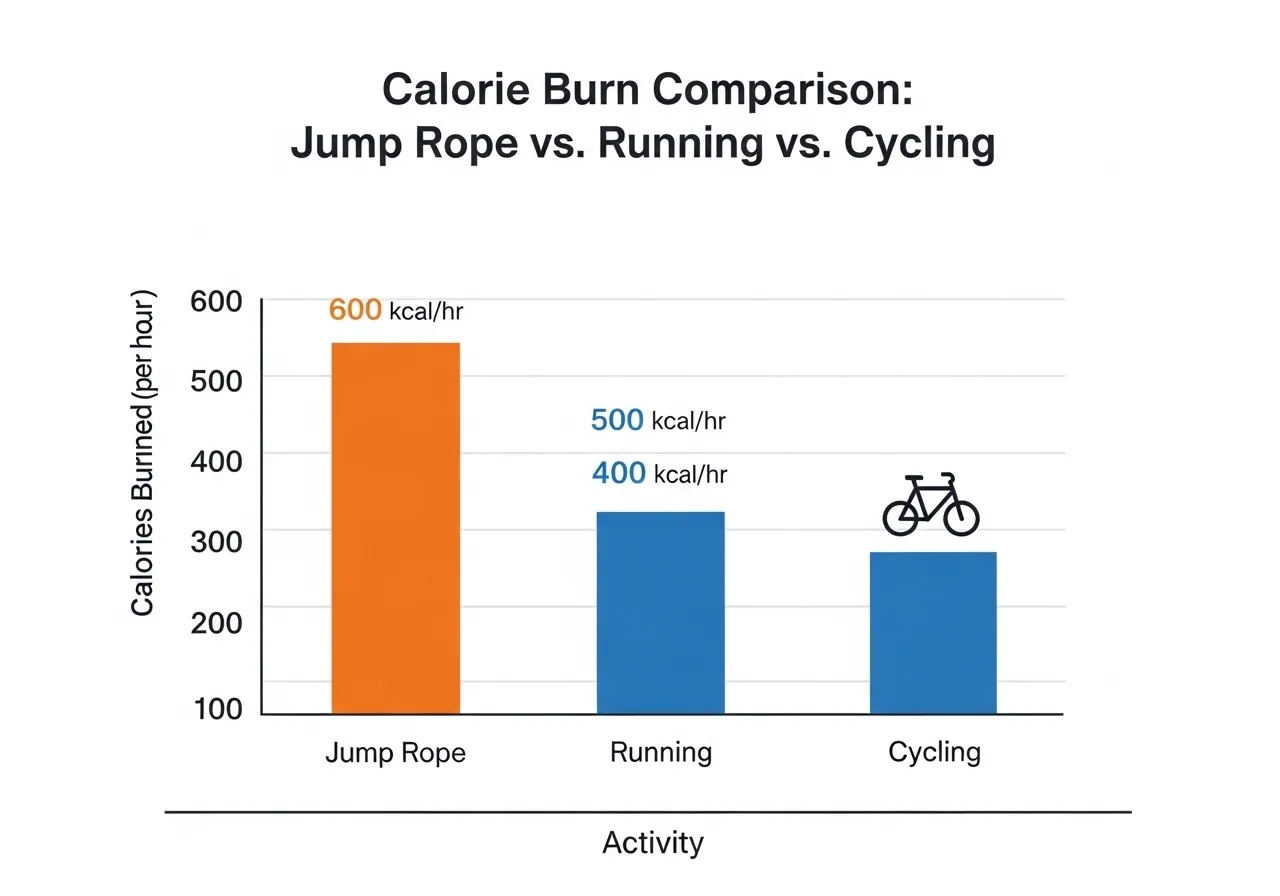
The calorie expenditure of jump rope is genuinely impressive when measured against other popular cardio modalities. Studies on jump rope at moderate to vigorous intensity find energy expenditure of 700-1000 kcal per hour depending on body weight and intensity — comparable to running at 8-10 minute mile pace. But the HIIT application of jump rope pushes significantly beyond what steady-state running produces through the mechanism of excess post-exercise oxygen consumption (EPOC).
EPOC — sometimes called the afterburn effect — refers to the elevated metabolic rate that persists for hours after high-intensity exercise as the body restores oxygen stores, clears lactate, and repairs exercise-induced muscle disruption. Research consistently shows that HIIT protocols produce significantly greater EPOC than steady-state cardio of equivalent duration. A 20-minute jump rope HIIT session therefore continues burning calories at an elevated rate for 12-24 hours after the workout ends, making total caloric impact considerably higher than the workout itself suggests.
The Complete Jump Rope HIIT Protocol
The following protocol is structured in three phases — beginner, intermediate, and advanced — that build progressively over 8-12 weeks. Don’t rush phases. The coordination demands of jump rope are real, and attempting advanced intervals before the movement pattern is ingrained produces frustration and shin splints rather than fitness.
Phase 1: Beginner Protocol (Weeks 1-3)
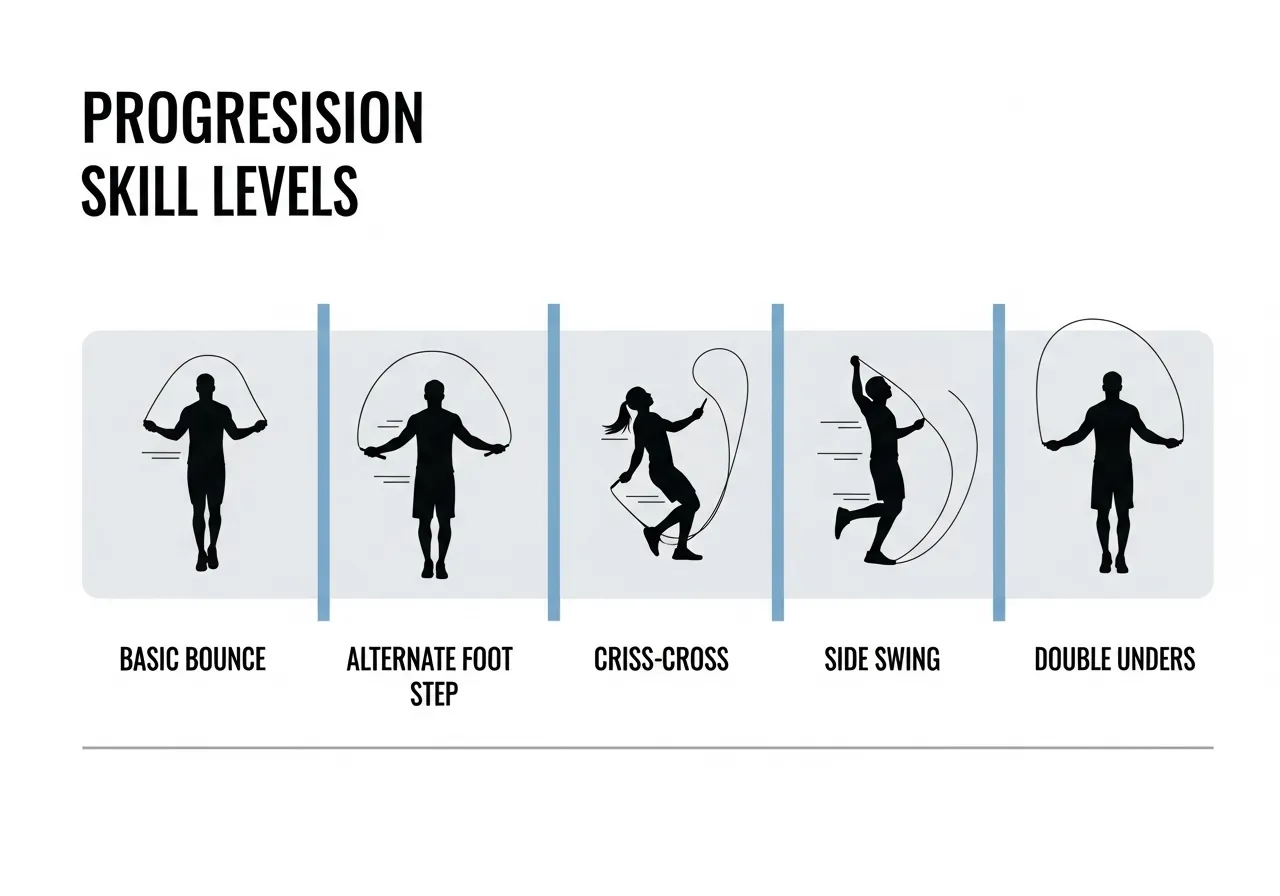
Goal: Build the jumping rhythm and rope timing without cardiovascular distress. Duration: 15 minutes total. Structure: 30 seconds jumping, 90 seconds rest, 8 rounds. Jumping style: Basic two-foot bounce, small jumps (1-2 inches off the ground), consistent rhythm. Focus entirely on staying relaxed — tight shoulders and bent elbows are the enemy of efficient rope work. Your arms should feel almost passive, with the rotation driven from the wrists.
The most important thing at this stage is landing softly on the balls of your feet, not your heels. Heel striking during jump rope is the primary cause of shin splints and knee discomfort in beginners. Visualize landing like a cat — quiet, springy, and absorbed through the ankle and knee rather than jarred through the heel.
Phase 2: Intermediate Protocol (Weeks 4-7)
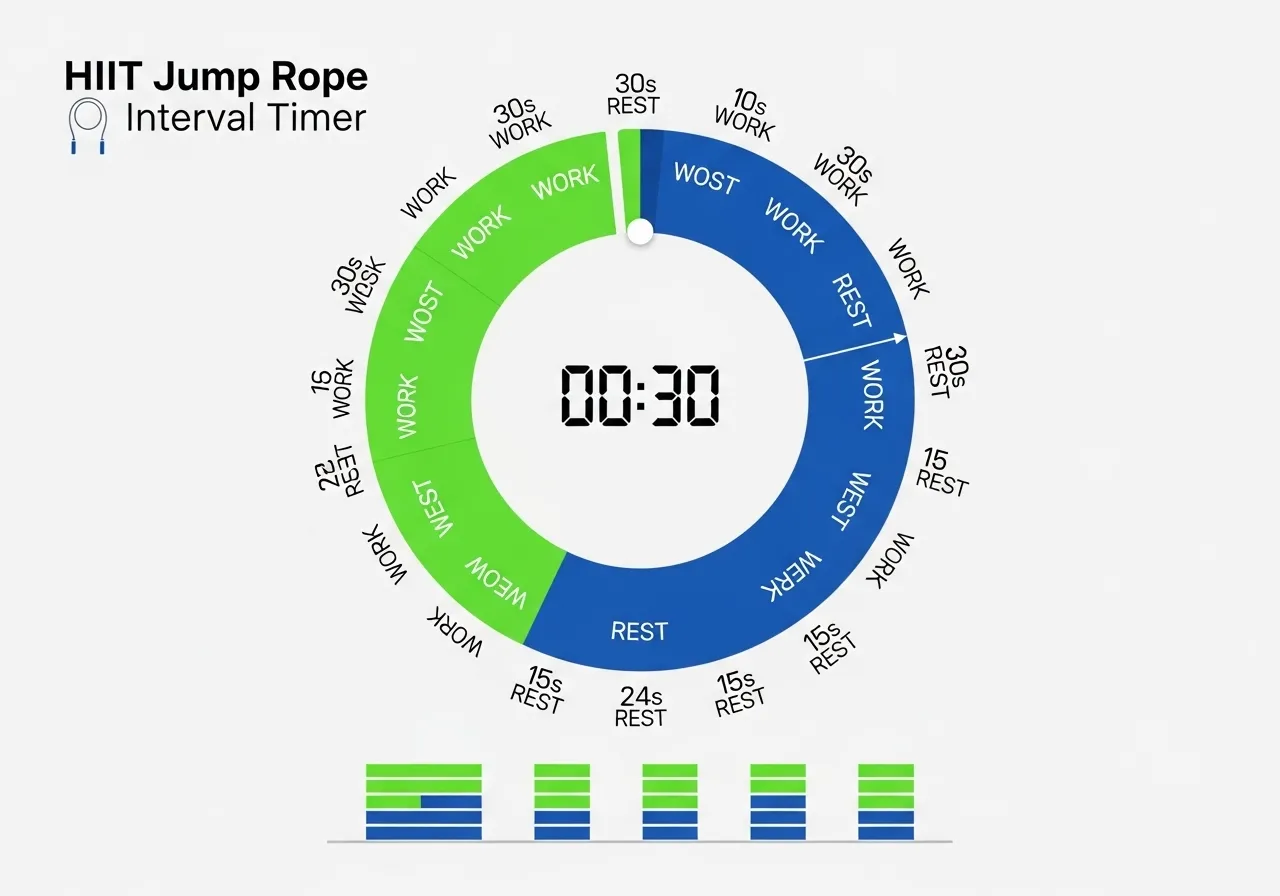
Goal: Build genuine cardiovascular capacity and introduce interval intensity. Duration: 20 minutes total. Structure: 40 seconds jumping at moderate-high intensity, 20 seconds rest, 15 rounds. Jumping styles: Alternate between basic bounce, alternating foot jump (like slow running in place), and high knees within working sets. The 2:1 work-to-rest ratio at this phase begins to meaningfully challenge the cardiovascular system and introduces the oxygen debt that drives EPOC.
Phase 3: Advanced Protocol (Weeks 8+)
Goal: Maximize caloric expenditure and metabolic demand. Duration: 20 minutes total. Structure: 45 seconds maximum effort, 15 seconds rest, 16 rounds (with 2-minute easy jumping warm-up and 2-minute cool-down). Jumping styles: Mix basic bounce, double-unders (rope passes twice per jump), criss-cross, and speed intervals. The 3:1 work-to-rest ratio of this phase is genuinely demanding — most people find it harder than any other cardio they’ve done. Research on high-intensity interval training protocols confirms that short rest periods of this nature maximize cardiovascular adaptation and fat oxidation post-exercise.
Jump Rope Technique: The Foundations That Make Everything Easier
Poor technique in jump rope doesn’t just look bad — it costs energy, causes injury, and limits how hard you can push. The coordination investment in the first two weeks of rope work pays returns throughout your training. These are the technique principles I teach every beginner and revisit with every intermediate athlete who hits a plateau.
Rope Length
Stand on the center of the rope and pull both handles up — they should reach your armpits, not your shoulders or chest. A rope that’s too long creates extra slack that catches and trips. A rope that’s too short forces awkward shoulder mechanics. Most adjustable ropes ship too long for most people — cut or adjust before your first session.
Hand and Arm Position
Hands should be at hip height, roughly 30cm out from your hips. Elbows stay close to the body — this is the most commonly violated technique principle. When elbows flare out, the rotation arc gets large and the rope slows down. All rotation happens at the wrists. Think of turning a small key in a lock, not swinging a lasso. Keeping elbows in also reduces shoulder fatigue dramatically and allows sustained high-intensity work.
Jump Height and Rhythm
Jump only as high as necessary for the rope to pass underneath — this is approximately 1-2 inches off the ground for basic bounce. Higher jumps cost more energy per revolution and slow your maximum speed. At advanced levels, experienced jumpers look almost like they’re barely leaving the ground — the jump height is minimal while the rope speed is maximal.
Find your rhythm before worrying about speed. Consistent rhythm at slower speed builds the neural pattern faster than erratic fast jumping. Once the rhythm is automatic — when you stop thinking about timing — speed increases naturally.
Programming Jump Rope HIIT Into Your Weekly Training
Jump rope HIIT is intense enough that recovery between sessions matters. Here’s how to integrate it without overtraining or interfering with strength training goals.
For Fat Loss Priority
3-4 jump rope HIIT sessions per week with at least one rest day between sessions. Pair with 2 strength training sessions. The combination of heavy compound lifting and jump rope HIIT creates a powerful dual stimulus — the lifting preserves muscle while the HIIT maximizes fat oxidation. Place HIIT sessions on different days from leg training to prevent compromised performance from lower body fatigue.
For Athletic Conditioning
2-3 sessions per week used as conditioning finishers after sport-specific training. 10-15 minutes of jump rope intervals after a practice session provides cardiovascular conditioning without the impact volume of additional running. Jump rope is particularly valuable for boxers, MMA athletes, and basketball players because it develops the quick-twitch foot coordination that directly transfers to sport performance.
For Cardiovascular Health Without Gym Access
Jump rope is the most portable serious cardio tool that exists. A speed rope fits in any bag and can be used in any space with 3 feet of ceiling height and a 6-foot diameter. For travelers, remote workers, or anyone who doesn’t have consistent gym access, a daily 20-minute jump rope protocol provides all the cardiovascular health benefits that treadmill or bike work offers — with zero equipment beyond the rope itself.

Common Jump Rope Mistakes That Kill Your Progress
After watching countless beginners struggle with jump rope, the same errors appear repeatedly. Knowing them in advance saves weeks of frustration.
Jumping Too High
The most universal beginner error. Beginners jump 6-12 inches off the ground trying to “make room” for the rope. This exhausts the calves in 60 seconds and makes sustainable intervals impossible. The rope needs 2 inches of clearance, not 8. Start consciously small and the efficiency improvement is immediate.
Looking Down
Looking at your feet disrupts balance and makes rhythm harder to maintain. Fix your gaze on a point at eye level directly ahead. This aligns your head and spine naturally and reduces the tendency to hunch forward, which tightens the rope arc and causes trips.
Tense Shoulders
Jump rope requires relaxed upper body. Tense shoulders elevate the handles, alter the rope arc, and fatigue the upper body prematurely. Between sets, consciously roll your shoulders and let them drop. Return to relaxed position before the next working interval.
Ignoring Shin Pain
Mild shin discomfort in the first week is normal adaptation. Persistent shin pain that worsens over sessions is the beginning of shin splints. Shin splints from jump rope are almost entirely caused by two things: heel striking and too much volume too soon. Fix heel striking immediately (land on balls of feet) and reduce volume if pain persists beyond session 3.
Frequently Asked Questions About Jump Rope HIIT
Can beginners do jump rope HIIT? Yes, but start with Phase 1 regardless of cardiovascular fitness. The coordination demand is separate from fitness level — a very fit person can be a terrible jump roper initially. Build the skill first, then the intensity.
What type of rope should I buy? For HIIT, a speed rope (lightweight, thin cable) is ideal. Weighted ropes (250g-500g handles or weighted cables) are excellent for upper body conditioning and general fitness but limit the speed required for double-unders and advanced footwork. ACSM guidelines support high-intensity interval training as an efficient modality for cardiovascular health regardless of the specific tool used.
How long until I can do double-unders? Most people who practice consistently can achieve their first double-under within 3-6 weeks. The key is developing consistent single-under timing first — double-unders require jumping slightly higher and rotating the rope faster, which only works when the basic rhythm is completely automatic.
Is jump rope bad for my knees? Jump rope is lower impact than running when performed with proper technique (ball-of-foot landing, small jump height). People with existing knee conditions should consult a healthcare provider before starting, but for healthy knees, jump rope is generally well-tolerated and builds the reactive strength that protects knees long-term.
How does jump rope compare to running for weight loss? Calorie-per-minute expenditure is comparable at equivalent intensities. The advantage of jump rope HIIT over steady-state running is EPOC — the elevated post-exercise metabolism that continues burning calories for hours after the session. For the same total time investment, HIIT protocols consistently outperform steady-state cardio for fat loss outcomes in the research literature.
The Jump Rope Workout You Can Do Anywhere, Starting Today
Here is a complete standalone session for someone starting from zero who wants to test jump rope HIIT today. No experience required. Total time: 20 minutes including warm-up and cool-down.
Warm-up (3 minutes): March in place for 60 seconds, then 10 leg swings per leg, then 30 seconds of easy rope practice (or shadow jumping without the rope if coordination is the bottleneck). Reduce your self-consciousness — everyone trips in the beginning.
Main session (14 minutes): 30 seconds jumping at comfortable pace, 90 seconds rest, 7 rounds. That’s it. If you make it through all 7 rounds without stopping, you’ve accomplished something meaningful. If you trip — and you will — pick the rope up and keep going. Tripping isn’t failure; stopping after tripping is.
Cool-down (3 minutes): Easy walking, calf stretches (30 seconds each side), and forward fold hamstring stretch. Jump rope works the calves hard — stretching them post-session prevents the soreness that discourages beginners from session two.
Progress over the following 8 weeks using the phase structure above. Take video of your sessions starting from week one — watching your own form catches errors faster than any written cue, and watching week-one footage from week eight is the kind of evidence that builds lasting training motivation.
The rope costs $15. The investment of two weeks of looking slightly ridiculous while you build the coordination returns years of the most efficient, portable, and genuinely enjoyable cardio training available. The American Heart Association recommends at least 150 minutes of moderate-intensity or 75 minutes of vigorous-intensity aerobic activity per week — three 20-minute jump rope HIIT sessions covers the vigorous-intensity requirement entirely.
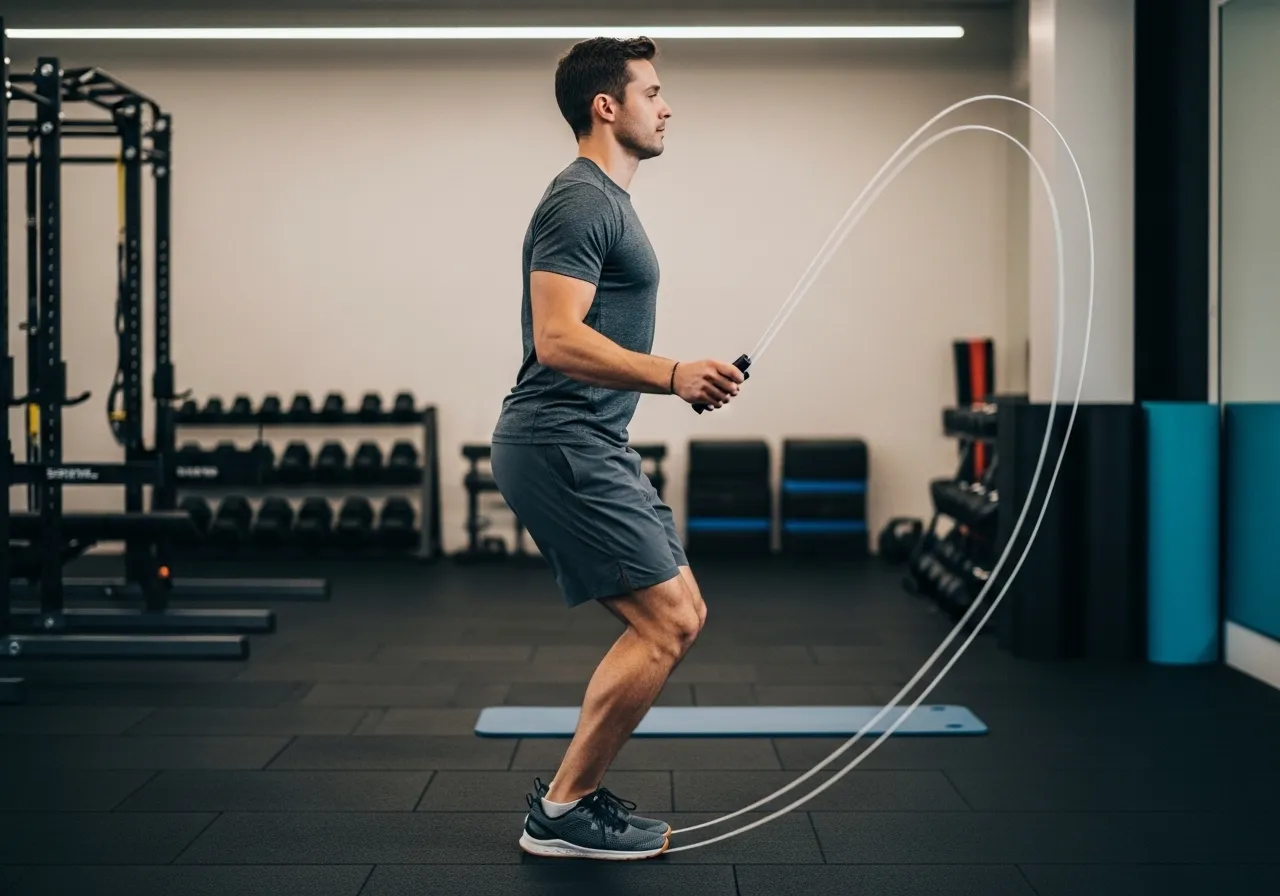
person doing jump rope HIIT workout outdoors burning fat

")


