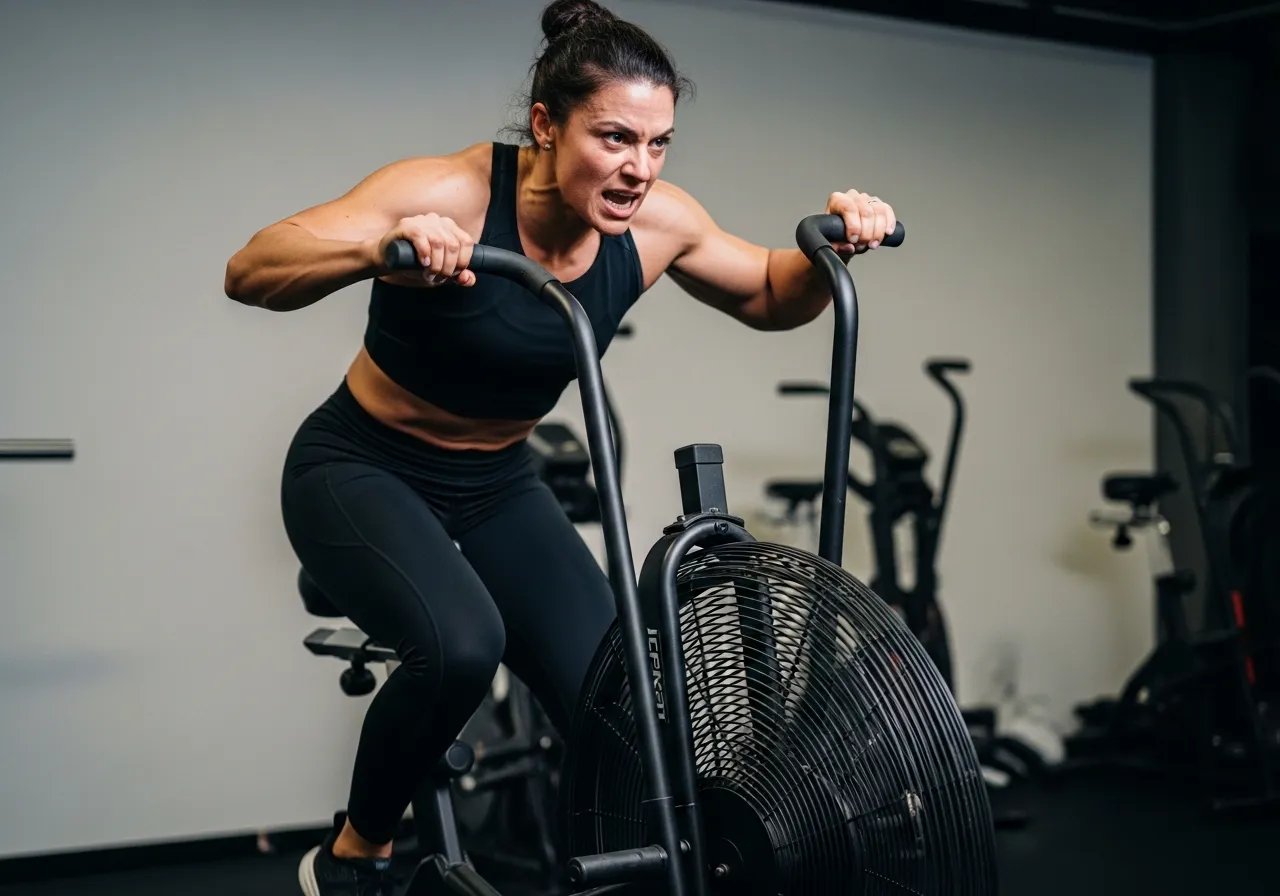
Most cardio equipment trains the legs while the upper body assists at best. The assault bike is different. The arms drive the handlebars forward and back while the legs pedal. Both contribute to power output simultaneously.
This total-body demand creates a cardiovascular and metabolic challenge that leg-only cardio equipment cannot replicate at the same effort level. The assault bike recruits more total muscle mass, elevates heart rate faster, and produces higher VO2 consumption per session than traditional stationary cycling at matched perceived exertion.
This guide covers the research behind why the assault bike produces superior cardiovascular testing results, the wind resistance mechanics that make it unique, five programming protocols from recovery pace to maximum effort, and an 8-week conditioning progression from beginner to intermediate capacity.
The Physiology: Why Total-Body Cardio Creates a Different Stimulus
Muscle Mass Recruitment and VO2 Demand
Maximal oxygen uptake is limited by two factors: cardiac output (how much blood the heart can pump) and peripheral oxygen extraction (how much oxygen the working muscles can extract from that blood). Increasing the muscle mass involved in exercise increases both.
More working muscle mass requires more cardiac output to supply oxygen to all working tissues simultaneously. It also increases the total peripheral oxygen extraction demand because more muscles are consuming oxygen. The combined effect is that total-body exercise at the same perceived exertion elicits higher absolute VO2 than lower-body-only exercise.
📌 Key Finding
The assault bike elicits higher VO2 max, higher peak heart rate, and higher lactate than traditional leg-only cycling at matched effort. Total-body recruitment is the mechanism. More muscle mass working simultaneously creates a greater cardiovascular and metabolic demand than leg-only exercise at equivalent perceived exertion.
📌 Key Finding
Air bike VO2 max testing shows good to excellent agreement with treadmill protocols. The assault bike is a valid cardiovascular fitness assessment tool, not just a conditioning implement. This makes it uniquely useful for trainees who cannot run but need accurate aerobic fitness measurement.
The Wind Resistance Mechanics
Most stationary bikes use magnetic or friction resistance that is set manually and remains constant regardless of effort. The assault bike uses a large fan that generates wind resistance proportional to the speed of pedalling and arm pumping.
This creates an exponential resistance curve. The harder you push, the harder the bike pushes back. At low effort, it feels light. At maximum effort, it becomes almost impossibly difficult. There is no ceiling on resistance and no adjustment required. The machine automatically matches and exceeds your output.
The practical consequence: the assault bike self-regulates to any fitness level. A beginner pedalling at 40% effort encounters moderate resistance. An elite athlete at 100% effort encounters maximum resistance. Both are working at their personal maximum simultaneously on the same machine at the same settings.
This eliminates the need for resistance adjustments between intervals and allows transitions between high and low effort within seconds rather than adjusting settings mid-session. No other piece of cardio equipment replicates this instant intensity modulation without any mechanical adjustment. It is a fundamental design advantage that makes the assault bike uniquely well-suited for interval training at all experience levels.
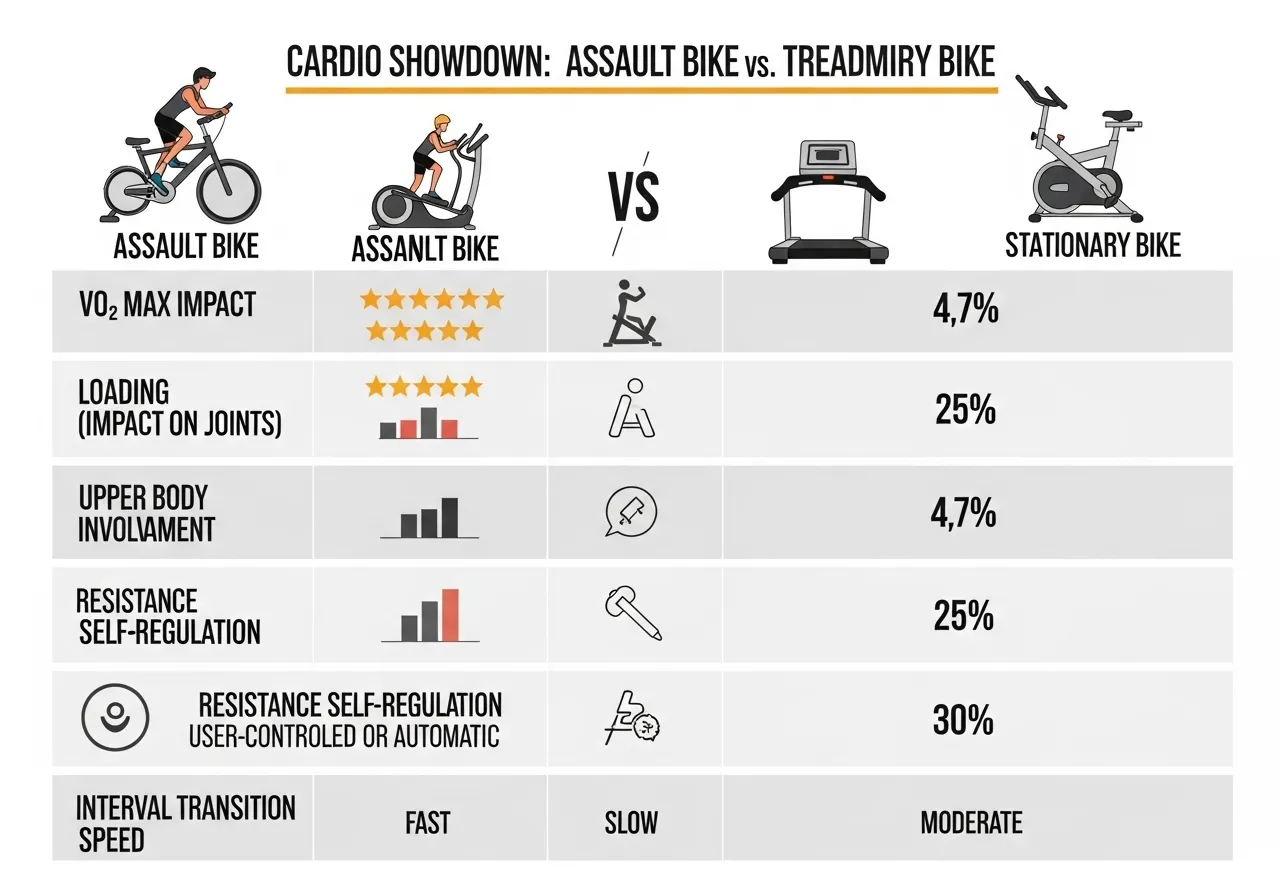
Assault Bike vs Other Cardio Equipment: When to Choose It
The practical difference: for the same session duration, the assault bike produces greater total cardiovascular stimulus and caloric expenditure than a standard stationary bike. The upper body contributes to total power output alongside the legs.
For trainees with limited training time who need maximum cardiovascular stimulus per session, this advantage is significant. More total work is accomplished in the same window of time.
Assault Bike vs Running
Running and assault bike training produce similar cardiovascular adaptations at matched intensity and duration. The key practical differences are impact loading and upper body involvement.
Running creates significant ground reaction forces with each stride. Cumulative impact over weeks of training produces musculoskeletal stress that requires recovery time and limits total weekly training volume for many recreational athletes.
The assault bike produces negligible impact force. Trainees with knee, hip, or ankle pathology that limits running can often use the assault bike at equivalent cardiovascular intensities without the same joint stress.
Factor
Assault Bike
Treadmill Running
Stationary Bike
VO2 max elicited
High (total body)
Highest (gold standard)
Moderate (legs only)
Impact loading
Negligible
High
Negligible
Upper body involvement
High
Low
Minimal
Resistance self-regulation
Automatic (wind)
Manual (speed/incline)
Manual (resistance)
Interval transition speed
Instant
Slow (belt speed)
Slow (resistance change)
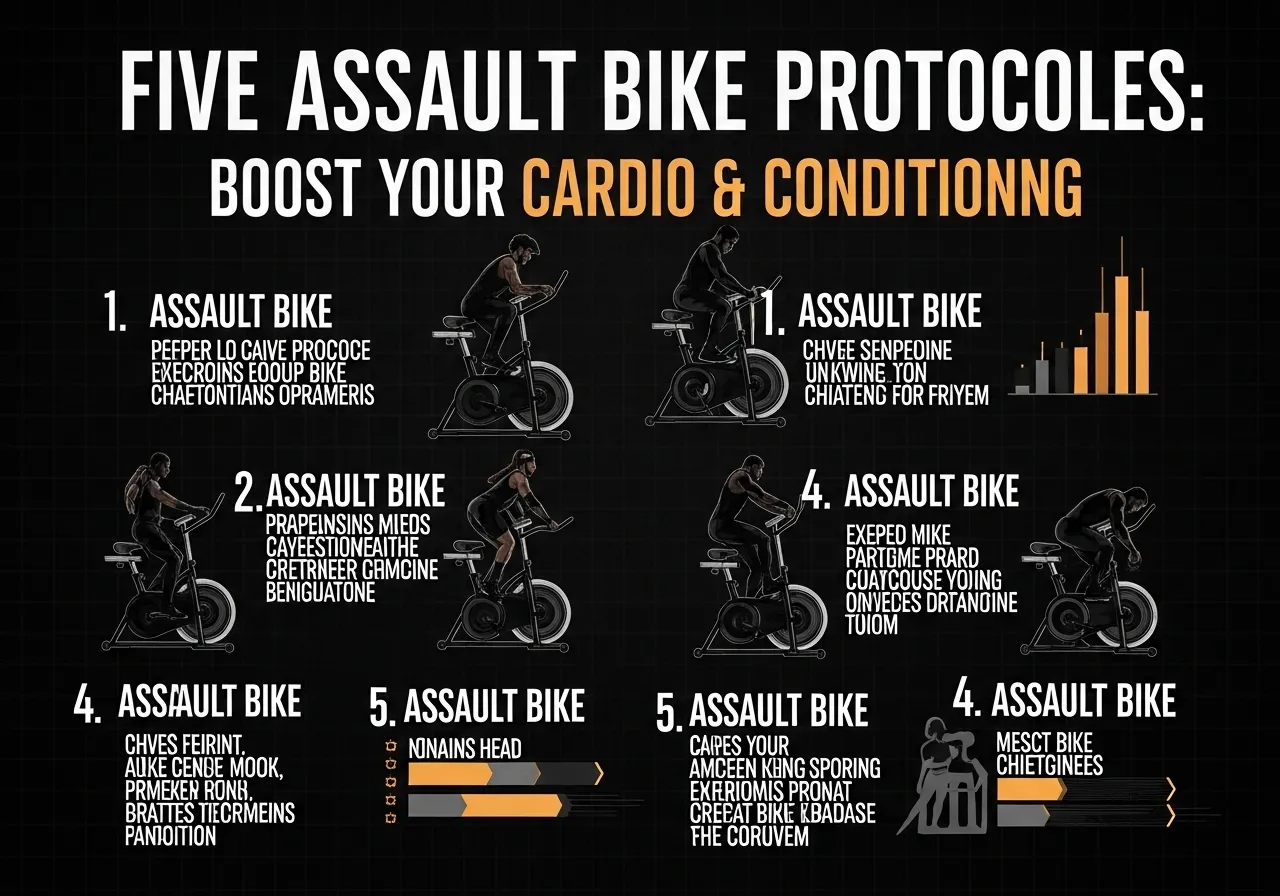
5 Assault Bike Protocols: From Recovery to Maximum Effort
🚴 Protocol 1: Zone 2 Steady State (30 to 45 Minutes)
Target:** Zone 2 heart rate (75 to 85% of LT2 heart rate), aerobic base building
How: Maintain a comfortable, conversational pace on the assault bike for the full session duration. Heart rate should remain below LT2 throughout. Pace is light enough to speak in full sentences.
Best for: Aerobic base building, active recovery, beginners building initial conditioning. The assault bike’s automatic resistance makes Zone 2 training simple: if the effort feels easy and conversation is possible, the intensity is correct.
🚴 Protocol 2: 20-10 Tabata (4 Minutes)
Target: VO2 max stimulus, maximal aerobic power, short-duration adaptation
How: 8 rounds of 20 seconds maximum effort followed by 10 seconds of complete rest. Total session time: 4 minutes. This is one Tabata cycle. Perform 1 to 3 cycles with 3 minutes of easy pedalling between cycles.
Best for: Maximum cardiovascular stimulus in minimal time, trainees with limited training time, intermediate to advanced athletes. Not appropriate for beginners due to the extreme intensity demand of true maximum effort repeated 8 times.
🚴 Protocol 3: 10-Second Sprints (Alactic Power Development)
Target: Alactic energy system, peak power output, neuromuscular power
How: 10 seconds of absolute maximum effort, 50 seconds of complete rest or very easy pedalling. Repeat 8 to 12 times. The 1:5 work to rest ratio allows near-complete phosphocreatine system recovery between efforts.
Best for: Power development, maintaining peak sprint capacity, combining with strength training in the same session. The 10-second effort is short enough to produce maximum power without significant lactate accumulation.
How: 30 seconds at Zone 4 to 5 intensity (near or above LT2 heart rate), 30 seconds of easy pedalling. Repeat 10 to 20 rounds. Total high-intensity work: 5 to 10 minutes. The assault bike’s instant resistance change makes 30-30 transitions seamless compared to treadmill or stationary bike alternatives.
Best for: Lactate threshold development, intermediate trainees building capacity for sustained high-intensity work. This protocol bridges the gap between short sprint protocols and longer tempo work. For a complete lactate threshold training framework, the lactate threshold training guide covers testing, zones, and progressive programming in detail.
🚴 Protocol 5: EMOM Assault Bike (Every Minute on the Minute)
Target: Work capacity, metabolic conditioning, repeated sprint ability
How: At the start of every minute, sprint on the assault bike for a fixed number of calories (typically 10 to 15 calories for intermediate trainees). Rest for the remainder of the minute. Repeat for 10 to 20 rounds. As fitness improves, the calorie target is reached faster, providing more rest within each minute.
Best for: Metabolic conditioning, functional fitness training, measuring and tracking progress. The calorie-per-minute metric is one of the most trackable assault bike performance markers and provides clear objective progress data across weeks.
Assault Bike Technique: How to Maximise Power Output and Reduce Injury Risk
⚠️ Shoulder and Knee Safety Note The assault bike places the shoulder in a dynamic pushing and pulling pattern under load. Individuals with acute shoulder impingement, rotator cuff tears, or recently injured shoulders should obtain assessment before assault bike training, as the pushing phase loads the anterior shoulder under fatigue. The knee tracks forward over the foot throughout the pedal stroke. Any knee pain or tracking issues during assault bike use should be assessed before continuing at training intensities.
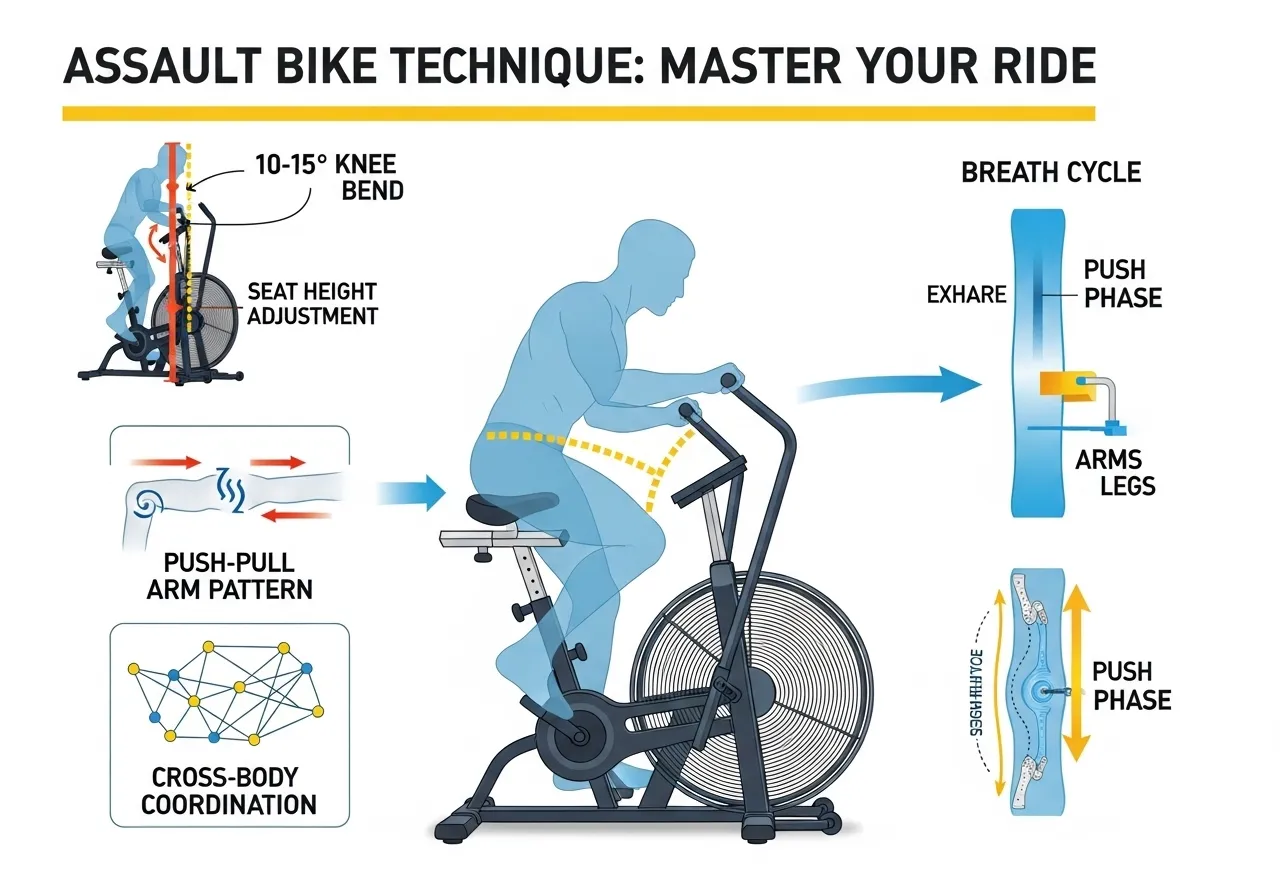
Seat Height: The Most Important Setup Variable
Seat height determines the knee angle at the bottom of the pedal stroke. At the correct height, the knee should have a slight bend of approximately 10 to 15 degrees when the pedal is at its lowest point. Fully locked knee at the bottom increases patellofemoral stress and reduces power transfer efficiency.
Too low a seat creates excessive knee flexion throughout the pedal stroke and produces anterior knee discomfort quickly under high-effort intervals. The correct height is almost always higher than most trainees initially set it. A practical guide: sitting on the seat and placing the heel on the pedal at the lowest position, the leg should be almost fully extended. With the ball of the foot on the pedal, the leg will then be at the correct slight bend.
Arm Technique: Push-Pull for Maximum Power
The assault bike handlebars move forward and backward in conjunction with the opposite leg. When the right leg pushes down, the right arm pulls back and the left arm pushes forward. This cross-body coordination pattern is the same as a natural walking or running arm swing.
Trainees who grip the handlebars and push or pull symmetrically rather than alternating are using the arms less efficiently. The asymmetric push-pull pattern generates greater total force per stroke and reduces shoulder fatigue by distributing the load across the anterior and posterior shoulder musculature in alternation rather than loading both simultaneously in one direction.
Breathing Pattern Under High Effort
The assault bike at high intensity produces rapid, involuntary breathing changes that trainees cannot consciously regulate the same way they can on steady-state cardio. The useful guidance is to exhale forcefully during the push phase and allow inhalation to occur naturally during the pull phase, following the natural rhythm of the arm movement.
Holding the breath or breathing shallowly during assault bike intervals is the primary cause of the nausea that many new users experience. Forceful exhalation prevents carbon dioxide accumulation, reduces the perceived breathlessness, and maintains the breathing mechanics that allow maximum effort to continue through all prescribed intervals.
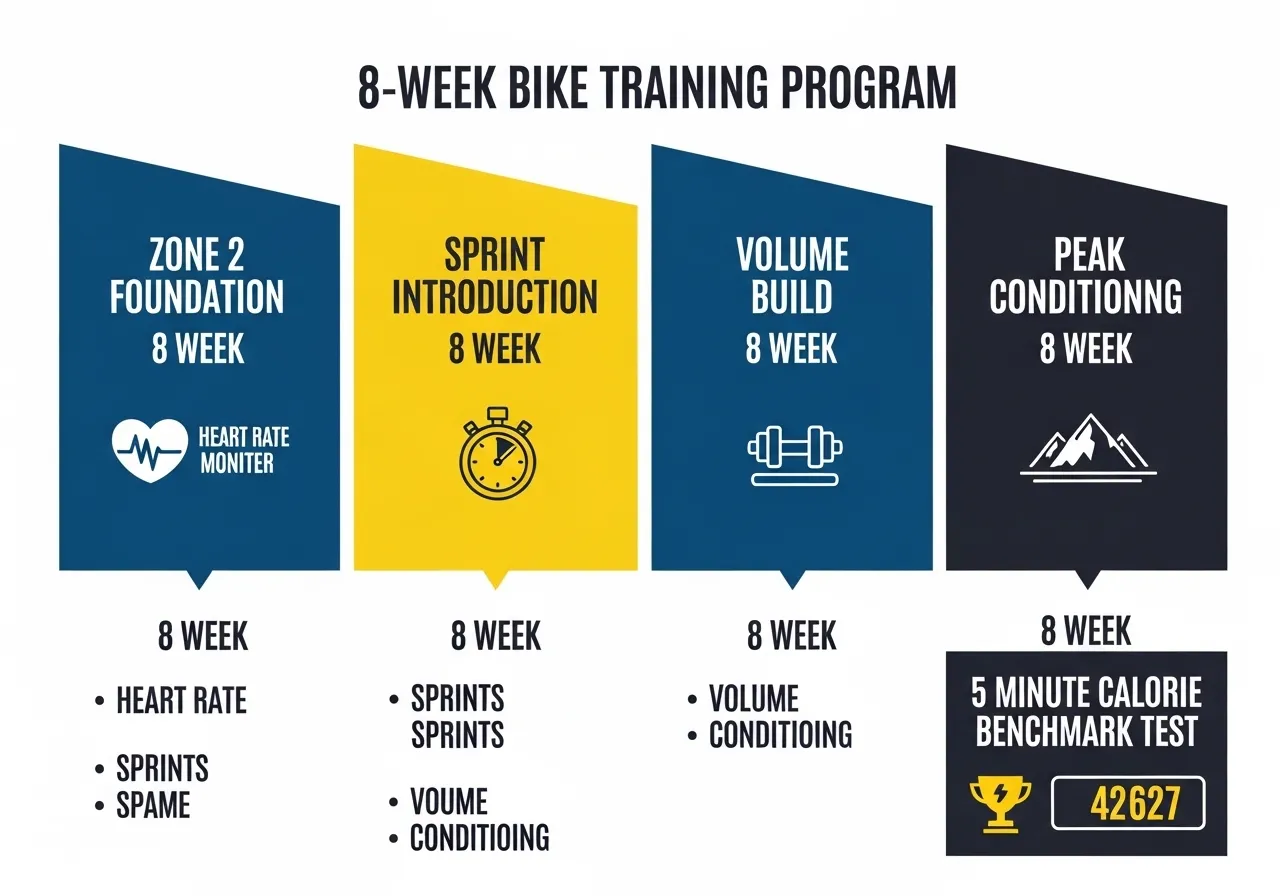
8-Week Assault Bike Conditioning Programme
📅 Phase 1: Weeks 1 to 2: Aerobic Base and Technique
2 sessions per week, 20 to 25 minutes each
Protocol: Zone 2 steady state only
Focus: seat height setup, push-pull arm mechanics, breathing pattern
No high-intensity work until technique and pacing are established
Focus: Master technique before intensity. Poor mechanics at low intensity become dangerous mechanics at maximum effort.
📅 Phase 2: Weeks 3 to 4: Introducing Intervals
2 to 3 sessions per week
Session A: 25 minutes Zone 2 steady state
Session B: 10-second sprint protocol (8 rounds, 1:5 work to rest)
Session C (optional): 30-minute Zone 2
Focus: Introduce alactic sprint work at low volume. The 10-second sprints develop peak power without significant metabolic fatigue on base-building days.
📅 Phase 3: Weeks 5 to 6: Volume and Intensity Build
3 sessions per week
Session A: 30-30 interval protocol (10 to 15 rounds)
Session B: 30 minutes Zone 2
Session C: Tabata (1 to 2 cycles with 3 minutes rest between)
Focus: Begin developing lactate threshold and VO2 max concurrently. The three distinct session types address different energy systems without competing for recovery.
📅 Phase 4: Weeks 7 to 8: Peak Conditioning
3 sessions per week
Session A: EMOM protocol (12 calories per minute, 15 rounds)
Session B: 35 minutes Zone 2
Session C: 30-30 intervals (15 to 20 rounds)
Week 8: benchmark test: calories in 5 minutes at maximum effort (compare to Phase 1 baseline)
Focus: Peak work capacity. The 5-minute maximum calorie test is the standard assault bike performance benchmark and provides clear objective data on 8-week progress.
How the Assault Bike Fits Into a Strength Training Programme
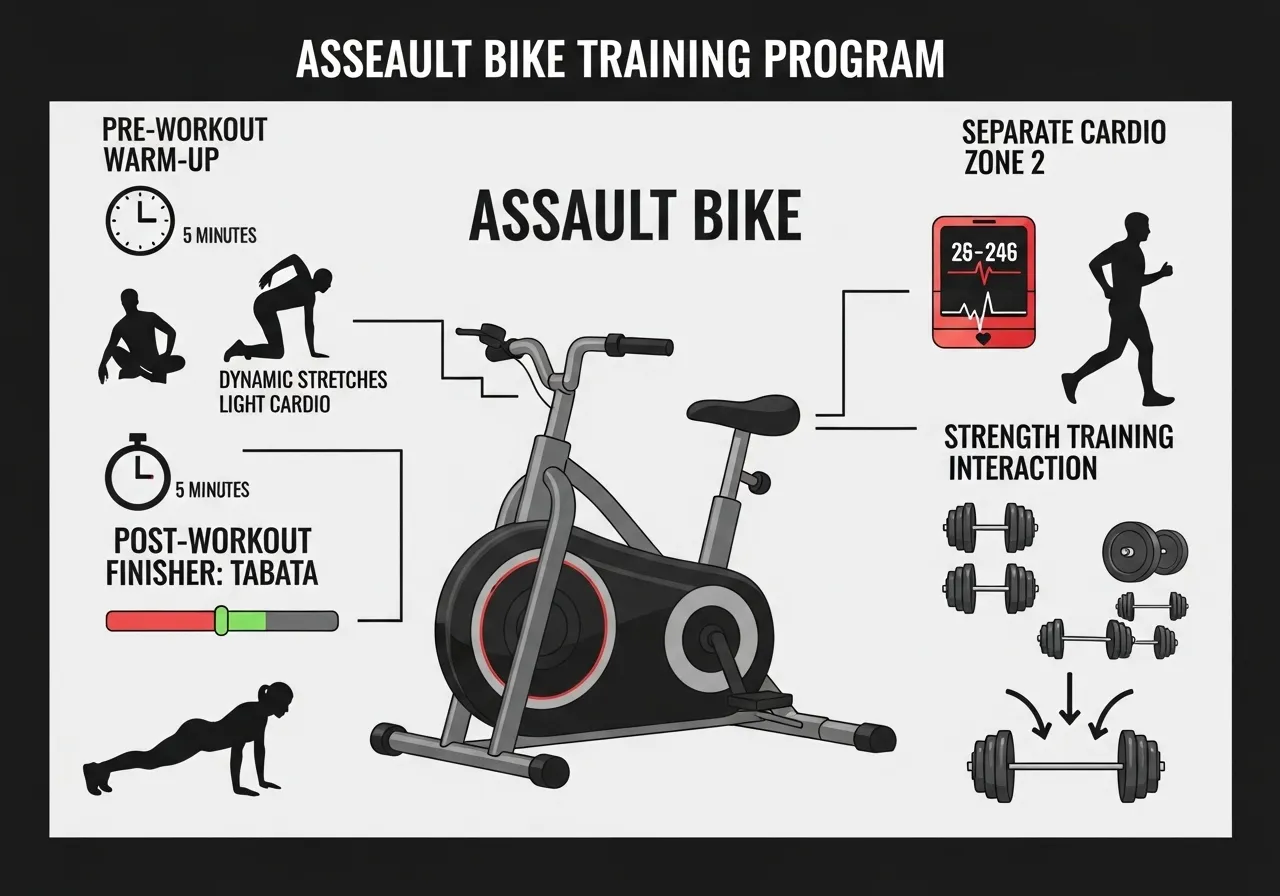
Before Strength Training: The Warm-Up Application
Five minutes of easy to moderate assault bike work before strength training is one of the most effective general warm-up protocols available. The total-body movement raises core temperature, increases heart rate and blood flow to working muscles, and activates the posterior and anterior shoulder musculature that pressing and pulling exercises require.
This differs from stationary bike warm-ups, which primarily warm the lower body while the upper body remains largely unactivated. For upper body training sessions specifically, the assault bike warm-up is superior to leg-only cardio warm-ups because it prepares the shoulder and arm musculature as well as the cardiovascular system simultaneously.
After Strength Training: Finisher Protocols
Short assault bike finisher protocols placed at the end of strength sessions add metabolic conditioning stimulus without requiring additional training days. A 5 to 10 minute finisher of 30-30 intervals or a single Tabata cycle elevates heart rate to maximum intensity briefly and provides the HIIT stimulus that strength-only training does not deliver.
The assault bike’s instant resistance change makes end-of-session finishers practical in a way that treadmill sprints are not. The trainee steps off the barbell and onto the bike without setup. The session ends with maximum cardiovascular stimulus. The HIIT cardiovascular benefits and how finisher protocols compare to dedicated HIIT sessions is covered in the HIIT training guide.
Separate Cardio Days: Zone 2 Base Building
For trainees who programme separate cardiovascular training days, the assault bike at Zone 2 intensity provides effective aerobic base building at low injury risk. The combination of low impact, full-body muscle recruitment, and automatic resistance regulation makes 30 to 45 minute Zone 2 assault bike sessions an efficient base-building tool that complements rather than competes with strength training recovery.
The Zone 2 training framework and how to structure aerobic base building alongside strength training is covered in the Zone 2 training guide.
Frequently Asked Questions About Assault Bike Training
Why is the assault bike so much harder than other cardio equipment?
The assault bike is harder than other cardio equipment for two reasons. First, the wind resistance is exponential: the harder you push, the harder it gets. There is no ceiling on resistance. A leg-only stationary bike at fixed resistance becomes easier as fitness improves; the assault bike always matches your maximum output.
Second, the total-body involvement recruits more muscle mass than any other stationary cardio option. More muscle mass working simultaneously means greater oxygen demand, faster heart rate elevation, and faster lactate accumulation. The combination makes true maximum effort on an assault bike more physiologically demanding than true maximum effort on almost any other single piece of cardio equipment.
How do I track progress on the assault bike?
The primary assault bike performance metrics are calories per minute and watts per kilogram of bodyweight at a given effort level. A 5-minute maximum effort calorie test is the standard benchmark. Tracking the same test every four to six weeks provides objective progress data.
Secondary markers include average calories per minute during Zone 2 work (which increases as aerobic efficiency improves), heart rate at a fixed effort level (which decreases as fitness improves), and recovery heart rate after a fixed interval set (which improves as cardiovascular fitness develops).
Can the assault bike be used for VO2 max testing?
Yes. The research reviewed in this guide confirms that air bike VO2 max testing shows good to excellent agreement with treadmill protocols. For individuals who cannot run due to joint issues or injury, the assault bike is a validated alternative for VO2 max assessment.
The standard assault bike VO2 max test uses a progressively staged protocol starting at low intensity and increasing effort every 3 minutes until volitional exhaustion. This produces VO2 max values comparable to traditional cycle ergometer testing while eliciting higher peak values due to total-body recruitment, which may represent a more complete assessment of overall cardiovascular capacity.
How does the assault bike compare to HIIT on a treadmill?
Both produce effective HIIT cardiovascular adaptations. The practical advantage of the assault bike for HIIT is transition speed: switching from maximum effort to complete rest on an assault bike takes one second. Switching from maximum sprint pace to rest on a treadmill requires slowing the belt, stepping to the sides, and then restarting, taking 10 to 20 seconds.
For short interval protocols like 20-10 Tabata where rest periods are 10 seconds, treadmill HIIT is mechanically impractical. The assault bike makes these protocols fully achievable. For longer interval protocols with 2 to 3 minute rest periods, treadmill and assault bike produce comparable results and the choice is preference and joint loading consideration.
Is the assault bike appropriate for complete beginners?
Yes, with a modified approach. Beginners should start with Zone 2 steady state sessions at a comfortable conversational pace for the first two to three weeks, treating the assault bike as a learning phase rather than a conditioning phase.
The wind resistance that makes the assault bike challenging at high intensity makes it forgiving at low intensity. At slow, easy pedalling, the fan barely turns and resistance is minimal. A beginner who pushes gently will find the bike entirely accessible. The issue arises when beginners attempt maximum-effort intervals too early without the aerobic base to sustain or recover from them.
The progression outlined in the 8-week programme above addresses this explicitly: two weeks of Zone 2 only, then gradual introduction of alactic sprints (10-second efforts with full rest), then moderate intervals. This progression gives the cardiovascular system time to develop the base capacity that makes higher-intensity work productive rather than simply exhausting.
The common beginner error is treating the assault bike as a maximum-effort tool from day one because that is how it is used in CrossFit and conditioning contexts. Those contexts assume a pre-existing aerobic base. Building that base first, then adding intensity, produces better long-term results than attempting maximum effort sessions before the aerobic foundation supports them.
Key Takeaways
The assault bike elicits higher VO2 max, peak heart rate, and lactate than traditional leg-only cycling. Total-body muscle recruitment is the mechanism.
Air bike VO2 max testing shows good to excellent agreement with treadmill protocols, making it a valid cardiovascular fitness assessment tool for trainees who cannot run.
Wind resistance is exponential: the harder you push, the harder it gets. This automatic resistance self-regulation makes the assault bike effective for any fitness level without adjustment.
The 5-minute maximum calorie test is the standard assault bike performance benchmark. Test every 4 to 6 weeks to track objective progress.
The assault bike suits all cardiovascular training zones: Zone 2 steady state for base building, 30-30 intervals for lactate threshold, and Tabata or 10-second sprints for VO2 max and power development.
Why Cycling Is the Most Joint-Friendly Serious Cardio You Can Do Cycling occupies a unique position among cardiovascular training options: it provides the full cardiovascular and metabolic demands of serious cardio training with a fraction of the joint impact that running and other weight-bearing activities impose. This combination makes it genuinely exceptional for athletes who…
⚠️ Health & Fitness DisclaimerThis article is for general educational and informational purposes only.It does not replace professional medical or fitness advice.If you have any pre-existing condition, joint concern, or cardiovascular issue — please consult a qualified healthcare professional before starting or modifying any exercise program. Jump rope training has been used by boxers, athletes,…
⚠️ Health & Fitness DisclaimerThis article is for general educational and informational purposes only.It does not replace professional medical or fitness advice.If you have any pre-existing condition, knee, hip, or lower back concern — please consult a qualified healthcare professional or certified personal trainer before starting or modifying any exercise program. The barbell back squat…
⚠️ Fitness Disclaimer: The information in this article is for general educational purposes only and does not constitute professional fitness or medical advice. Always consult a qualified healthcare professional before starting any new exercise program. ⚠️ Cardiovascular Health Notice: If you have a history of heart disease, high blood pressure, or any cardiovascular condition, obtain…
⚠️ Fitness Disclaimer: The information in this article is for general educational purposes only and does not constitute professional fitness or medical advice. Always consult a qualified healthcare professional before starting any new exercise program. ⚠️ Cardiovascular Health Notice: If you have a history of heart disease, high blood pressure, or any cardiovascular condition, obtain…
⚠️ Health & Fitness DisclaimerThis article is for general educational purposes only. It does not replace professional medical advice. If you have cardiovascular, joint, or respiratory conditions, consult a qualified healthcare professional before beginning a running programme. Running is the most accessible cardiovascular exercise on the planet. No equipment, no membership, no learning curve —…