⚠️ Health & Fitness Disclaimer This article is for general educational and informational purposes only and does not replace professional medical or fitness advice. If you have any pre-existing lower back, hip, or knee condition — consult a qualified healthcare professional before starting any deadlift program.
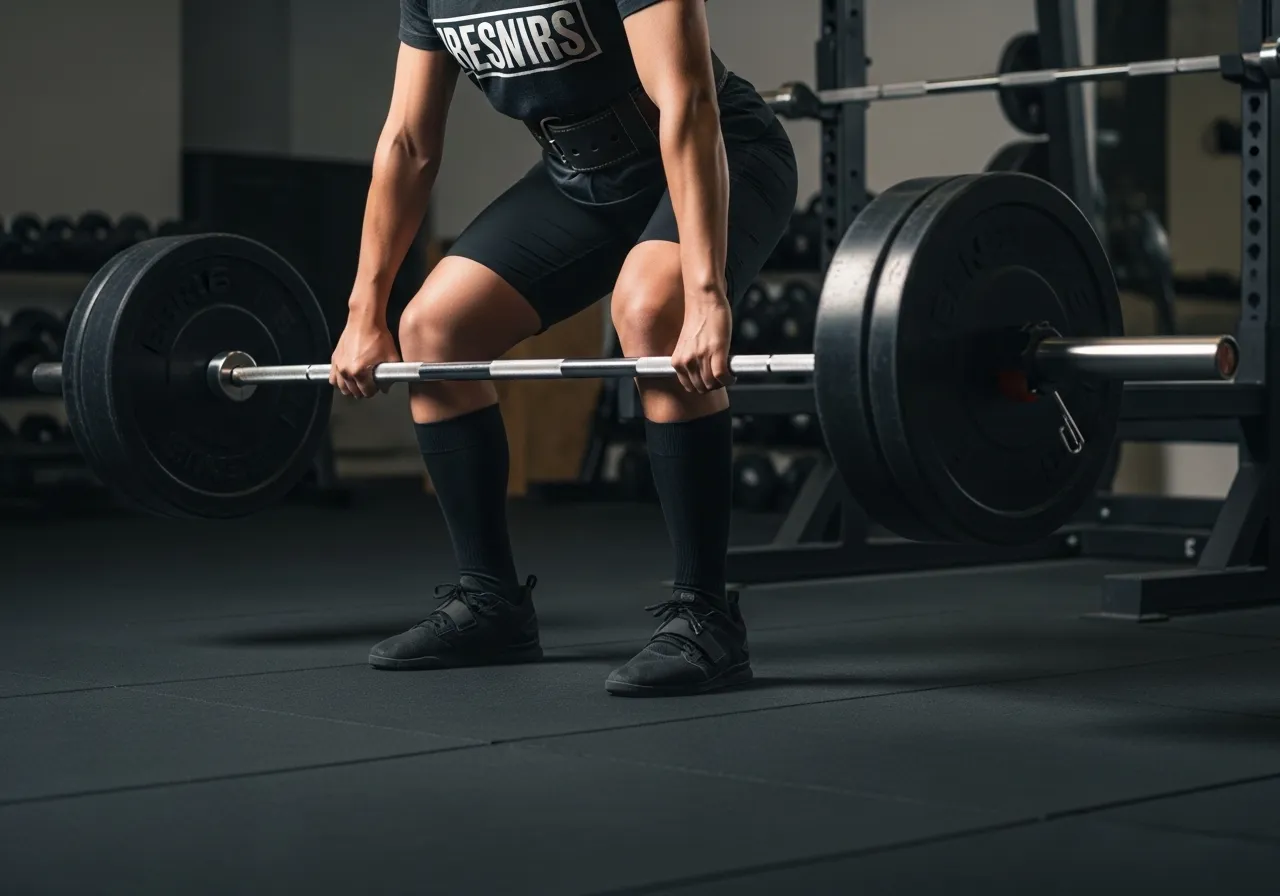
The conventional deadlift is one of the most effective strength exercises ever studied — a single movement that simultaneously trains the posterior chain, builds grip strength, develops core stability training, and produces systemic anabolic stimulus that few other exercises can match.
Yet it is also one of the most consistently misperformed exercises in commercial gyms, where lower back rounding, bar drift, and inappropriate load selection create the exact injury risk the exercise is unfairly blamed for causing.
This guide covers the research on deadlift biomechanics, breaks down conventional vs. sumo technique in detail, explains the major variants and when to use each, and provides a complete 8-week programming plan.
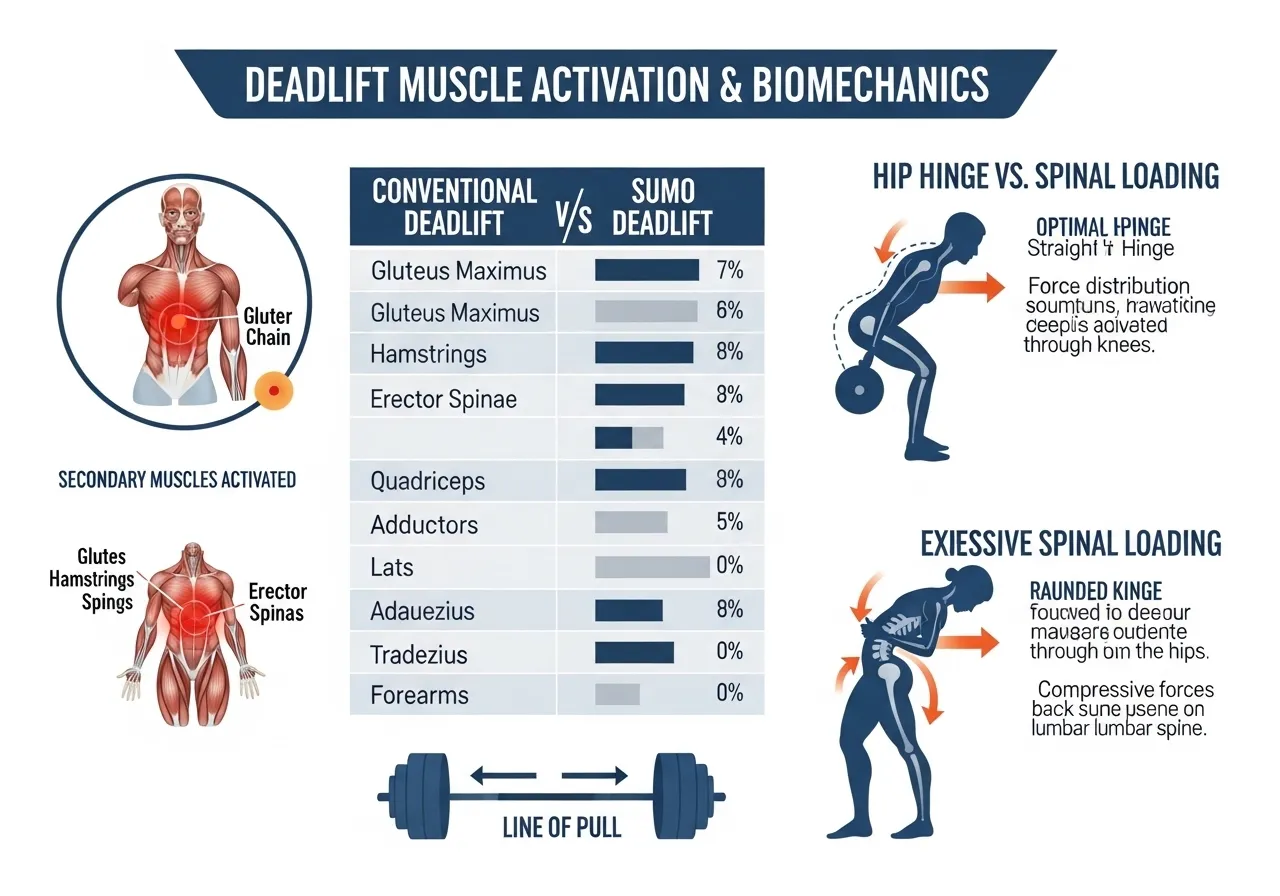
Deadlift Biomechanics: What the Research Shows About Muscle Activation
This research clarifies the long-running debate about which style is “better” — the answer depends entirely on the training goal:
If the goal is maximum posterior chain (glute, hamstring, erector) development: conventional is preferred
If the goal is maximum total load lifted, frontal plane hip strength, or knee-protective loading: sumo may be advantageous
If the goal is specific hamstring isolation: neither conventional nor sumo achieves this as well as the RDL vs conventional comparison variant
The Hip Hinge: The Fundamental Movement Pattern Behind the Deadlift
The deadlift is fundamentally a hip-hinge movement — the spine maintains a neutral position while the hips move backward and forward to generate force.
Understanding the hip hinge mechanically:
The hips are the hinge point — the spine and lower leg act as rigid levers around this joint
The load is pulled upward by hip and knee extension acting simultaneously
The lower back’s role is stabilization, not extension — it should maintain a constant neutral curve throughout the lift
This distinction — stabilization, not extension — is the key to safe deadlifting. The lower back muscles work isometrically (contracting without changing length) to hold the spine in position, not concentrically (contracting to produce movement). When the lower back “does the lifting,” the hip hinge mechanics have broken down.
Spinal Loading During the Deadlift: Context and Nuance
The deadlift is sometimes criticized for placing high loads on the lumbar spine. This concern deserves a nuanced response:
High absolute spinal compression during heavy deadlifts is documented in the literature — loads significantly exceeding 10× bodyweight have been recorded at the L4–L5 disc during near-maximal lifts
However, spinal compression in isolation is not a predictor of injury — discs require compressive load for nutrition and adaptation
Spinal shear (force acting horizontally on the vertebrae) is more closely associated with disc injury risk — and correct deadlift technique minimizes shear through the neutral spine position
The risk comes primarily from excessive lumbar flexion under load (the “rounded back deadlift”) — not from deadlifting itself
Individuals with diagnosed lumbar disc herniations, spondylolisthesis (vertebral slippage), or acute back pain episodes should obtain physiotherapy or sports medicine clearance before deadlifting — these conditions require specific assessment and may need technique modifications or temporary substitution with lower-load hip hinge alternatives.
Why Learning the Hip Hinge Matters Beyond the Gym
The hip hinge pattern — bending at the hips while maintaining a neutral spine — is not merely a gym technique. It is the mechanically sound way to pick up anything heavy from the floor in daily life.
Most lower back injuries from lifting in everyday and occupational settings occur because people round their back during loading rather than hinging at the hips. The gluteal muscles and hamstrings are designed to absorb and generate this force; the lumbar discs are not.
Training the deadlift is, in part, motor pattern training for life outside the gym — ingraining a protective movement habit that reduces lifting-related injury risk in the kitchen, garden, warehouse, or anywhere objects are lifted from below hip height.
Breathing and Bracing Technique for the Deadlift
Proper breathing and bracing are non-negotiable for safe, efficient deadlifting — particularly at heavier loads:
Intra-abdominal pressure: Taking a deep breath before the lift and bracing the abdominals — as if about to take a punch — creates intra-abdominal pressure (IAP) that functions like an internal air bag stabilizing the spine from within
The 360° brace: Pressure should be felt expanding in all directions — front, sides, and back — not just tensing the front abs. This ensures the deep stabilizers including the multifidus (small deep spinal muscles) and quadratus lumborum are fully engaged
When to breathe: Take the breath before picking up the bar — not after. Attempting to inhale and brace after beginning the pull produces a weaker brace and compromises spinal stability during the most vulnerable portion of the lift
Exhale at lockout: Release the breath at the top of each rep — then reset the brace before the next
Individuals with hypertension (high blood pressure) or cardiovascular conditions should discuss the Valsalva maneuver (breath-holding under exertion) with their healthcare provider before applying maximal bracing during heavy deadlift work.
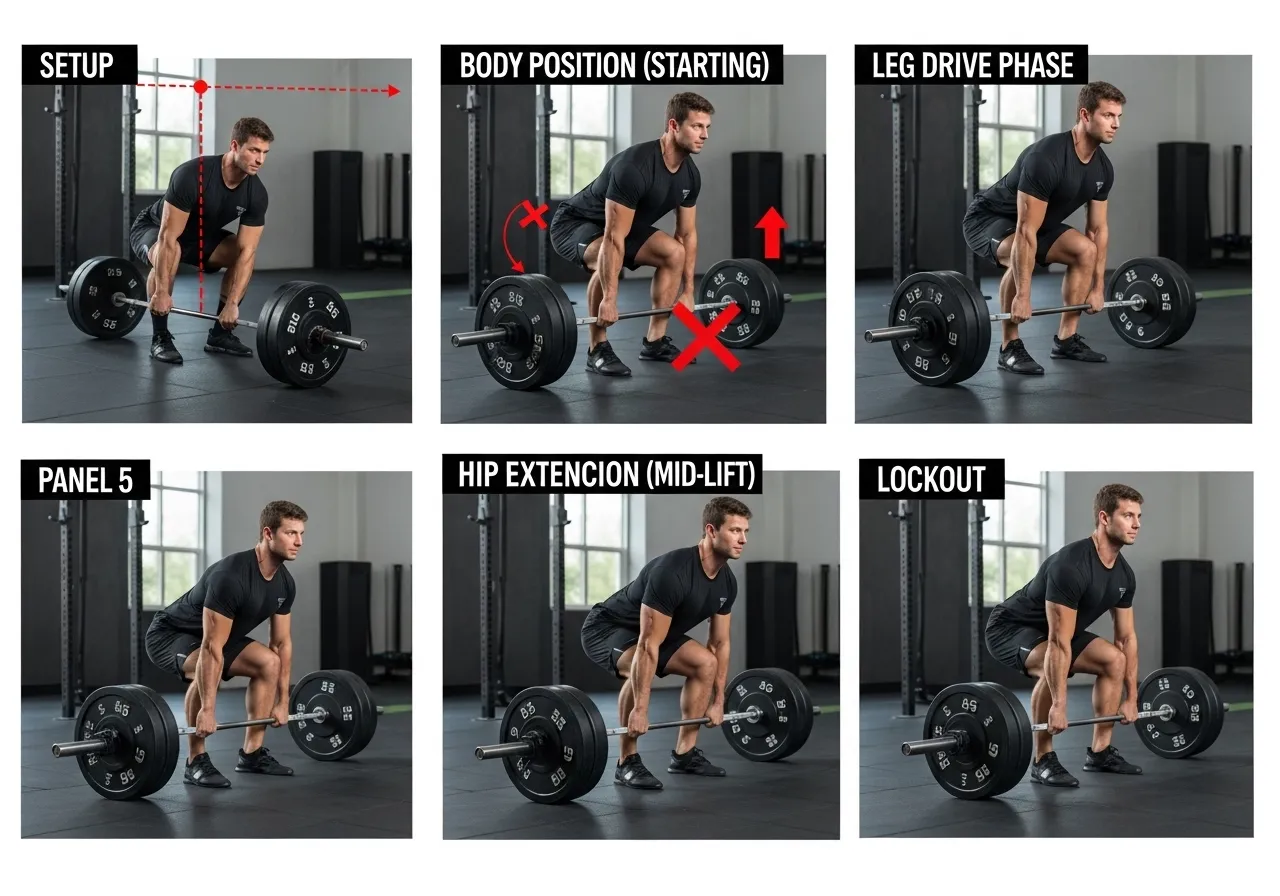
Setup: The Starting Position That Makes or Breaks the Lift
Consistent setup is arguably more important than the lift itself — small setup errors compound into large force production losses and increased injury risk once the bar leaves the floor.
Bar position: Bar over mid-foot — approximately 2–3 cm from the shins (not touching initially, not 10 cm away) Foot width: Hip-width apart — feet roughly under the hip joints, not shoulder-width Foot angle: Toes out 15–30° — slight outward rotation allows the hips to clear the thighs during the initial pull Grip: Just outside the legs — double overhand for lighter work, mixed grip (one hand pronated, one supinated) for heavy sets Grip width: Arms vertical when viewed from the front — not inside the knees
The Starting Body Position
Hips: Drop into position — neither a squat (hips too low) nor a stiff-leg pull (hips too high). Hips above knee height, below shoulder height. Back angle: Tilted roughly 45° from vertical — this varies with limb proportions Spine: Neutral — a slight natural lumbar arch maintained. Not flat, not hyperlordotic, not rounded Chest: “Chest up” — a cue that extends the thoracic spine and sets the back into the correct isometric position Shoulders: Directly over the bar or very slightly in front Eyes: Looking at a spot on the floor 3–5 meters ahead — not up at the ceiling (hyperextends the neck), not down at the floor (promotes rounding)
The Pull: Leg Drive Phase (Floor to Knee)
The first phase of the deadlift is driven primarily by leg extension — the knee angle increases as the bar rises from the floor to approximately knee height.
Critical cue for this phase: “Push the floor away” — not “pull the bar up.” This cue activates the quadriceps and produces the leg drive that moves the bar through the initial range.
During this phase, the back angle remains constant — if the hips rise faster than the shoulders, the lift has converted from a deadlift into a stiff-leg good morning, dramatically increasing lower back demand.
The Pull: Hip Extension Phase (Knee to Lockout)
Once the bar passes the knees, the movement transitions to hip extension — the hips drive forward as the bar continues its vertical path.
Critical cues:
“Hips through”: The hips drive forward to meet the bar at the top — not the bar curling back to meet the hips
“Squeeze the hip thrust guide at lockout”: Full hip extension with active glute contraction at the top — not hyperextending backward, which compresses the lumbar spine
“Bar stays in contact with the legs”: The bar should graze the shins and thighs throughout — bar drift away from the body creates a longer lever arm and increases back demand exponentially
The Lockout and Return
Lockout: Full hip and knee extension, shoulders stacked over the hips, glutes contracted — not leaning back beyond vertical Return (descent): Hip hinge first — push the hips backward as the bar descends below the hip level, then allow the knees to bend as the bar passes the knees Touch-and-go vs. dead stop: Dead stop (resetting on the floor between reps) develops more consistent starting strength; touch-and-go maintains tension and works better for higher-volume accumulation sets
5 Critical Technique Errors
Error
What Happens
Risk
Correction
Lower back rounding at setup
Spine flexed under load before the pull begins
High lumbar disc shear
“Chest up, proud chest” before initiating
Hips shooting up first
Bar converts to stiff-leg good morning
Lower back overloaded
“Push the floor away” not “pull the bar up”
Bar drift away from body
Increasing lever arm as bar moves away
Back demand increases dramatically
Engage lats — “protect your armpits”
Hyperextending at lockout
Leaning backward past vertical at the top
Lumbar compression at end range
Stand tall, not lean back — squeeze glutes
Jerking the bar off the floor
Slack in the bar loaded explosively
Sudden spinal compression surge
“Take the slack out” — apply tension before pulling
Using Video Analysis to Correct Technique
Video feedback is one of the most effective tools for deadlift technique development — errors that feel correct under load often look dramatically different from the outside.
Setting up a phone camera at hip height, approximately 3–4 meters to the side, captures the sagittal plane view needed to assess:
Bar path — does the bar travel vertically from floor to lockout, or does it drift forward?
Hip rise timing — do the hips and shoulders rise together, or do the hips shoot up first?
Spine position — is the lumbar curve maintained throughout, or does it flatten/round at any point?
Lockout quality — is the finish position genuinely upright, or does excessive lean suggest the hips are forward-dominating?
Reviewing video of working sets — not just warm-ups — routinely reveals technique drift that accumulates gradually and becomes deeply ingrained without correction.
Deadlift Variations: Choosing the Right Tool for the Goal
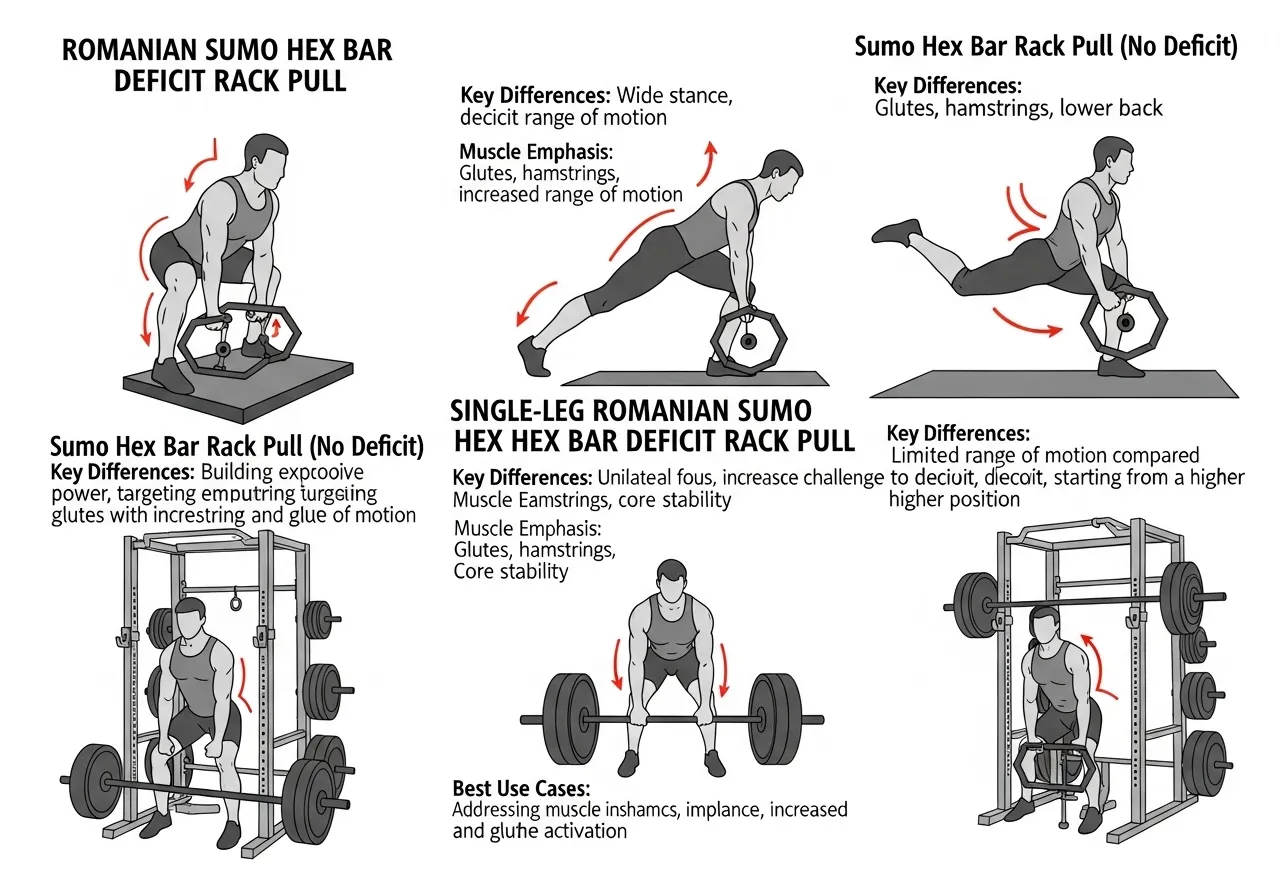
The Romanian deadlift differs from the conventional in one critical way: the knees remain relatively extended throughout, placing the hamstrings in a maximally stretched position as the hips hinge back.
This positioning makes the RDL the most effective deadlift variant for hamstring hypertrophy — the lengthened-position loading is more potent for muscle growth than the partial range the hamstrings work through in the conventional lift.
Key setup differences:
→ Start standing with the bar at hip height (rack or clean to position)
→ Hinge the hips backward — maintain a slight knee bend (not locked out)
→ Lower until a hamstring stretch is felt — typically bar to mid-shin level
→ The shins should remain close to vertical throughout — knees do not travel forward
→ Drive the hips forward to return to standing; squeeze the glutes at the top
Best for: Hamstring hypertrophy, posterior chain work without heavy spinal loading, technique teaching progression before the full conventional lift.
Sumo Deadlift: The Wide-Stance Variant
The sumo deadlift uses a stance significantly wider than shoulder width, with toes pointed out substantially (45–60°) and the hands gripping the bar between the legs rather than outside them.
The wider stance allows a more upright torso position — reducing the moment arm on the lower back compared to the conventional style, which is why many lifters with lower back limitations find sumo more comfortable.
Technique cues specific to sumo:
“Spread the floor”: Drive the knees outward in line with the toes throughout the lift — prevents knee cave and activates the hip abductors and adductors
Narrower grip: Hands inside the legs — a closer grip maintains a more vertical bar path given the stance width
Hip crease to bar: Drop the hips until the crease of the hip is below the top of the hip bones — creates the hip position needed to generate the upward push
Hex Bar / Trap Bar Deadlift: The Beginner-Friendly Alternative
The hex bar (also called the trap bar or hex bar) places the lifter inside a hexagonal frame — the handles are beside the body rather than in front of it.
This changes the mechanics significantly:
The center of mass is aligned with the lifter rather than in front — dramatically reducing the lever arm on the lumbar spine
A more upright torso is naturally adopted — shifting the movement pattern closer to a squat-deadlift hybrid
The erector spinae are less loaded; the quadriceps and glutes are more loaded compared to the conventional lift
The hex bar deadlift is an excellent starting point for beginners learning the hip hinge pattern, for athletes seeking maximal power output with reduced back strain, and for individuals returning from lower back injuries under physiotherapy guidance.
Deficit Deadlift: Building Starting Strength
Standing on a raised platform (typically 3–6 cm) increases the range of motion by lowering the bar relative to the starting position — requiring greater hip and ankle mobility and producing more work in the initial phase where most lifters are weakest.
The deficit deadlift specifically targets starting strength (the ability to produce force from a dead-stop position without elastic energy contribution) — used by powerlifters to address weakness off the floor.
Rack Pull: Developing Lockout Strength
The rack pull starts the bar at knee height (or higher) using safety bars — allowing significantly more weight than the full conventional deadlift and training only the top portion of the movement.
Rack pulls target the hip extension “lockout” phase specifically — useful for lifters whose deadlift stalls in the final 20–30 cm of the lift. They also produce significant upper back and grip loading at loads impossible in the full lift.
Single-Leg Romanian Deadlift: Balance and Unilateral Strength
The single-leg RDL balances on one foot while hinging — creating significant balance, hip stabilizer, and gluteus medius demand that bilateral deadlift variations cannot produce.
Using a dumbbell or kettlebell in the opposite hand to the working leg (contralateral loading) creates the greatest anti-rotation demand — the most functional progression for athletes and for correcting left-right strength asymmetries.
When to Use Lifting Straps for Deadlift Variants
While primary conventional deadlift training should prioritize grip development, lifting straps are legitimately appropriate in specific contexts:
High-rep Romanian deadlift sets (10+ reps) where grip fatigue limits the posterior chain training stimulus before the target muscles are sufficiently loaded
Heavy rack pulls where loads significantly exceed double bodyweight — the spinal loading of the top range stimulus is the goal, not additional grip work
Periods following hand or wrist injuries when grip loading is temporarily contraindicated but lower body training continues
Straps should be viewed as a targeted tool for specific contexts — not as a default solution to avoid developing the grip strength that transfers to overall athletic capability and functional daily use.
Programming the Deadlift: Sets, Reps, and 8-Week Plan
Understanding Deadlift Training Frequency
The deadlift is a high-fatigue exercise — the systemic recovery demand of heavy conventional deadlifts is greater than almost any other exercise in a strength program.
Unlike the squat (which many advanced trainees can perform 2–3 times per week), heavy conventional deadlifting at maximum intensity is generally limited to once per week for most intermediate and advanced trainees — with additional posterior chain work coming from RDL, hex bar, or single-leg variations at lower intensities on other days.
Beginners and early intermediates, using lighter loads, may be able to train the conventional deadlift 2× per week without excessive recovery demand.
Sets and Reps by Training Goal
Goal
Sets × Reps
Load
Rest
Technique / beginner
3–4 × 5
Light — 50–60%
2 min
Hypertrophy
3–4 × 6–10
Moderate — 65–75%
2–3 min
Strength
4–5 × 1–5
Heavy — 80–90%
3–5 min
Power (speed pulls)
5–8 × 1–3
Moderate — 60–70%, maximal intent
2–3 min
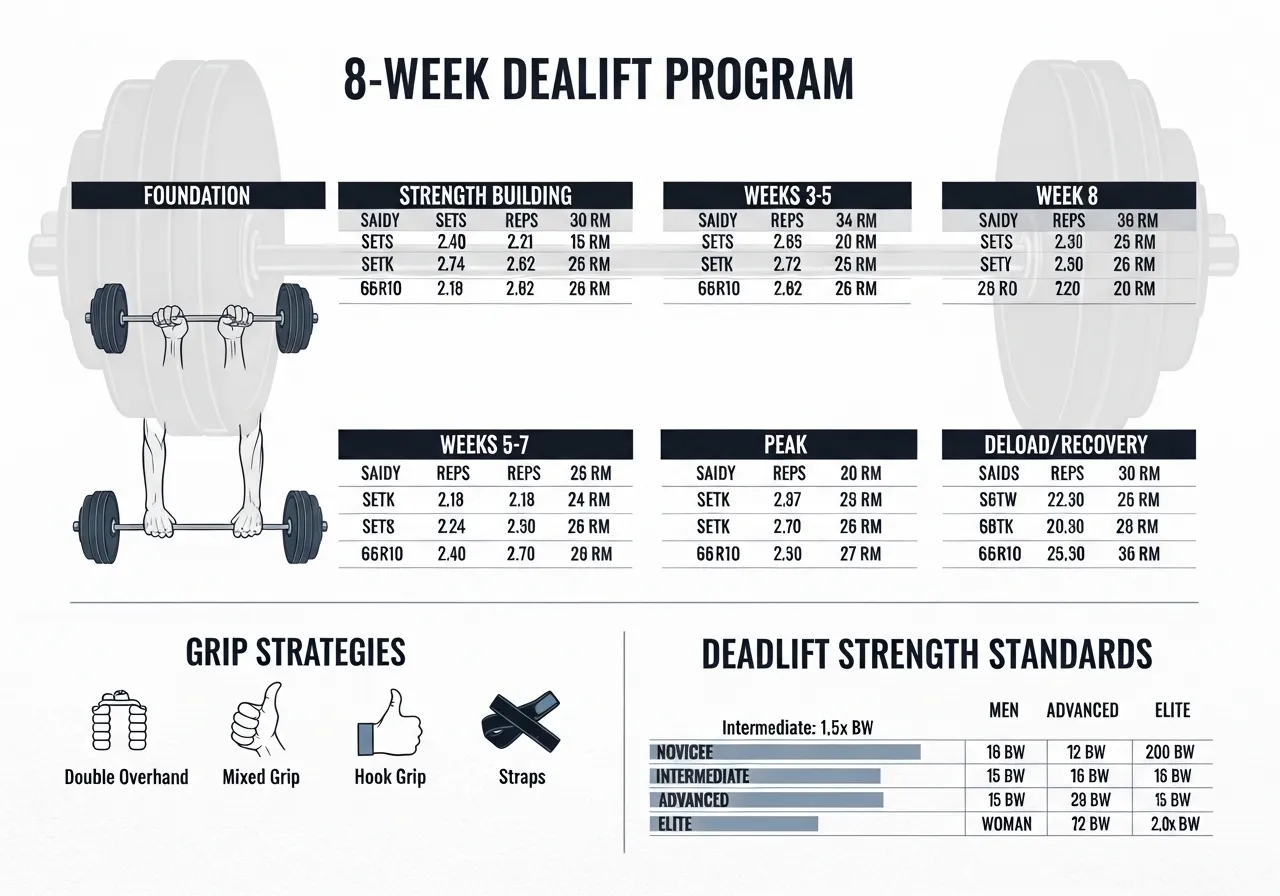
8-Week Beginner to Intermediate Deadlift Program
Weeks 1–2 — Technique Foundation:
Conventional Deadlift: 4 × 5 @ 50–60% | Dead stop every rep | Focus: bar path, hip hinge, neutral spine
RDL: 3 × 8 @ light | Teaching hamstring tension
Weeks 3–4 — Load Introduction:
Conventional Deadlift: 4 × 5 @ 65–70% | Add 5–10 kg per session when all reps are clean
RDL: 3 × 8 @ 60–65%
Weeks 5–6 — Volume Build:
Conventional Deadlift: 4 × 4 @ 75% (Monday) + Hex Bar: 3 × 8 @ 65% (Thursday)
Single-Leg RDL: 3 × 8 each side (accessory)
Weeks 7–8 — Strength Phase:
Conventional Deadlift: 4–5 × 3 @ 80–85% | Working up to a top set
RDL: 3 × 6 @ 70–75%
Week 9 — Deload:
Conventional Deadlift: 3 × 5 @ 60% | Technique reinforcement | Full rest between sets
Session Placement and Program Integration
Place the deadlift at or near the beginning of a lower body or full-body session — technique degradation under accumulated fatigue is a meaningful risk with this exercise
Do not deadlift to failure — the high technical demand and spinal loading of the deadlift make failure sets genuinely risky, unlike failure sets on machine exercises
Separate heavy deadlift sessions from heavy squat sessions by at least 48 hours — both exercises load the spinal extensors heavily and compete for recovery resources
Grip Strategies for Heavier Deadlifts
Grip typically becomes the limiting factor before the lower body or back does as loads increase:
Double overhand: Both palms facing toward the lifter — develops the most grip strength over time; recommended for all warm-up and moderate sets
Mixed grip (alternate grip): One hand pronated, one supinated — prevents the bar from rolling; allows heavier loads; use only for heaviest working sets due to the asymmetrical torque on the biceps and spine
Hook grip: The thumb is trapped under the fingers in a double overhand position — used by Olympic weightlifters; painful to learn but produces grip security comparable to mixed grip without the asymmetry
Lifting straps: Nylon or leather loops connecting the wrist to the bar — appropriate when grip is the limiting factor on heavy accessory work, but should not replace grip development in primary lift training
Common Questions About the Deadlift
Is the deadlift safe for the lower back?
With correct technique, appropriate progressive loading, and adequate recovery, the deadlift is not inherently unsafe for the lower back — and the research on long-term outcomes in trained deadlifters does not support the popular belief that it causes disc degeneration in healthy individuals.
The primary source of lower back injury risk during deadlifting is lumbar flexion under load — the spine rounding under a heavy weight is the mechanism of injury, not the exercise itself. Maintaining neutral spine throughout the lift, using appropriate loads, and not training to failure are the primary risk management strategies.
Any individual with existing lower back pathology should seek physiotherapy assessment before deadlifting — the appropriate technique modifications, load parameters, and variant selection for a compromised spine require clinical judgment beyond what general training guidance can provide.
Should beginners use a hex bar instead of a barbell?
The hex bar is a legitimate starting point — its more upright torso position and reduced lower back demand make it more forgiving of early technique errors while still developing hip hinge strength. (see also: barbell squat guide)
However, the hex bar does not teach the conventional hip hinge mechanics required for the barbell deadlift — a trainee who has only hex-bar deadlifted will still need to learn the conventional pattern when transitioning.
Beginners comfortable with the hip hinge pattern can start directly on the barbell at appropriate loads. Those with lower back sensitivity, limited hip mobility, or general movement quality concerns may benefit from starting with the hex bar for 4–8 weeks before transitioning to the conventional barbell.
✅ Key Takeaways
The conventional deadlift maximizes posterior chain activation — particularly the erector spinae, glutes, and hamstrings — with higher activation than the sumo variant
The Romanian deadlift produces the greatest hamstring stretch and is the most effective variant for hamstring hypertrophy
The lower back’s role is stabilization, not extension — rounding the lower back under load is the primary risk factor, not deadlifting itself
Technique degrades as fatigue accumulates — keep reps per set conservative for heavy work and never train the deadlift to muscular failure
Grip is typically the first limiting factor — develop double overhand grip strength before relying on mixed grip or straps
Advanced Deadlift Training: Periodization, Specialty Bars, and Long-Term Development
Why the Deadlift Responds Well to Periodization
Periodization (the systematic variation of training variables over time to drive ongoing adaptation and prevent stagnation) is particularly important for the deadlift because:
The exercise generates high neuromuscular fatigue — training at maximum intensity every session rapidly leads to recovery debt and stagnation
Neural adaptations drive early progress; structural adaptations (muscle and connective tissue growth) drive later progress — different intensity ranges are needed at different training stages
The deadlift has a long skill component — technique refinement continues to improve performance independent of raw strength gains
Linear Progression: The Beginner’s Best Friend
For beginners, adding a fixed amount of weight each session (typically 5–10 kg for the deadlift) is the most effective approach — the neuromuscular and structural adaptations in untrained individuals are fast enough that sessions can be consistently exceeded for weeks or months.
Linear progression should be continued until it consistently stalls — typically after 3–6 months of consistent training. Attempting to implement complex periodization before linear progress has genuinely stalled delays the fastest strength gains available to a beginner.
Intermediate Periodization: Wave Loading
When simple linear progression no longer works session-to-session, wave loading extends progress by varying intensity across a training week:
Example 3-week wave:
Week 1: 5 × 5 @ 75% (volume)
Week 2: 4 × 3 @ 82% (intensity build)
Week 3: 3 × 1–2 @ 88–90% (peak) + 1 top single attempt
Repeat with slightly higher starting weights
Specialty Bars: Extending the Deadlift Stimulus
Beyond the hex bar, several specialty bars are increasingly available in well-equipped gyms:
Safety squat bar deadlift: The cambered bar changes the center of mass and grip position — used for variety and to address specific weak points
Dead-squat bar: A wider, more rigid bar that reduces bar flex and changes the initial pull position
Cambered bar: Provides greater range of motion at the bottom — similar benefit to the deficit deadlift but with a different feel
Specialty bars are tools for addressing specific weaknesses or adding variety to advanced programs — not necessary for general fitness trainees, but valuable additions when basic variations have been thoroughly developed.
These are broad population estimates with significant individual variation based on anthropometry, training specificity, and genetics. Progress against personal bests over time is a more meaningful metric than comparison with population standards.
The Deadlift for Older Adults
The deadlift — appropriately scaled — is particularly valuable for older adults:
The hip hinge pattern directly trains the mechanics of lifting objects from the floor — one of the most injury-prone daily activities for older adults who lack posterior chain strength
The spinal loading stimulates bone remodeling in the vertebrae and femur — weight-bearing loading is the primary stimulus for maintaining bone mineral density
Grip strength development from deadlifting is strongly associated with functional independence and all-cause mortality reduction in older populations
For older adults beginning deadlift training, the hex bar at moderate loads with limited range of motion is a practical entry point — transitioning to conventional barbell work as strength, mobility, and technique develop under the guidance of a qualified personal trainer or exercise physiologist.
Older adults with diagnosed osteoporosis, hip replacement, or significant lumbar pathology should receive specific clearance and guidance from their healthcare provider and a qualified exercise specialist before undertaking any loaded hip hinge training.
Working With a Coach to Maximize Deadlift Progress
The deadlift has a technical complexity that makes external feedback genuinely valuable — errors visible on video or to a knowledgeable observer are often invisible to the lifter under load.
A certified strength and conditioning specialist (CSCS), powerlifting coach, or experienced personal trainer can:
Identify the specific technique error limiting performance — most sticking points have a technique, not strength, cause
Select the appropriate variant and loading strategy for an individual’s anthropometry (limb lengths significantly affect optimal setup)
Design a periodization program matched to training age, recovery capacity, and long-term goals
Provide the objective external perspective that prevents the self-taught technique drift that commonly plateaus self-coached deadlifters
Even 2–4 sessions with a qualified coach at the beginning of serious deadlift training typically produces better long-term results than months or years of self-directed work with suboptimal technique.
⚠️ Health & Fitness DisclaimerThis article is for general educational purposes only and does not replace professional medical advice. If you have cardiovascular, respiratory, or musculoskeletal conditions, please consult a qualified healthcare professional before beginning a swimming program. Swimming is one of the most physiologically complete forms of exercise available — simultaneously developing cardiovascular fitness,…
Most recreational athletes choose one form of cardio and repeat it. Runners run. Cyclists cycle. Swimmers swim. This is not a strategic decision. It is the path of least resistance: the familiar equipment, the practised movement, the social group tied to the activity. The repetition accumulates a specific cardiovascular adaptation to one mode of exercise…
⚠️ Health & Fitness DisclaimerThis article is for general educational purposes only and does not replace professional medical advice. If you have cardiovascular, musculoskeletal, or respiratory conditions, consult a qualified healthcare professional before beginning a new walking program. Walking is simultaneously the most studied, most accessible, and most underestimated form of physical activity available. It…
⚠️ Fitness Disclaimer: The information in this article is for general educational purposes only and does not constitute professional fitness or medical advice. Always consult a qualified healthcare professional before starting any new exercise program. ⚠️ Cardiovascular Health Notice: If you have a history of heart disease, high blood pressure, or any cardiovascular condition, obtain…
⚠️ Health & Fitness DisclaimerThis article is for general educational and informational purposes only.It does not replace professional medical or fitness advice.If you have any pre-existing condition, knee, hip, or lower back concern — please consult a qualified healthcare professional or certified personal trainer before starting or modifying any exercise program. The barbell back squat…
⚠️ Health & Fitness DisclaimerThis article is for general educational and informational purposes only and does not replace professional medical or fitness advice.If you have any pre-existing back, knee, or cardiovascular condition — please consult a qualified healthcare professional before starting any rowing program. The rowing machine mastery sits in an unusual category among cardio…