The Lat Pulldown: What the Research Actually Says About Grip Width and Back Development
This article is for general educational and informational purposes only.
It does not replace professional medical or fitness advice.
If you have any pre-existing condition, injury, or shoulder concern — please consult a qualified healthcare professional or certified personal trainer before starting or modifying any exercise program.
The lat pulldown mastery guide is one of the most widely performed machine exercises for upper pull-ups back guide — yet a persistent myth surrounds it: that a wider grip targets the latissimus dorsi more effectively than a narrower one.
Recent EMG research challenges this assumption directly.
This guide breaks down what the evidence actually shows, explains the mechanics of each grip variation, and provides a structured approach to programming the lat pulldown for long-term back development.
Lat Pulldown Mechanics: What the Machine Is Actually Training
The Latissimus Dorsi and Its Role in the Pulling Pattern
The latissimus dorsi (Latin: “broadest muscle of the back”) is a large, flat muscle that originates from the lower thoracic and lumbar vertebrae and inserts at the front of the upper humerus (upper arm bone).
Its primary actions are shoulder adduction (bringing the arm toward the body’s midline), shoulder extension (pulling the arm backward from an overhead position), and internal rotation of the shoulder.
The lat pulldown directly targets these functions — pulling an overhead bar downward toward the chest engages the lats through their primary movement plane.
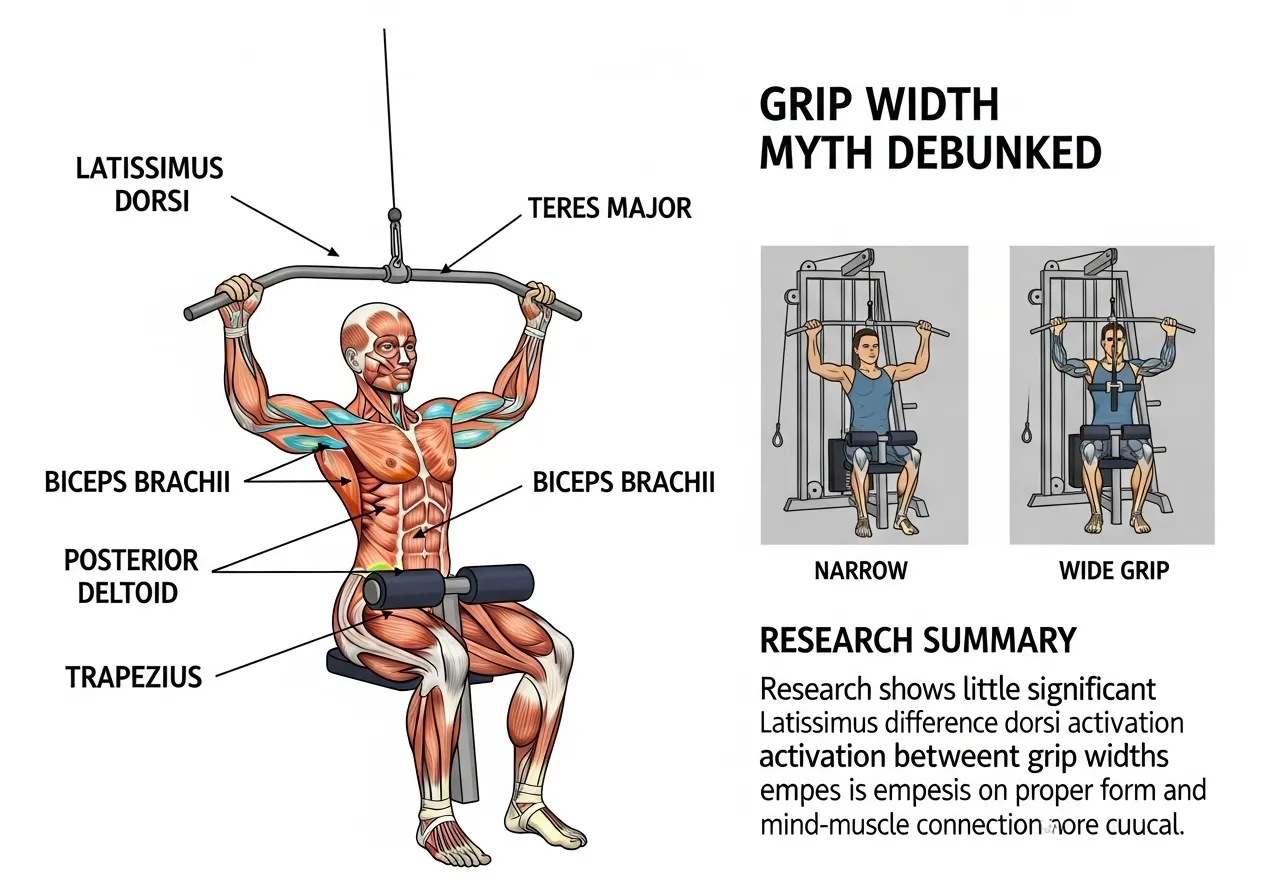
Secondary Muscles Involved
| Muscle | Role During Lat Pulldown | Activation Level |
|---|---|---|
| Latissimus Dorsi | Primary shoulder adductor and extensor | High |
| Teres Major | Assists lats in adduction and extension | High |
| Biceps Brachii | Elbow flexion during the pull | Moderate–High |
| Posterior Deltoid | Shoulder extension, rear delt engagement | Moderate |
| Middle & Lower Trapezius | Scapular depression and retraction | Moderate |
| Infraspinatus | Rotator cuff stabilizer during the movement | Low–Moderate |
Why “Wider = More Lats” Is a Myth
The popular belief that a wider grip better isolates the latissimus dorsi is one of the most repeated claims in gym culture — but EMG research does not consistently support it.
A 2025 study published in MDPI examined seven lat pulldown grip variations in 40 resistance-trained men and found that grip variations did not produce significant differences in latissimus dorsi activation, challenging the longstanding assumption that wider grips more effectively target this muscle.
A separate PubMed study comparing six different grip widths found that narrow and medium grips allowed significantly higher 1RM strength than wide grip, with similar latissimus dorsi EMG activation across all three widths — suggesting the wide grip may impose a strength disadvantage without a corresponding muscle activation benefit.
What Grip Width Actually Changes
While grip width may not meaningfully alter lat activation, it does change several other variables that matter for training:
- Range of motion: Narrower grips allow a greater elbow travel arc during the pull — potentially providing more lat stretch at the top and more contraction at the bottom
- Biceps involvement: Supinated (underhand) narrow grips tend to increase biceps brachii recruitment due to the more favorable elbow flexion mechanics
- Shoulder stress: Very wide pronated grips place the shoulder in greater abduction at the start position — which may be a consideration for individuals with existing shoulder impingement or rotator cuff concerns
- Load capacity: Narrow and medium grips typically allow heavier loads — meaning more total mechanical tension on the lats despite similar activation percentages
The Scapular Depression Cue: More Important Than Grip Width
Regardless of grip selection, proper scapular mechanics may have a more meaningful impact on lat engagement than grip width choices.
Initiating the pulldown by depressing the scapulae (pulling the shoulder blades downward away from the ears) before engaging the arms activates the lats earlier in the movement and reduces biceps-dominant pulling patterns.
A commonly used coaching cue: “Push your shoulder blades into your back pockets” before pulling — this pre-activates the lats and lower trapezius in the starting position.
Why the Lat Pulldown Deserves a Central Role in Upper Back Programming
The lat pulldown is one of the few exercises that loads the latissimus dorsi through a full overhead range of motion in a controlled, adjustable environment.
Unlike barbell rows (which train the lats in a shortened position) or pull-up programme (which require sufficient bodyweight strength as a prerequisite), the lat pulldown allows any trainee to load the lat through its complete lengthening-to-shortening range at any strength level.
This full range stimulus — from full shoulder flexion overhead to shoulder extension at the bottom — may produce more complete lat development than exercises that load only one portion of the muscle’s range.
For beginners, the lat pulldown is often the entry point for vertical pulling strength that eventually transfers to unassisted pull-ups.
For intermediate and advanced trainees, it provides volume and range-of-motion stimulus that complements heavier horizontal rowing movements in a balanced back program.
The Research Landscape: What We Know and What Remains Uncertain
It is worth being transparent about the state of lat pulldown research:
Most EMG studies use relatively small samples (10–40 participants), test specific protocols at specific loads, and measure activation rather than long-term hypertrophy outcomes.
The finding that grip width does not significantly change lat activation is consistent across multiple studies — but whether modest activation differences matter for long-term muscle development outcomes has not been definitively established in longitudinal research.
The practical takeaway: choose the grip that allows the strongest, most comfortable pull through the fullest range of motion — the evidence does not currently justify sacrificing load or comfort for a specific grip width in pursuit of a theoretically superior lat stimulus.
Comparing the Lat Pulldown to the Seated Cable Row
Both the lat pulldown and seated cable row are staple machine exercises for back development — but they train the latissimus dorsi in different portions of its range:
| Factor | Lat Pulldown | Seated Cable Row |
|---|---|---|
| Movement plane | Vertical (overhead to chest) | Horizontal (forward to torso) |
| Lat range trained | Full stretch to contraction | Mid-range to shortened |
| Scapular retraction | Lower — depression focus | Higher — retraction emphasis |
| Mid-back (rhomboids/traps) | Moderate | Higher |
Including both exercises in a weekly back program may produce more complete lat and mid-back development than relying on either alone — they complement each other rather than duplicate the same stimulus.
Viewing it as a long-term practice — rotating grip variations, maintaining strict technique, and progressing load consistently — produces the most complete lat development over months and years of training.
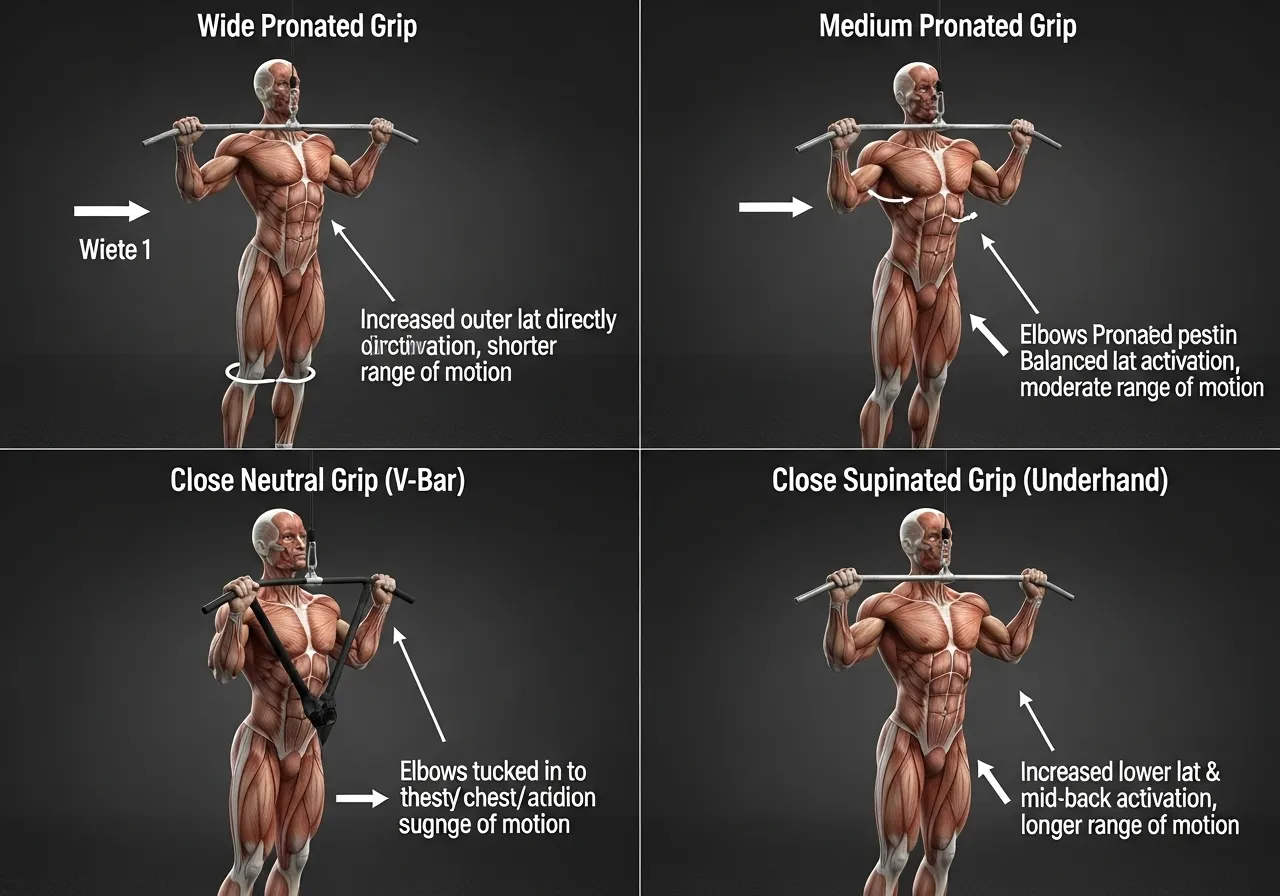
Grip Variations: What Each Version Develops and When to Use It
Wide Pronated Grip (Traditional Overhand Wide Grip)
The most commonly seen lat pulldown grip — hands placed approximately 1.5–2× biacromial distance (the width between the outer edges of the shoulder bones) apart, palms facing away.
Relative strength: Lowest of the three grip widths
Range of motion: Most limited — the wide hand position restricts elbow travel
Best suited for: Trainees specifically targeting the posterior deltoid or those using it as a variation alongside other grip choices
An additional finding from the 2025 MDPI study: the wide pronated grip with a 30° trunk lean produced greater posterior deltoid activation than the standard upright wide grip — making the slight trunk lean a useful technique cue when targeting this muscle specifically.
Medium Pronated Grip (Shoulder-Width Overhand)
Hands placed approximately 1–1.5× biacromial distance apart, palms facing away — roughly shoulder-width or slightly wider.
Relative strength: Equal to or slightly higher than wide grip
Range of motion: Moderate — allows a fuller elbow arc than wide grip
Best suited for: General lat development; a practical starting point for most trainees
Close Neutral Grip (V-Bar or Parallel Grip)
Hands placed close together with palms facing each other, typically using a V-bar attachment — this creates a neutral forearm orientation throughout the movement.
Relative strength: Typically highest — neutral grip maximizes elbow flexion mechanics
Range of motion: Greatest elbow arc — allows the most lat stretch at the top
Best suited for: Trainees prioritizing lat length and fullness; those with shoulder discomfort in wider grip positions
Supinated (Underhand) Close Grip
Hands placed close together with palms facing toward the body — a supinated forearm position (palms facing you, like a biceps curl grip).
🔵 Research comparing grip orientations found that forearm orientation affects muscle activation patterns differently than grip width alone — supinated grips alter the mechanics of the pull in ways that go beyond simply changing hand position
🔵 Useful as a variation when specifically targeting the biceps alongside the lats
Behind-the-Neck Pulldown: A Note on Risk
The behind-the-neck lat pulldown — pulling the bar to the back of the head rather than the front — places the cervical spine (neck vertebrae) in forced flexion and the shoulder in an extreme externally rotated, abducted position simultaneously.
⚠️ Most exercise professionals and physical therapists advise against this variation for most trainees.
⚠️ If you currently perform behind-the-neck pulldowns, consulting with a qualified personal trainer or physiotherapist about safer alternatives may be worthwhile.
Grip Selection Summary
| Grip Type | Lat Activation | Load Capacity | ROM | Best Use |
|---|---|---|---|---|
| Wide Pronated | Similar | Lower | Limited | Variation; posterior delt focus |
| Medium Pronated | Similar | Moderate | Moderate | Primary lat development |
| Close Neutral (V-bar) | Similar | Higher | Greatest | Lat stretch; shoulder comfort |
| Close Supinated | Similar | Moderate | Good | Biceps emphasis variation |
Understanding the “Elbows to Back Pockets” Cue
The coaching cue “drive your elbows toward your back pockets” is one of the most widely used for improving lat pulldown technique — and understanding why it works helps apply it more effectively.
When the mental focus is on “pulling the bar down,” the tendency is to initiate the movement with elbow flexion — which recruits the biceps first and reduces lat pre-activation.
Re-cueing to “drive elbows backward and downward” shifts the mental focus from the hands to the shoulder, which better matches the lat’s actual movement function (shoulder adduction and extension rather than elbow flexion).
This is an example of an “attentional focus” (the mental target of a movement cue) shift — internal focus on the target muscle (lats) versus external focus on the implement (bar) or joint (elbows) can meaningfully affect which muscles are preferentially recruited during an exercise.
Seat Position and Pad Height: Getting the Setup Right
Several setup variables affect lat pulldown mechanics that are often overlooked:
- Thigh pad height: Set so the thighs are secured at approximately 90° knee flexion — too high creates a gap under the pad, too low causes the legs to be pinned uncomfortably
- Foot position: Flat on the floor — this provides a stable base and prevents the lower body from moving during the pull
- Seat height: Adjust so the arms are fully extended when gripping the bar in the starting position — sitting too close to the bar creates a crowded starting position that limits the overhead stretch
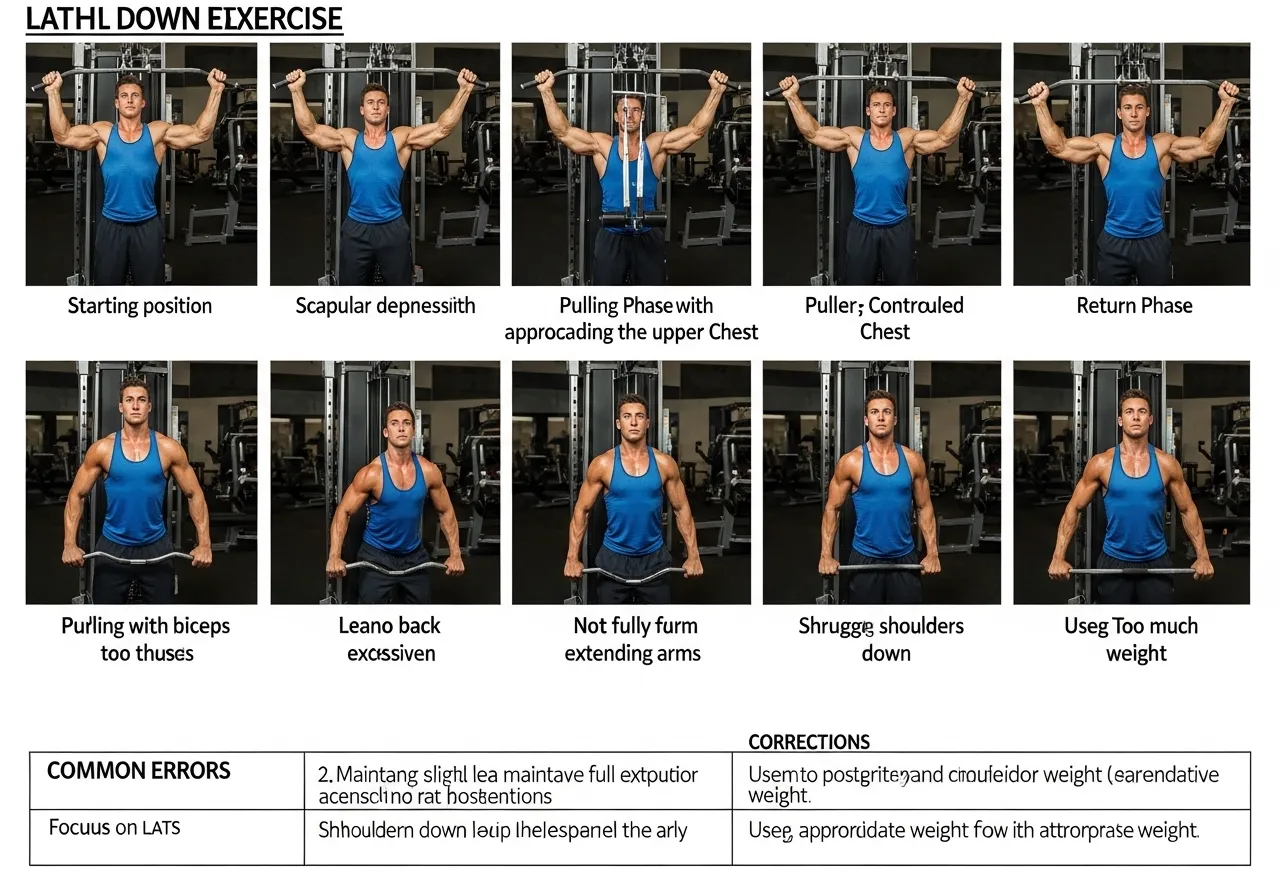
Step-by-Step Lat Pulldown Technique
Setup and Starting Position
- Adjust the thigh pad so the legs are secured firmly — the pad should hold the thighs down during the pull without requiring active effort to keep seated
- Stand to reach the bar, grip it at the chosen width, then sit down while keeping the grip — this ensures the arms are properly positioned before loading
- Lean the torso back slightly — approximately 10–15° from vertical — this is a natural position that aligns the bar’s path with the lats’ pulling angle
- Chest up, shoulders down and back — establish scapular depression before beginning the first rep
The Pull Phase (Concentric)
Step 2: Drive the elbows down and back — think “elbows to back pockets” rather than “pull the bar to your chest.” This mental cue shifts the pulling sensation from the biceps to the lats.
Step 3: Pull the bar to upper chest level — typically to or slightly above the clavicles (collarbone). Pulling below this point may require the torso to lean excessively backward.
Step 4: At the bottom, squeeze the lats and hold for 1 second — a brief isometric pause here builds mind-muscle connection (the neuromuscular focus on a target muscle during exercise).
The Return Phase (Eccentric)
Step 6: At the top, allow the shoulder blades to rise fully — this complete stretch of the lats at the top of each rep may increase the hypertrophic stimulus (muscle growth stimulus) of the exercise.
Step 7: Reset the scapular depression cue before initiating the next rep.
The 5 Most Common Technique Errors
| Error | What It Looks Like | How to Correct |
|---|---|---|
| Excessive backward lean | Torso angles 45°+ backward during the pull | Reduce load; maintain 10–15° lean throughout |
| Shrugging the shoulders up | Shoulders rise toward ears at the top | “Push shoulder blades down” before and during the pull |
| Letting the bar snap back | Weight stack bouncing at the top of each rep | Resist the bar upward — 2–3 second return |
| Pulling below clavicle level | Bar pulled to the waist or stomach | Stop at upper chest — the lats are fully shortened here |
| Not reaching full stretch at top | Shoulder blades do not rise at the top | Allow arms to fully extend and scapulae to elevate at top |
Breathing Pattern
The recommended breathing pattern for lat pulldown:
- Inhale as the bar returns upward (eccentric phase) — this supports thoracic expansion and maintains posture
- Exhale as you pull the bar downward (concentric phase) — expiring during the exertion phase is the standard recommendation for most resistance exercises
For heavier sets near maximum load, using a brief Valsalva maneuver (a technique of inhaling, bracing the core, and holding breath momentarily during the exertion to stabilize the spine) before the pull is commonly practiced — though individuals with cardiovascular concerns should discuss this with their healthcare provider before applying it.
Controlling Load Selection: Avoiding the Most Common Mistake
Going too heavy — forcing excessive torso lean, momentum, and partial range of motion — is the most common mistake that reduces the lat pulldown’s effectiveness.
A practical self-check for appropriate load:
→ A controlled 2–3 second return on every rep
→ Torso remaining within 15° of vertical throughout
→ The shoulder blades to rise fully at the top of each rep
→ The final rep of the set completed with the same form as the first rep
If any of these break down before the final rep, the load is likely too heavy for the current training stimulus — reducing by 5–10% and maintaining strict form typically produces better lat development than continuing with technique breakdown.
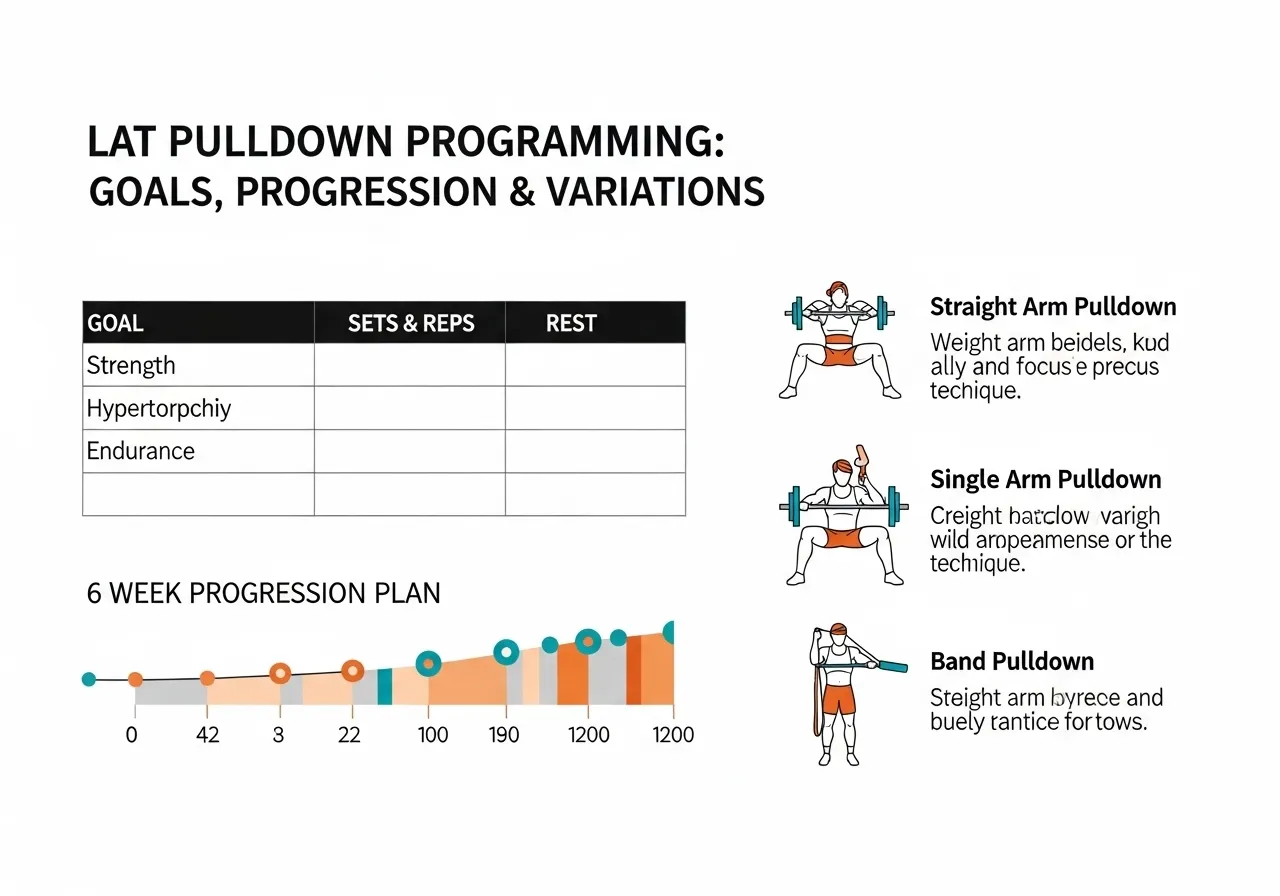
Lat Pulldown Programming: Sets, Reps, Frequency, and Progression
Sets and Reps by Training Goal
| Goal | Sets × Reps | Load | Tempo | Rest |
|---|---|---|---|---|
| Technique learning | 3 × 10–12 | Light — 50–60% | 3 sec return | 90 sec |
| Muscle growth (hypertrophy) | 3–4 × 8–12 | Moderate — 65–75% | 2–3 sec return | 60–90 sec |
| Strength development | 4 × 5–6 | Heavy — 80–85% | Controlled | 2–3 min |
| Endurance / general fitness | 2–3 × 15–20 | Light — 40–55% | Moderate | 45–60 sec |
Where to Place the Lat Pulldown in a Training Session
The lat pulldown functions effectively as both a primary and secondary pulling exercise depending on the session structure:
✅ As secondary (after barbell rows): 3 sets of 10–12 reps at moderate load — used to add lat volume after heavier compound rowing
✅ As accessory (full-body or upper day): 2–3 sets of 10–15 reps at lighter load — added for lat activation without heavy systemic demand
6-Week Progression Plan
3 × 10 @ 60% | Strict 3-sec return | Focus: scapular depression initiation and full stretch at top
Weeks 3–4 — Volume Build:
4 × 10 @ 65–70% | 2-sec return | Add 2.5–5 kg when all 4 × 10 reps are completed cleanly
Weeks 5–6 — Load Emphasis:
4 × 6–8 @ 75–80% | Controlled return | Progress weight when top set feels manageable
Week 7 — Deload:
3 × 10 @ 55% | Technique reset | Allow connective tissue and nervous system recovery
Frequency Guidelines
- 2× per week is a commonly recommended starting frequency — once as a primary movement and once as accessory work in a different session
- 48 hours minimum between sessions that heavily load the lats — adequate recovery is required before re-stimulating the same musculature
- If significant soreness in the lats or biceps persists into the next planned session, extending recovery before loading again is advisable
Integrating the Lat Pulldown in a Back Training Week
1. Barbell or Dumbbell Row — 4 × 6–8 (horizontal pull primary)
2. Lat Pulldown — 3 × 8–10 (vertical pull primary)
3. Face Pulls or Rear Delt Fly — 3 × 15 (rear delt and rotator cuff)
4. Biceps Curl — 2–3 × 10–12 (isolated elbow flexion)
Example Full-Body Day:
Lat Pulldown — 3 × 10 as the vertical pulling exercise for that session
Progressive Overload in the Lat Pulldown: Practical Methods
Beyond simply adding weight, several progressive overload methods are available for the lat pulldown:
- Load progression: Add 2.5–5 kg when all target reps are completed with strict technique — the most direct method
- Tempo manipulation: Extending the eccentric return from 2 seconds to 3–4 seconds increases time under tension (total duration the muscle is under load) without changing the external load
- Range of motion increase: Deliberately allowing a fuller overhead stretch at the top of each rep — this increases the total range the lat works through
- Volume increase: Adding a set (from 3 to 4 sets) at the same weight before pursuing load increases
- Grip rotation: Periodically rotating between grip types provides different mechanical stimuli and may reduce accommodation (the gradual reduction in training response as the body adapts to a fixed stimulus)
Deload Strategy for Lat Pulldown Programs
Planning a deload week every 4–8 weeks — reducing volume by 40–50% and load by 20–30% — allows the connective tissue around the shoulder, elbow, and wrist to recover from the cumulative mechanical stress of repeated pulling.
The lat pulldown places significant repeated load on the biceps tendon, the shoulder capsule, and the brachioradialis (a forearm muscle that assists in elbow flexion during pronated pulling movements) — areas that benefit from periodic planned recovery rather than continuous progressive loading.
Signs that a deload may be needed before the scheduled time:
- Persistent aching in the elbow crease or biceps tendon that does not resolve after 48 hours
- Grip strength noticeably reduced at the start of sessions even after adequate rest
- Pulling strength declining for two or more consecutive sessions at the same weight
A qualified physiotherapist can distinguish between normal training fatigue and early overuse injury — seeking evaluation when elbow or shoulder discomfort persists beyond normal session soreness is advisable rather than waiting for symptoms to worsen.
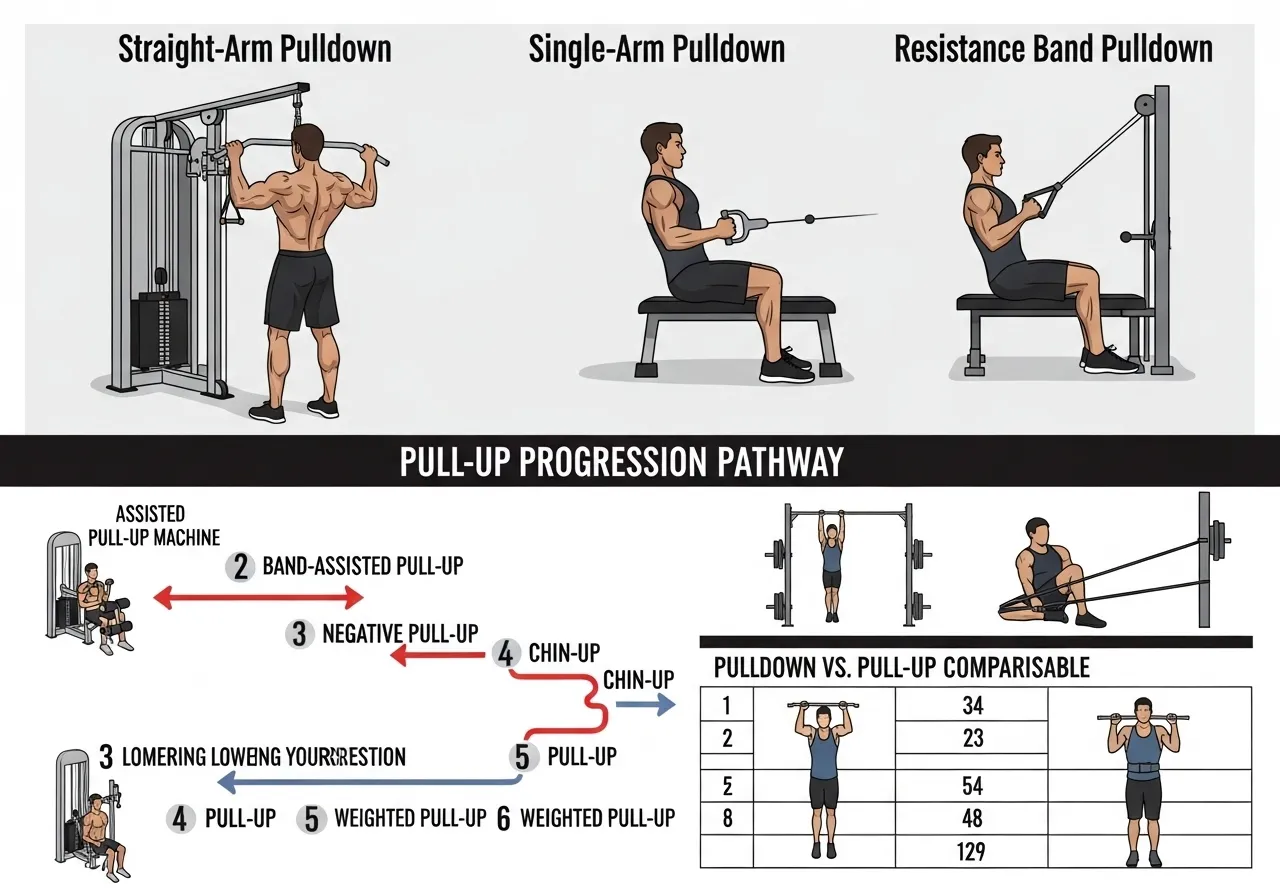
Lat Pulldown Variations and Advanced Techniques
Straight-Arm Lat Pulldown
A cable variation where the arms remain straight (elbows locked) and the movement occurs entirely at the shoulder — driving the hands downward from an overhead position to the hips while keeping the elbows extended.
This variation isolates the latissimus dorsi more purely than standard pulldowns by removing the biceps from the movement — the biceps cannot assist when the elbows are not bending.
Sets/Reps: 3 × 12–15 | Light load — the shoulder lever arm makes this considerably harder than it looks
Common error: Bending the elbows during the movement — this reintroduces biceps involvement and reduces the lat isolation
Single-Arm Lat Pulldown
Performing the movement with one arm at a time using a single cable handle — this unilateral approach (training one side at a time) allows greater range of motion, addresses left-right strength imbalances, and increases core engagement as the torso resists rotation.
Sets/Reps: 3 × 10 per side | Use a weight approximately 55–60% of bilateral pulldown load
Resistance Band Pulldown
A cable-free alternative using a resistance band looped over a pull-up bar or secured overhead — providing a variable resistance profile (increasing resistance as the band stretches further) that differs from the constant cable tension.
Useful for home training, warm-up activation, and rehabilitation contexts — though the variable resistance means load management is less precise than machine training.
Assisted Pull-Up as the Progression Target
The lat pulldown is commonly used as a stepping stone toward unassisted pull-ups.
A practical progression pathway:
Stage 2: Assisted Pull-Up (band or machine assistance) — practicing the specific movement pattern
Stage 3: Negative Pull-Up (jumping to the top position and lowering slowly) — eccentric-focused training that builds strength through the full range
Stage 4: Full Unassisted Pull-Up — the movement the lat pulldown has been building toward
The Lat Pulldown vs. Pull-Up: Key Differences
| Factor | Lat Pulldown | Pull-Up |
|---|---|---|
| Load control | Precise — any increment possible | Fixed at bodyweight (plus added weight) |
| Core demand | Lower — seated and stabilized | Higher — entire body suspended |
| Beginner accessibility | High — load can be set below bodyweight | Lower — requires adequate baseline strength |
| Muscle activation | Similar to pull-up at matched loads | Similar; higher overall systemic demand |
Research generally suggests that the lat pulldown and pull-up produce similar lat activation when loads are matched — the primary advantages of the lat pulldown are its accessibility for beginners and its precision for load management.
Practical Questions About the Lat Pulldown
Should I feel the lat pulldown in my lats or my biceps?
The ideal sensation is a working feeling in the lats — specifically in the broad area of the mid-back and sides, roughly from the armpit area downward.
If the biceps fatigue consistently before any back sensation is felt, this typically indicates one of two issues: the load may be too heavy (causing the arms to compensate), or the scapular depression cue at the initiation of each rep is not being applied.
Practicing the straight-arm pulldown variation before regular pulldowns may help establish the mind-muscle connection with the lats before returning to standard grip work.
How much should I be able to lat pulldown?
Rough strength benchmarks for the lat pulldown (for medium grip, 8–10 rep working weight):
| Level | Approx. Load (% of Bodyweight) |
|---|---|
| Beginner (6 months or less) | 40–55% |
| Intermediate (1–3 years) | 65–85% |
| Advanced (3+ years consistent) | 90–110%+ of bodyweight |
These are approximate population ranges — individual variation based on body proportions, arm length, and training history is significant.
Using these purely as progress checkpoints rather than fixed targets is more practical for most trainees.
Is the lat pulldown safe for people with shoulder pain?
This question requires individual assessment — not a general yes or no.
For many shoulder conditions, lat pulldowns performed with appropriate grip, load, and technique may be performed comfortably.
However, some shoulder presentations — particularly impingement syndrome, rotator cuff pathology, or labral tears — may require modification or avoidance of this exercise depending on the specific diagnosis and stage of recovery.
If you experience shoulder pain during or after lat pulldowns, please consult a physiotherapist, sports medicine physician, or orthopedic specialist for a proper evaluation before continuing the exercise.
- Grip width does not meaningfully change latissimus dorsi activation — choose the grip that allows the most comfortable, strongest, and fullest range of motion pull
- Scapular depression initiation (pushing shoulder blades down before pulling) matters more for lat engagement than grip selection
- The controlled eccentric return (2–3 seconds upward) is where much of the hypertrophic stimulus occurs — resist the bar on the way up
- 2× per week at moderate-to-heavy loads, placed appropriately in a pull-day structure, is a practical programming starting point
- Persistent shoulder pain during or after lat pulldowns warrants evaluation by a healthcare professional before continuing
Lat Pulldown for Rehabilitation and Special Populations
The lat pulldown’s seated, controlled nature makes it one of the more accessible resistance exercises for individuals with lower body limitations, balance concerns, or those in post-injury recovery programs.
For individuals with shoulder impingement, reduced shoulder mobility, or post-surgical recovery, a physiotherapist or sports medicine physician should assess whether lat pulldown training is appropriate and, if so, which grip and range of motion modifications are suitable.
The close neutral grip (V-bar) is generally considered the most shoulder-friendly lat pulldown option — the neutral forearm position reduces the shoulder external rotation demand compared to wide pronated grips.
For older adults or those with limited grip strength, wrist straps may help sustain lat training volume without grip fatigue becoming the limiting factor prematurely — though developing grip strength alongside lat strength is generally advisable when possible.
A certified strength and conditioning specialist (CSCS) or qualified personal trainer can assess your specific situation and design a lat pulldown program tailored to your fitness level, goals, and any movement limitations.
These combined factors make the lat pulldown a foundational and highly versatile exercise that can be productively included in virtually any resistance training program, from beginner general fitness through advanced competitive bodybuilding and athletic performance preparation.