⚠️ Health & Fitness Disclaimer This article is for general educational purposes only and does not replace professional medical advice. If you have any lower back, hip, or hamstring conditions, please consult a qualified healthcare professional before beginning a deadlift program.
The deadlift is the simplest expression of the most fundamental human movement pattern — picking a heavy object off the floor. Unlike the squat and bench press, which require specific equipment and stable anchors, the deadlift needs only a barbell and floor space. This simplicity, combined with the systemic strength demands it places on virtually every major muscle group from the hands to the hips, explains why it has remained a cornerstone of strength development across powerlifting, Olympic weightlifting, and functional training. (Related: barbell back squat guide)
This guide covers the EMG research on deadlift muscle activation and its variants, explains conventional versus sumo stance differences in biomechanics and loading, details the technique for each major variation, and provides an 8-week deadlift-focused program.
Deadlift EMG Research: What the Studies Show
The Systematic Review: What Muscles the Deadlift Actually Trains
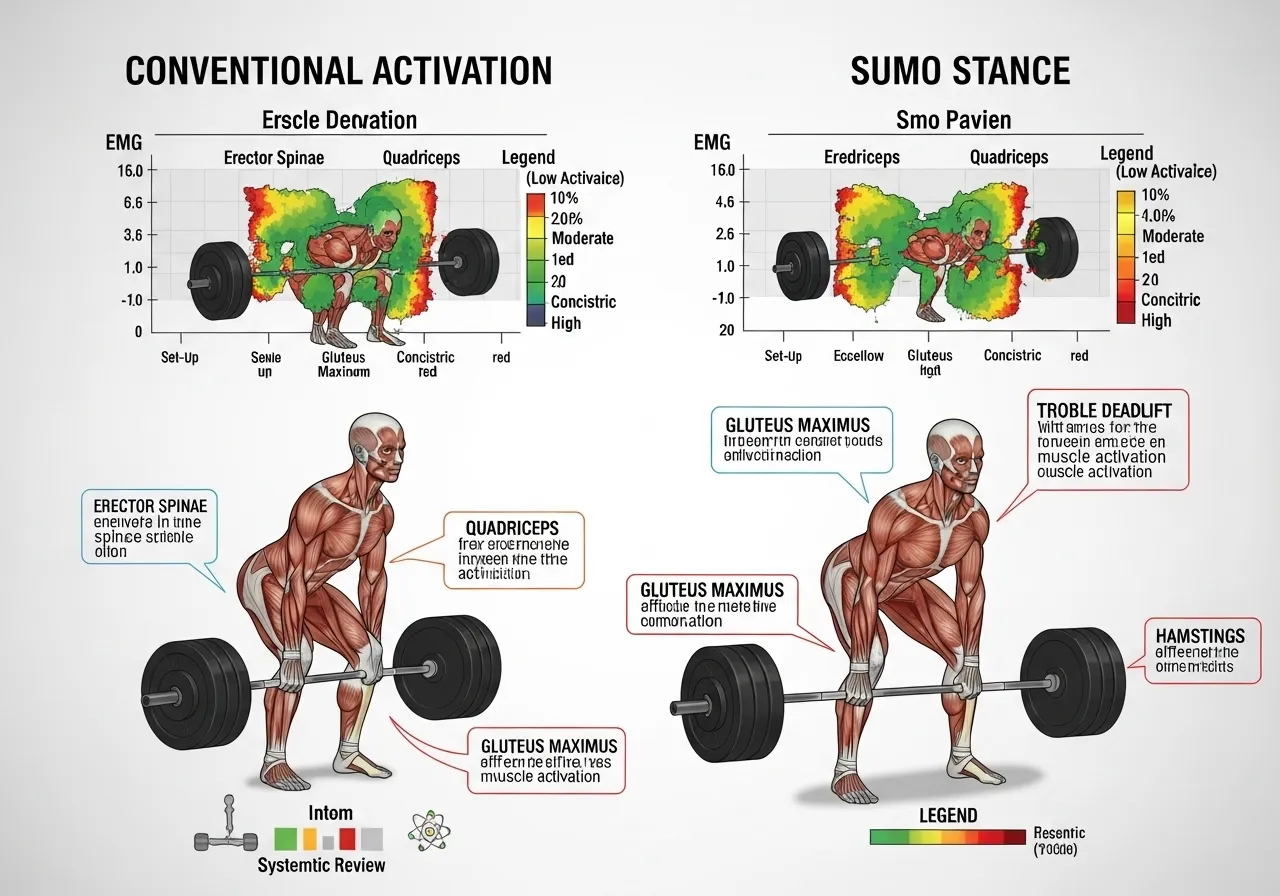
This finding challenges the popular perception that the deadlift is primarily a “back exercise” — the data consistently shows that the erector spinae activates highly but the quadriceps are equally significant contributors, making the conventional deadlift guide a genuine full posterior and lower body exercise rather than an isolated back developer.
Understanding which muscles contribute to each phase of the deadlift assists in both technique development and programming:
Muscle Group
Primary Phase
Function
Erector spinae
Throughout
Spinal extension and isometric stabilisation
Quadriceps
Initial drive (floor to knee)
Knee extension — pushing the floor away
Gluteus maximus
Lock-out (knee to hip extension)
Hip extension in the final third of the lift
Biceps femoris/semitendinosus
Throughout hip extension
Hip extension from floor — greater in Romanian variants
Trapezius/rhomboids
Throughout
Scapular depression and retraction — protecting shoulder
Latissimus dorsi
Initial pull
Keeping the bar close to the body — preventing bar drift
Grip Strategies: Double Overhand, Mixed Grip, and Hook Grip
Grip is the first limiting factor most deadlift beginners encounter — the back and legs can generate more force than the hands can maintain. Three grip strategies address this limitation at different stages:
Double overhand: Both palms facing the lifter — the weakest grip configuration but the most symmetrical. Developing double overhand strength through training or straps (which are appropriate for accessory work) prevents the spinal rotation that mixed grip can produce over years of training.
Mixed grip (alternate grip): One palm forward, one backward — prevents bar rotation that causes double overhand slipping. The standard competition grip for most powerlifters. The biceps of the supinated (palm-forward) arm are at slightly increased bicep tear risk under very heavy loads — a rare but documented injury mechanism.
Hook grip: The thumbs are wrapped under the fingers rather than over — creating a mechanical lock that is stronger than both overhand and mixed grip. Standard in Olympic weightlifting. The initial discomfort of thumb pressure resolves with adaptation over several weeks of consistent use.
The Deadlift and Bone Density: An Underappreciated Benefit
The deadlift generates among the highest compressive spinal loads of any resistance exercise — and this same compressive loading is the primary osteogenic (bone-building) stimulus that makes the deadlift particularly valuable for bone density preservation and development.
The mechanostat theory of bone biology proposes that bone tissue responds to mechanical loading by increasing density — but only when that loading exceeds the habitual strain threshold. The high axial spinal loading of heavy deadlifts far exceeds the habitual strain experienced during walking and most daily activities, making it an effective stimulus for bone density development at the sites most clinically significant for fracture risk: the lumbar vertebrae and hip.
For postmenopausal women and older adults where osteoporosis risk is highest, heavy axially-loaded exercises like the deadlift are specifically recommended by exercise scientists as part of bone density preservation programs — their mechanical loading stimulus exceeding what any impact exercise can produce at equivalent intensity levels.
Conventional Deadlift: Technique and Setup
The Setup: Getting Everything Right Before the First Pull
The conventional deadlift setup determines the quality of every subsequent rep. Experienced coaches emphasise that the setup — not the pull itself — is where most technique errors originate:
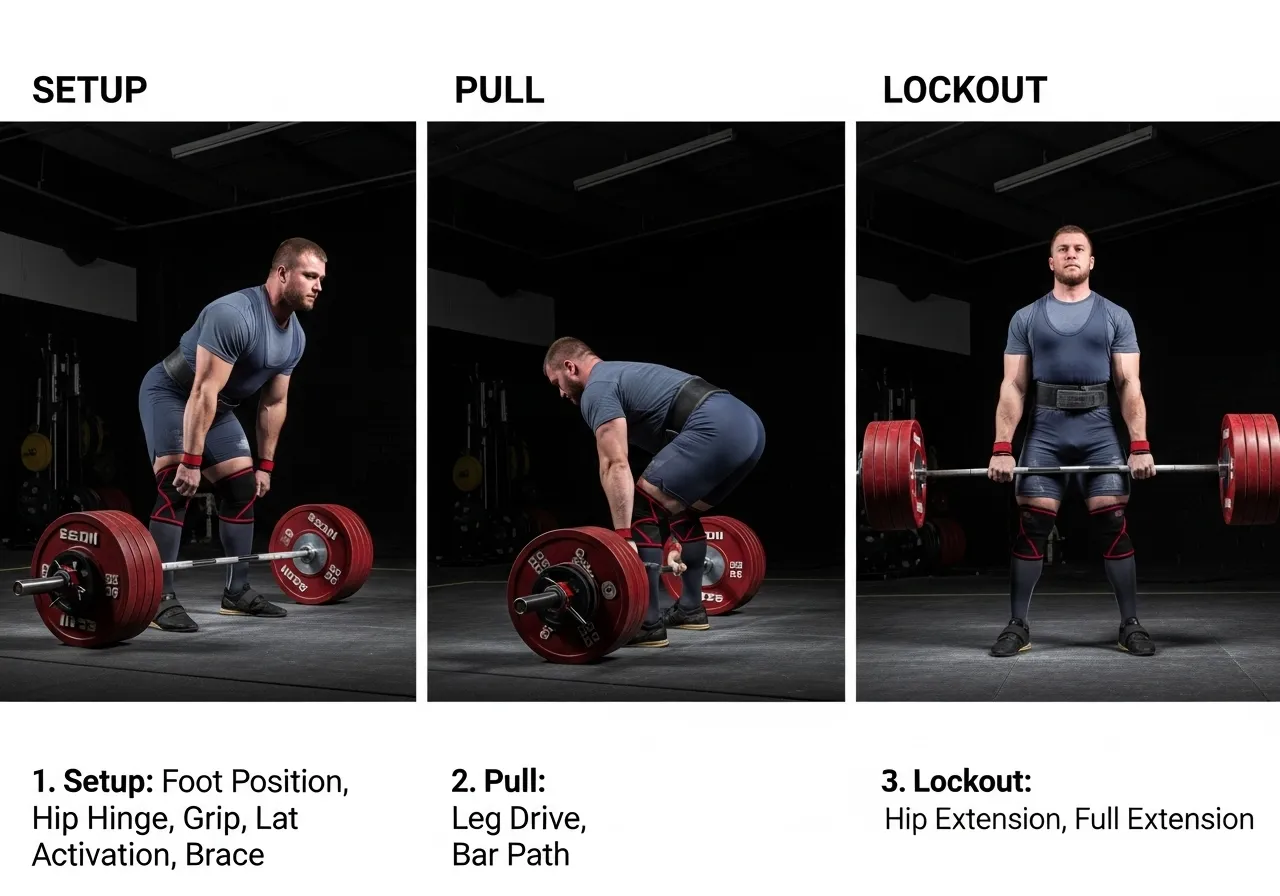
Foot position: Hip-width stance, toes pointed slightly outward (10–15°). The bar is over the midfoot — approximately 2–3 cm from the shins. Hip hinge to the bar: Bend the knees until the hands reach the bar — the hips should not drop to a squat position; the back angle should be roughly 45° from vertical at the bottom. Grip: Double overhand (both palms down) for lighter training loads; mixed grip (one palm up, one down) or hook grip for heavier loads. Grip width is just outside the legs. Lat activation: Before pulling, squeeze the lats as if trying to put them in the back pockets — this keeps the bar close to the body during the pull and prevents the “early morning” rounding of the upper back. Big breath and brace: Valsalva manoeuvre — fill the diaphragm with air and brace the core 360° before breaking the bar from the floor. Release the breath at lockout or between reps depending on training style.
The Pull: Leg Drive, Hip Hinge, and Lockout
The deadlift’s concentric phase has two distinct segments with different dominant muscles:
Floor to knee (leg drive phase): Drive the floor away — the quadriceps extend the knee while the hips remain at the starting angle. The back angle relative to the floor should not change during this phase. The bar travels straight up, maintaining close contact with the shins.
Knee to lockout (hip extension phase): As the bar passes the knee, the hips drive forward — the gluteus maximus becomes the primary motor. The back straightens, the hips come through, and the lift completes with the glutes squeezed and the body upright.
The most common fault — the “good morning” deadlift — occurs when the hips rise faster than the bar during the initial pull, converting the movement to a stiff-leg position where the erectors must compensate for the work the quadriceps should perform. This typically reflects either an inappropriate hip position at setup or insufficient quadriceps strength relative to the lower back.
The Lockout: What Correct Looks Like
A legitimate deadlift lockout requires three simultaneous conditions:
Full knee extension — legs straight, no soft knee
Full hip extension — hips through, not hyperextended. Squeezing the glutes at lockout achieves hip extension without the lumbar hyperextension that excessive lean-back creates.
Neutral to slight extension of the spine — no lumbar rounding, no excessive lean-back
Deficit Deadlift and Block Pull: Range of Motion Variations
Two common deadlift range-of-motion manipulations address specific weaknesses:
Deficit deadlift: Performed from plates or a raised surface that elevates the lifter by 3–7 cm — increasing the range of motion and strengthening the initial hip position. Particularly useful for lifters who lack power off the floor or who are preparing to pull from a competition floor surface after training on rubber mats.
Block pull (or rack pull): Bar rests on blocks or safety bars at knee height — reducing the range of motion to just the lockout phase. Overloads the lock-out position where the erectors and glutes complete hip extension. Allows heavier absolute loads than full-ROM deadlifts, building confidence with supramaximal weights.
Conventional Deadlift Breathing Strategies: Touch-and-Go vs. Dead Stop
Two primary execution strategies exist for multiple-rep deadlift sets, with different physiological demands and technique implications:
Dead stop (reset) reps: Each repetition begins from a dead stop on the floor — the bar is fully set down, the bracing is re-established, and the next rep initiates from scratch. This produces the most consistent rep quality and avoids momentum carryover but reduces total load capacity per set.
Touch-and-go reps: The bar touches the floor briefly without full reset — maintaining some elastic energy storage that reduces the perceived difficulty of subsequent reps. Common in training for work capacity and conditioning but produces a slightly different neuromuscular pattern than the competition dead-stop technique.
For strength development specifically, dead-stop reps better reflect competition conditions and build greater starting strength (force production from a stationary position). For hypertrophy and conditioning, touch-and-go allows more total volume with heavier loads than dead-stop reps for most trainees.
The combination of both rep strategies within the same training cycle — dead-stop reps in heavy strength phases and touch-and-go in higher-volume conditioning phases — develops the complete spectrum of deadlift competency most effectively.
Sumo Deadlift: Technique and When to Use It
Sumo Setup: The Wider Stance Mechanics
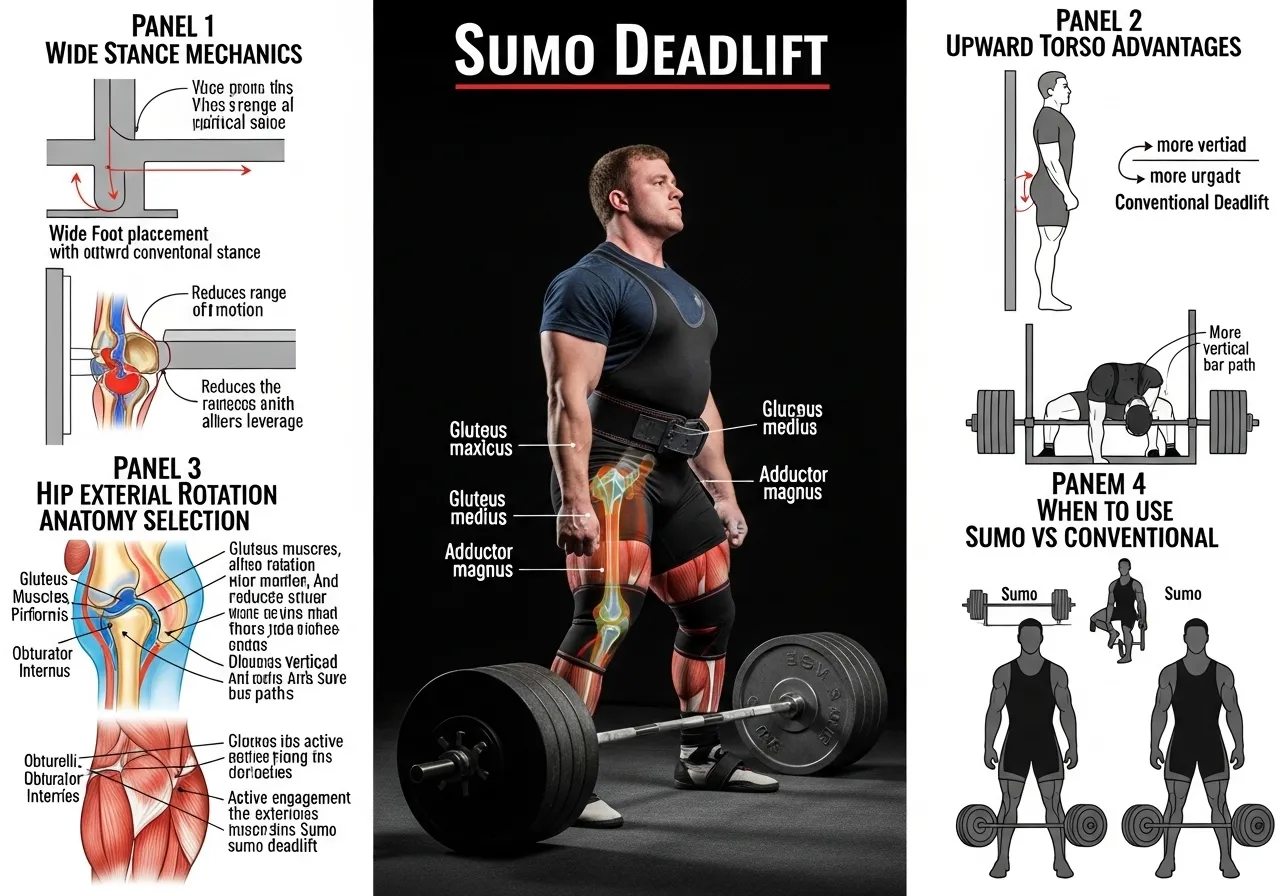
The sumo deadlift places the feet wider than shoulder-width with a more outward toe angle (30–60°), positioning the hands inside the legs. This stance geometry changes the biomechanics of the lift substantially:
The reduced torso-to-floor angle allows a more upright back position — reducing the moment arm of the bar about the lumbar spine and therefore the erector spinae loading
The wider stance reduces the vertical distance the bar must travel — typically by 20–25% compared to the same lifter’s conventional stance
The greater hip external rotation and abduction demand activates the hip adductors and anterior hip musculature more than conventional stance
Ideal anatomy for sumo deadlift: wider hip sockets (acetabular inclination favouring external rotation), relatively shorter femurs, and adequate hip external rotation range of motion. Individuals who are stiff in the hips or who have joint anatomy that limits comfortable hip external rotation may find conventional stance more biomechanically appropriate.
Sumo-Specific Technique Points
Foot position: Stance width varies considerably — some lifters pull with feet nearly touching the plates; others use a moderately wide stance. The key marker: at the bottom position, the shins should be roughly vertical when viewed from the front. Hip opening: Before driving up, actively push the knees outward into the thighs — this engages the hip external rotators and opens the hips into the correct starting position. Chest up: The more upright torso of the sumo pull requires particular attention to maintaining a proud chest throughout — the tendency to drop the chest forward converts the lift toward a conventional pulling angle and negates the sumo setup advantage.
Who Should Pull Sumo vs. Conventional?
The choice between sumo and conventional is ultimately determined by individual anatomy, training history, and injury considerations rather than a universal hierarchy of effectiveness:
Lifters with lower back pain or limited thoracic extension often find sumo’s more upright torso position more comfortable
Lifters with long torsos relative to their leg length often find conventional more mechanically appropriate
Those with excellent hip mobility and external rotation often thrive with sumo
Both styles are equally valid for strength and hypertrophy goals — the optimal choice is the one that allows the highest loads with the best technique for the individual’s anatomy
The Romanian deadlift occupies a unique programming position — it provides the highest hamstring hypertrophy stimulus of all conventional deadlift variations while allowing heavier loads than isolation exercises and fitting naturally after conventional deadlifts in strength-focused sessions:
3–4 sets of 8–12 repetitions following conventional deadlifts provides the hamstring volume needed for comprehensive posterior chain development
The slow eccentric phase (3–4 seconds lowering) dramatically increases hamstring time under tension and produces greater muscle damage stimulus than a rapid descent
Training the RDL at longer muscle lengths — descending further than the mid-shin standard toward near-ankle level for individuals with adequate hamstring flexibility — takes advantage of the stretch-mediated hypertrophy mechanism that produces superior long-muscle-length hypertrophy
Single-Leg Romanian Deadlift: The Balance and Asymmetry Corrector
The single-leg Romanian deadlift (also called the Bulgarian RDL or pistol RDL) performs the RDL movement on one leg while the other extends behind — simultaneously training the posterior chain and the single-leg stability relevant to running, cutting, and sport performance:
The single-leg loading exposes left-right strength and balance asymmetries that bilateral RDL training masks — corrections driven by single-leg training transfer to athletic performance and reduce injury risk
The hip abductor and gluteus medius engagement needed to prevent hip drop (the hip falling toward the non-weight-bearing side) develops lateral hip stability that bilateral training cannot develop
The hamstring stretch in the single-leg RDL is comparable to the bilateral version — maintaining the long-muscle-length hypertrophy stimulus while adding the functional single-leg demand
Which Deadlift Variation Best Targets the Hamstrings?
Is Deadlift Safe With Existing Back Pain?
Which Deadlift Variation Best Targets the Hamstrings?
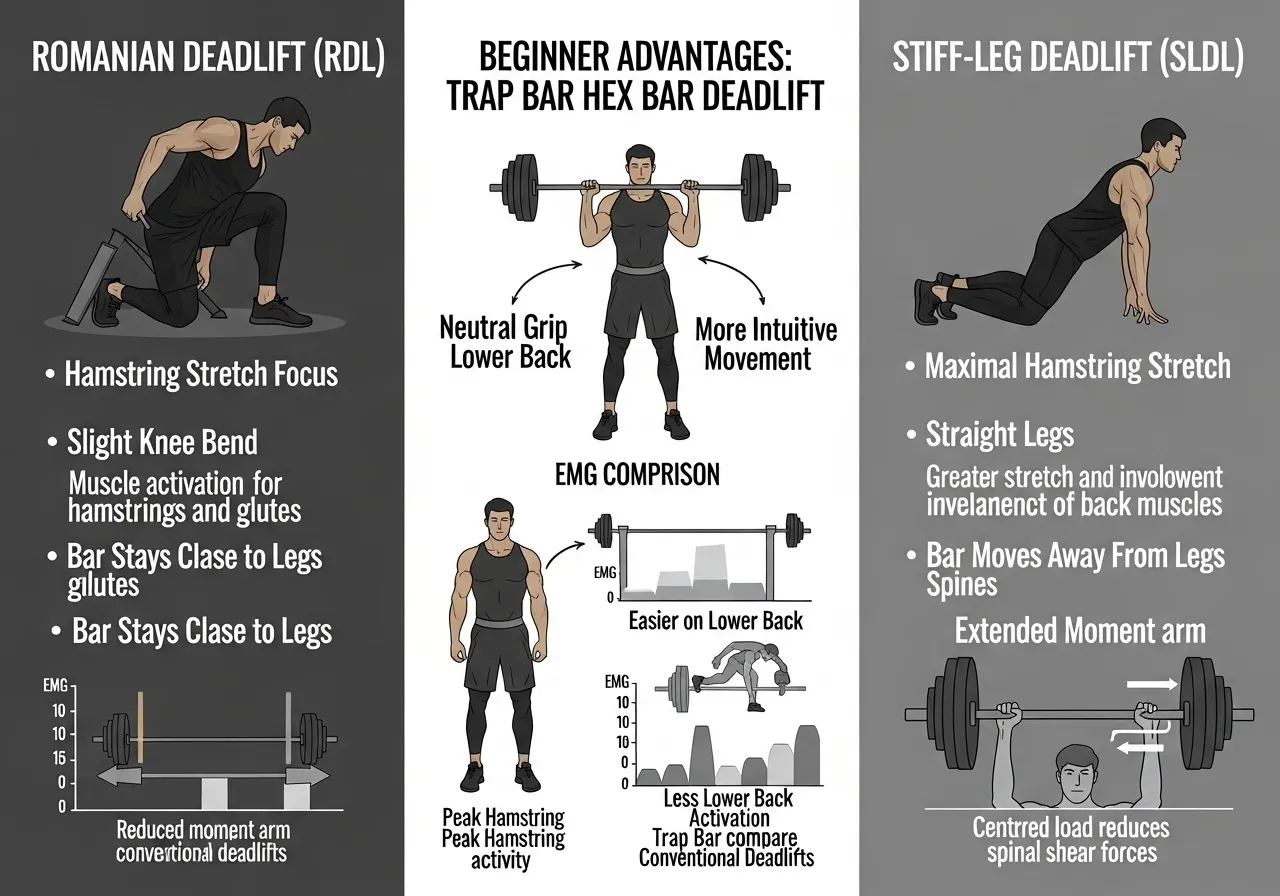
Romanian Deadlift: The Hamstring Specialist
The Romanian deadlift (RDL) starts from the standing position and hips back to approximately mid-shin level while keeping the knees nearly straight — the defining movement pattern is maximum hip hinge with minimal knee flexion. This technique dramatically increases the hamstring stretch stimulus compared to the conventional deadlift:
The near-straight-leg position prevents the quadriceps from contributing to the movement — placing the entire hip extension demand on the gluteus maximus and hamstrings
The hamstrings’ biarticular function (crossing both the hip and the knee) means they are maximally stretched when the hip is maximally flexed and the knee is maximally extended — precisely the bottom position of the RDL
Research consistently shows that the Romanian deadlift and stiff-leg deadlift produce higher hamstring EMG activity than the conventional deadlift at equivalent loads
RDL technique key point: the bar should stay in contact with the legs throughout — dragging down the thighs and shins. Allowing the bar to drift forward dramatically increases the lumbar moment arm and reduces hamstring loading.
Stiff-Leg Deadlift vs. Romanian Deadlift: The Difference
These two exercises are often used interchangeably but have a meaningful technical distinction:
The Romanian deadlift begins from the standing position and descends only to approximately mid-shin — the weight never touches the floor between reps, maintaining constant hamstring tension
The stiff-leg deadlift begins from the floor — like a conventional deadlift but with nearly straight knees — producing a greater initial hamstring stretch but requiring the lifter to manage the bar from a dead-stop position
For hamstring development, the RDL is typically preferred because the absence of a floor reset allows continuous tension and a cleaner stretch-shortening cycle
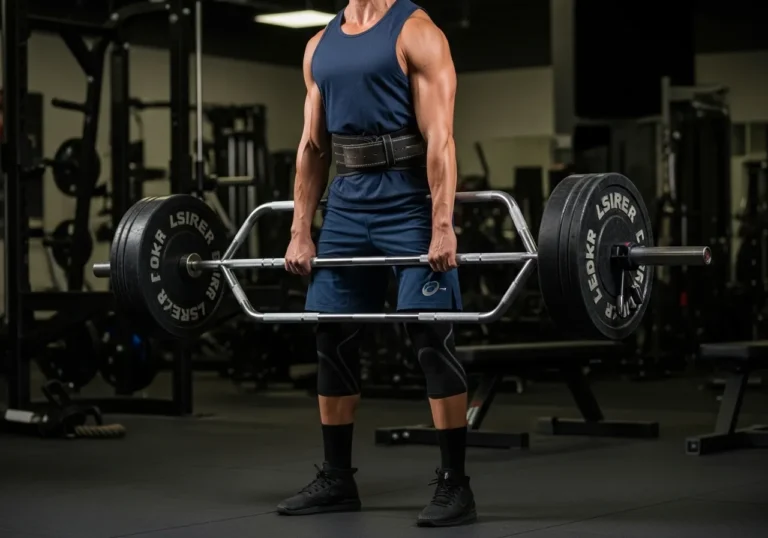
Trap Bar (Hex Bar) Deadlift: The Beginner-Friendly Alternative
The trap bar (or hex bar) — a hexagonal frame that allows the lifter to stand inside the bar — changes the deadlift mechanics significantly:
The handles are at the sides of the body rather than in front — eliminating the bar-shin contact issue and reducing the moment arm of the load about the lumbar spine
The handle height (typically 20–25 cm higher than a conventional barbell) reduces the required range of motion and allows a more upright torso position
Research shows the trap bar deadlift elicits higher overall EMG activity than conventional and sumo deadlifts at matched relative intensities — likely because the trap bar allows heavier absolute loads to be lifted due to its more favourable biomechanics
The trap bar deadlift is the most appropriate starting variation for beginners — the setup is simpler, the safety margin is greater, and the mechanics more closely resemble a squat pattern that most beginners are more familiar with than a hip hinge
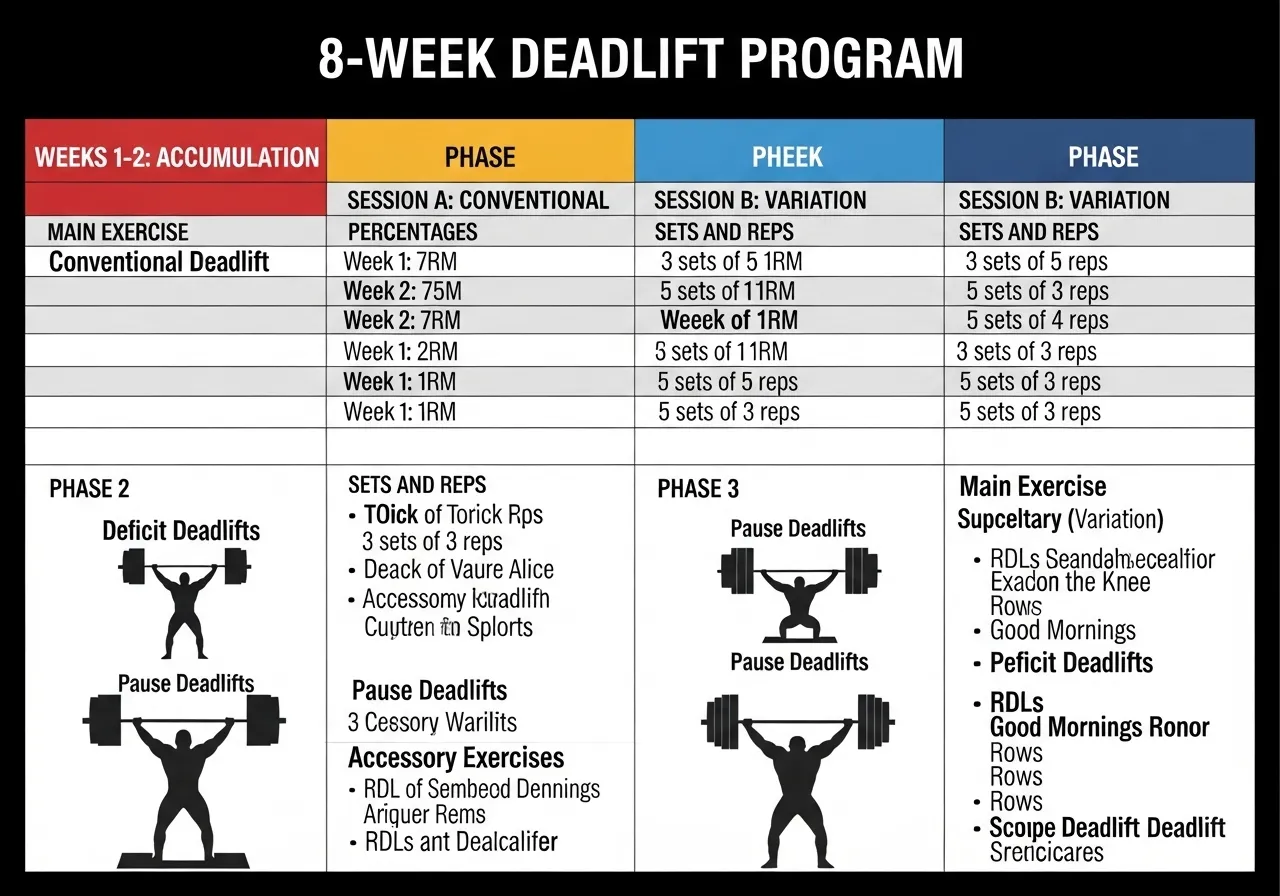
8-Week Deadlift Program
Program Design
Two dedicated deadlift sessions per week in a conjugate-style approach — one heavy conventional deadlift day and one variation day with Romanian deadlift as the primary movement. The program uses percentage-based loading and builds from technique consolidation to near-maximal singles.
Phase 1 — Weeks 1–2 (Technique and Baseline): Session A (Conventional focus):
Conventional deadlift: 4 × 5 @ 70% — technique priority
Romanian deadlift: 3 × 8 @ 50%
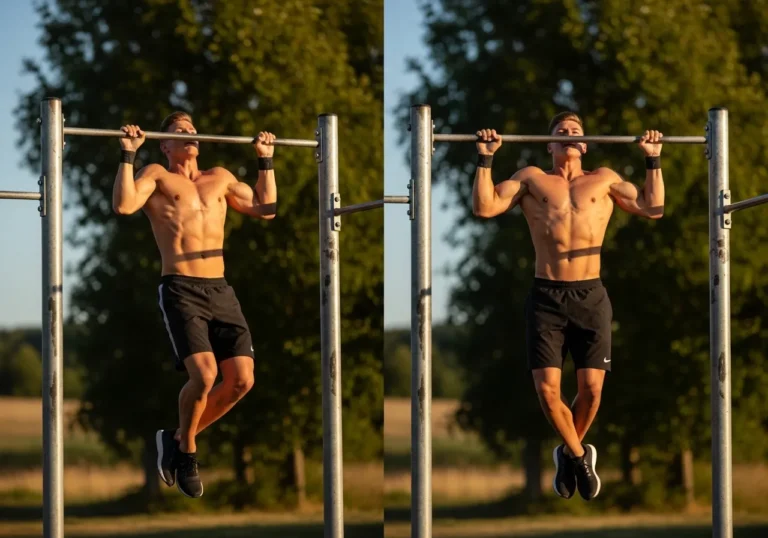
Lat pulldown: 3 × 10
Single-leg Romanian deadlift: 3 × 8 each side
Session B (Variation day):
Trap bar deadlift: 4 × 6 @ 72%
Romanian deadlift: 4 × 8 @ 55%
Seated cable row: 3 × 12
Glute bridge: 3 × 15
Phase 2 — Weeks 3–4 (Volume Build): Session A:
Conventional deadlift: 5 × 4 @ 75%
Romanian deadlift: 4 × 8 @ 60%
Face pull: 3 × 15
Bulgarian split squat: 3 × 8 each side
Phase 4 — Weeks 7–8 (Peak): Week 7 Session A:
Conventional deadlift: Work up to top set 3 @ 87%; 2 × 5 back-off @ 72%
Romanian deadlift: 3 × 6 @ 65%
Week 8 Session A (Test week):
Warm-up to 85%, then attempt 90–93% for a quality single
Romanian deadlift: 3 × 8 @ 60%
Deload following week: All lifts at 50–60%, 3 × 5 only
Deadlift Programming for Different Goals: A Summary Framework
The optimal deadlift programming approach varies significantly based on the primary training goal:
Maximum strength: Low rep ranges (1–5), long rest periods (3–5 minutes), progressive overload across 8–16 week cycles with planned deloads. Conventional or the lifter’s stronger stance. Minimal accessory volume to preserve recovery capacity for the primary lifts.
Muscle hypertrophy: Moderate rep ranges (6–12), including RDL and stiff-leg deadlift variations for hamstring volume, short-to-moderate rest (90–180 seconds), higher total volume across the week. The RDL is often the primary posterior chain hypertrophy exercise with the conventional deadlift as a secondary strength movement.
General fitness and conditioning: Trap bar deadlift for accessibility and safety, moderate loads, two sessions per week, Romanian deadlift supplementing for hamstring development. The compound nature of the deadlift provides caloric expenditure and metabolic demand that isolation exercises cannot match.
Is the Deadlift Dangerous for the Lower Back?
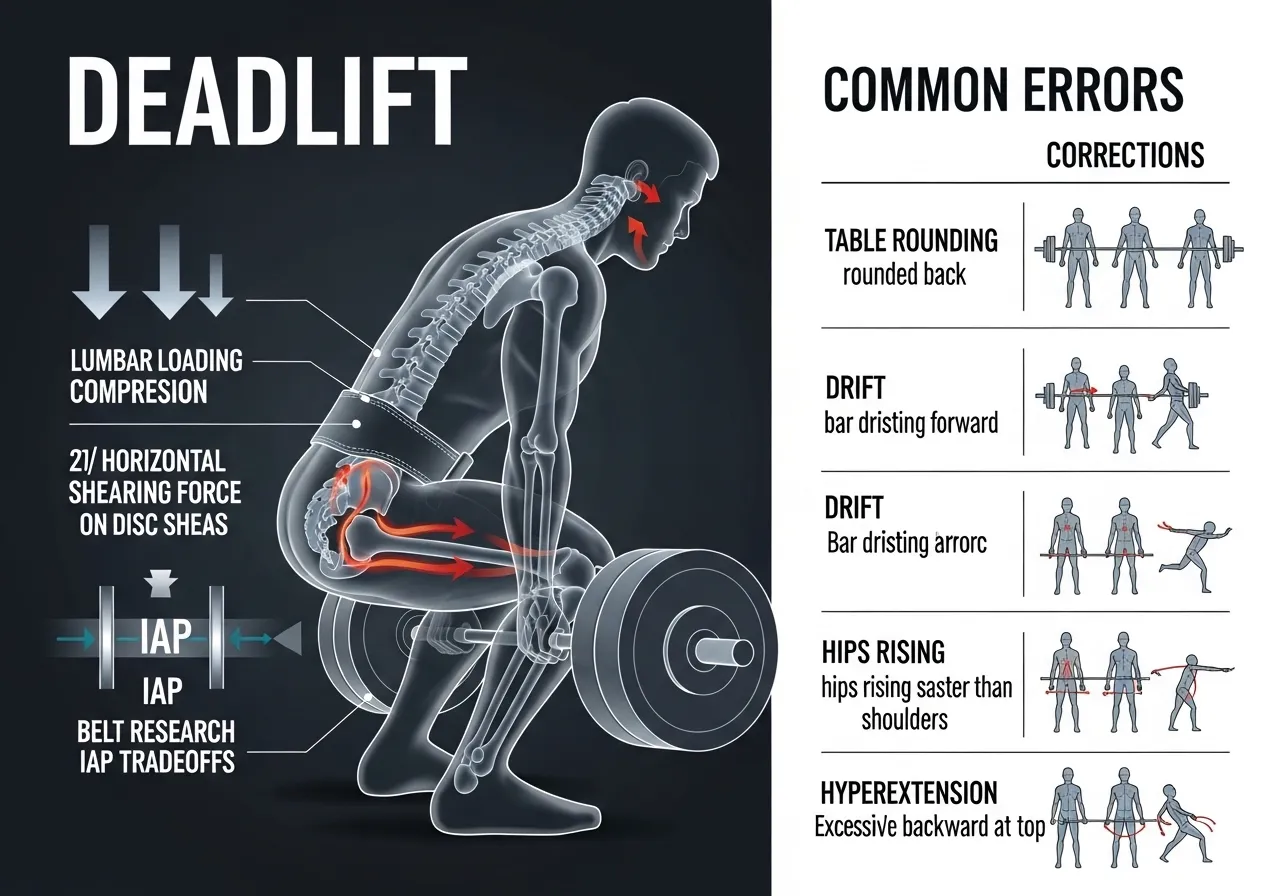
Lower Back Loading During Deadlifts
The lumbar spine is the structure most commonly injured during deadlift training, and understanding the loading mechanics is essential for safe programming:
The primary lumbar stress in deadlifts is compressive — the erector spinae muscles contracting to extend the spine create compression forces that increase with load and with bar distance from the spine (moment arm)
Lumbar flexion under load (rounding at the bottom) increases the moment arm and the disc shear forces substantially — the most consistently documented injury mechanism in deadlift training
Intra-abdominal pressure generation through the Valsalva manoeuvre (breath holding with core bracing) provides hydraulic support to the lumbar spine that meaningfully reduces the net compressive stress on the discs and erectors
The Belt Question: Research Evidence
Lifting belts (rigid leather or nylon belts worn around the waist) modify the mechanics of the Valsalva manoeuvre and are among the most debated pieces of training equipment:
Research confirms that belts increase intra-abdominal pressure by providing an anterior surface to brace against — producing greater hydraulic support for the lumbar spine at given loads
Belt use increases rectus abdominis activation while decreasing external oblique activation — a muscle activation tradeoff that may affect core stability training development over time in lifters who always train with a belt
The practical guidance: belts are appropriate for near-maximal competition lifts and heavy working sets; training without a belt for at least some portion of every cycle develops the intrinsic core stability that a belt supplements rather than creates
Common Deadlift Errors and Corrections
Error
Consequence
Correction
Lumbar rounding
Disc shear; injury risk increases with load
Reduce load; reinforce lat activation and chest up cue
Bar drifting from body
Increased lumbar moment; reduced efficiency
Drag the bar up the shins; activate lats hard
Hips rising faster than bar
“Good morning” — erectors compensate for quads
Drive floor away; maintain starting back angle
Hyperextending at lockout
Lumbar facet compression
Squeeze glutes — don’t lean back; stand tall
Jerking the bar
Spike in spinal loading; grip stress
Take slack out of bar first; smooth acceleration
Deadlift FAQ
Should I deadlift with my back straight or slightly rounded?
The target spine position for the deadlift is neutral — the natural curves of the spine maintained, not excessively arched or rounded. “Straight back” is a coaching cue that means neutral, not anatomically straight (which would be impossible given the spine’s natural curvature).
Mild upper back (thoracic) rounding is frequently observed in heavy deadlifts by strong, experienced lifters and does not appear to dramatically increase injury risk in individuals with well-developed thoracic extensors and appropriate loading progression. Lumbar (lower back) rounding is a more significant concern because it loads the intervertebral discs in their most vulnerable position under compressive load.
How often should I deadlift?
The conventional wisdom that the deadlift requires longer recovery than other compound lifts — due to its high systemic demand — is supported by most experienced coaches and most evidence-based programming. Most intermediate and advanced lifters deadlift heavy once per week, with an optional lighter variation session (Romanian deadlift, deficit deadlift, pause deadlift) mid-week.
Beginners can deadlift two to three times per week at sub-maximal loads while developing technique — the neuromuscular learning benefits of frequency outweigh the recovery cost at modest loads, and technique deteriorates faster with infrequent practice in the early stages of learning.
Is the deadlift safe for people with lower back pain?
This depends entirely on the nature of the lower back condition. Some lower back conditions — particularly those involving disc herniations that are sensitive to spinal flexion under load — may be aggravated by conventional deadlift training. Others — particularly those involving weak posterior chain musculature and poor hip extension mechanics — may be specifically helped by carefully coached hip hinge training.
Individuals with diagnosed lower back conditions should receive clearance from a physiotherapist or sports medicine physician before beginning deadlift training, and should ideally have their technique assessed by a qualified coach before adding meaningful load.
✅ Key Takeaways
The erector spinae and quadriceps show greater EMG activation than the gluteus maximus during conventional deadlifts — confirming the deadlift as a full posterior chain and lower body exercise, not merely a back exercise
Sumo deadlifts produce significantly higher vastus medialis and lateralis activation; conventional deadlifts produce greater biceps femoris and gastrocnemius activation — both styles are valuable with distinct muscle emphasis
The Romanian deadlift produces higher hamstring EMG activity than conventional deadlifts at equivalent loads — making it the more targeted hamstring training tool
The trap bar deadlift is the most beginner-appropriate variation — reduced lumbar moment arm, natural handle position, and simpler setup make it the lowest-barrier entry into deadlift training
Lumbar rounding under load is the most consistently documented injury mechanism — maintaining the lat activation, Valsalva manoeuvre, and starting back angle throughout the pull are the primary injury prevention strategies
Regarding how the deadlift compares to other hip-dominant exercises for overall lower body development, research consistently positions it as the most comprehensive single posterior chain exercise available — no other exercise simultaneously develops the erector spinae, quadriceps, hamstrings, gluteus maximus, and grip strength through a coordinated full-body movement pattern that mirrors functional lifting demands more directly than any other common gym exercise.
Deadlift Warm-Up Protocol
The conventional deadlift warm-up requires gradually increasing the specific neural activation pattern — not just tissue temperature. A structured warm-up that progressively loads the exact movement reduces injury risk and improves working set performance:
5 min light cardiovascular activity (bike, row) — tissue temperature elevation
Hip hinge drill (bodyweight): 2 × 10 — movement pattern activation
Empty bar deadlift: 2 × 5 — groove the pattern with zero load
50% working weight: 1 × 5
65% working weight: 1 × 3
77% working weight: 1 × 2
85% working weight: 1 × 1 — final prep before working sets
This warm-up structure takes approximately 12 minutes and consistently produces better working set performance than shorter or unstructured warm-ups — the progressive neural activation at each weight increment prepares the specific neural pattern rather than just general fatigue management.
⚠️ Fitness Disclaimer: The information in this article is for general educational purposes only and does not constitute professional fitness or medical advice. Always consult a qualified healthcare professional before starting any new exercise program, especially if you have existing injuries or medical conditions. The Exercise That Separated Me From the Athletes I Trained With…
⚠️ Fitness Disclaimer: The information in this article is for general educational purposes only and does not constitute professional fitness or medical advice. Always consult a qualified healthcare professional before starting any new exercise program. The dumbbell vs barbell bench Plateau Nobody Talks About Honestly I hit 100kg on the bench press and then —…
The trap bar deadlift carries a stigma in serious strength training communities. It is described as the easier deadlift, the beginner deadlift, the deadlift for people who cannot do a real deadlift. The perception is that its reduced range of motion and more upright torso represent a shortcut around the technical and physical demands of…
The barbell squat is the king of lower body exercises. Nobody argues this. But the squat trains both legs simultaneously, allows the stronger leg to compensate for the weaker, and does not replicate the single-leg mechanics of every sport, every staircase, and every walking stride. The barbell lunge addresses what squatting leaves untrained. It loads…
The Zercher squat looks uncomfortable. It is. That discomfort is also precisely what makes it effective. Named after Ed Zercher, a strongman from the 1930s who reportedly squatted this way because he lacked a squat rack, the Zercher squat holds the barbell in the crease of the elbows rather than on the back or front…
The good morning is one of the most effective posterior chain exercises in existence. It is also one of the most avoided. The name sounds casual. The movement is not. A barbell loaded across the upper back while the torso hinges forward to near-parallel creates a tremendous demand on the spinal erectors, hamstrings, and glutes…