How to Master the Front Squat: EMG Research, Rack Position Science, Technique, and Progressive Loading
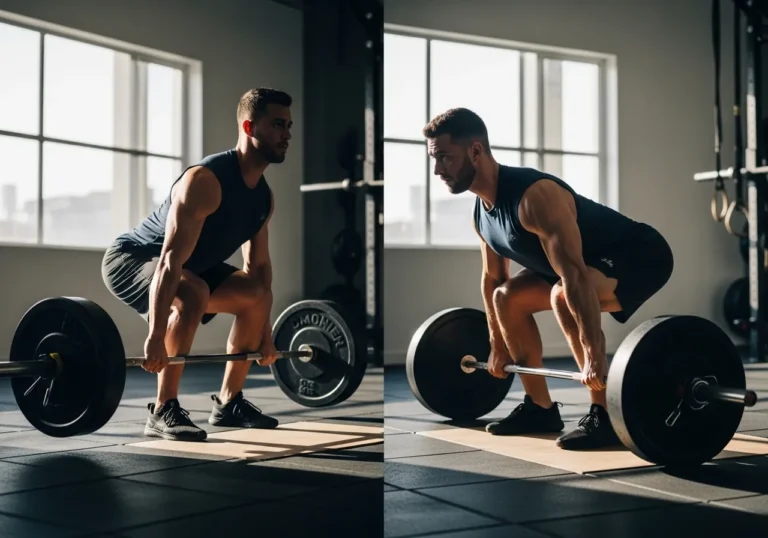
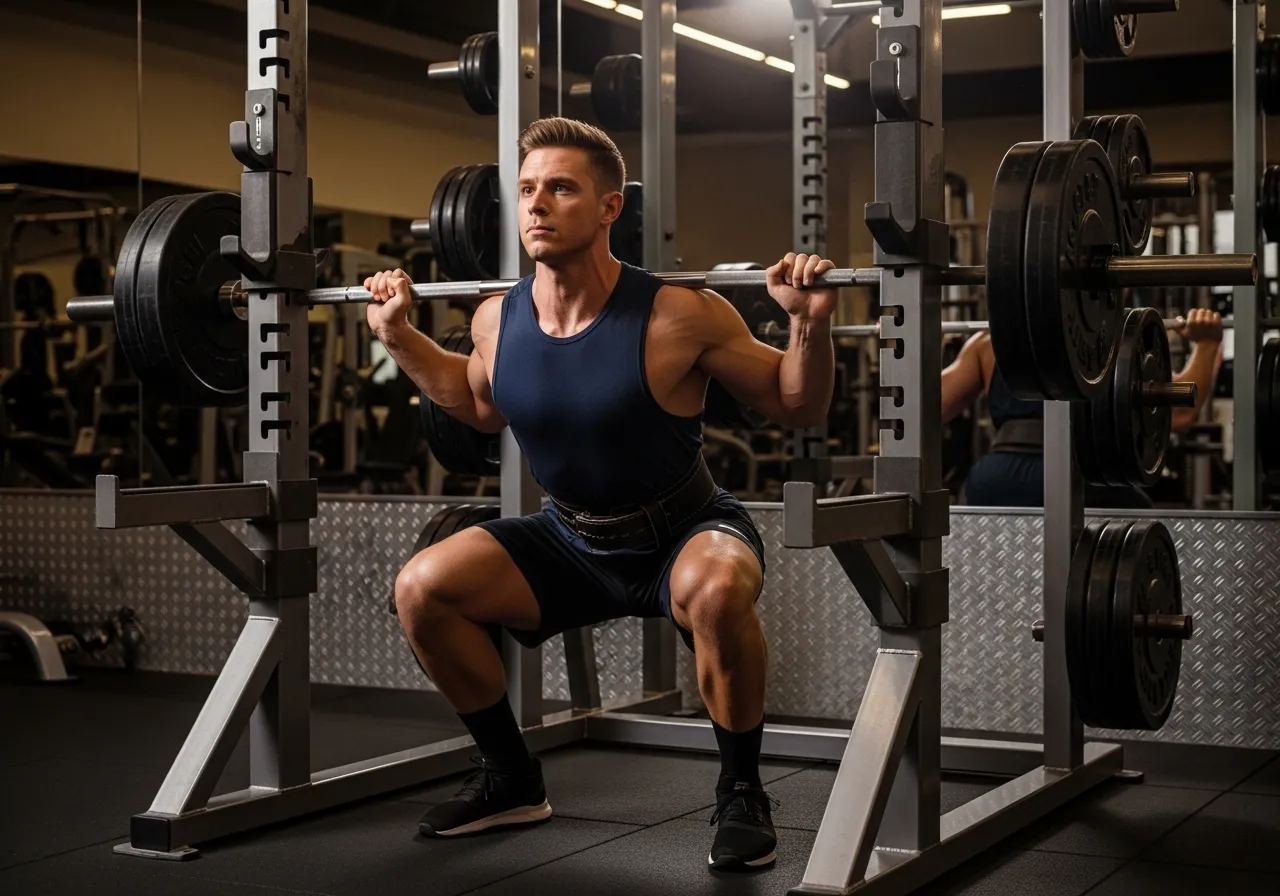
The front squat is the most technically honest squat in any strength programme. The barbell sits on the front of the shoulders. The elbows point forward. The torso stays vertical.
When the technique is correct, it works. When one element breaks, whether wrist immobility, collapsed elbows, or forward lean, the bar rolls forward and the set ends.
The front squat self-selects for good technique in a way the back squat does not. That honesty is why serious strength athletes use it, and why recreational trainees avoid it.
This guide covers what the EMG research shows about front versus back squat muscle activation. It also explains why the rack position limits most trainees, breaks down the technique phase by phase, and provides an 8-week progressive loading programme from beginner to intermediate competency.
What the EMG Research Shows About Front Squat Muscle Activation
The Vastus Medialis Advantage
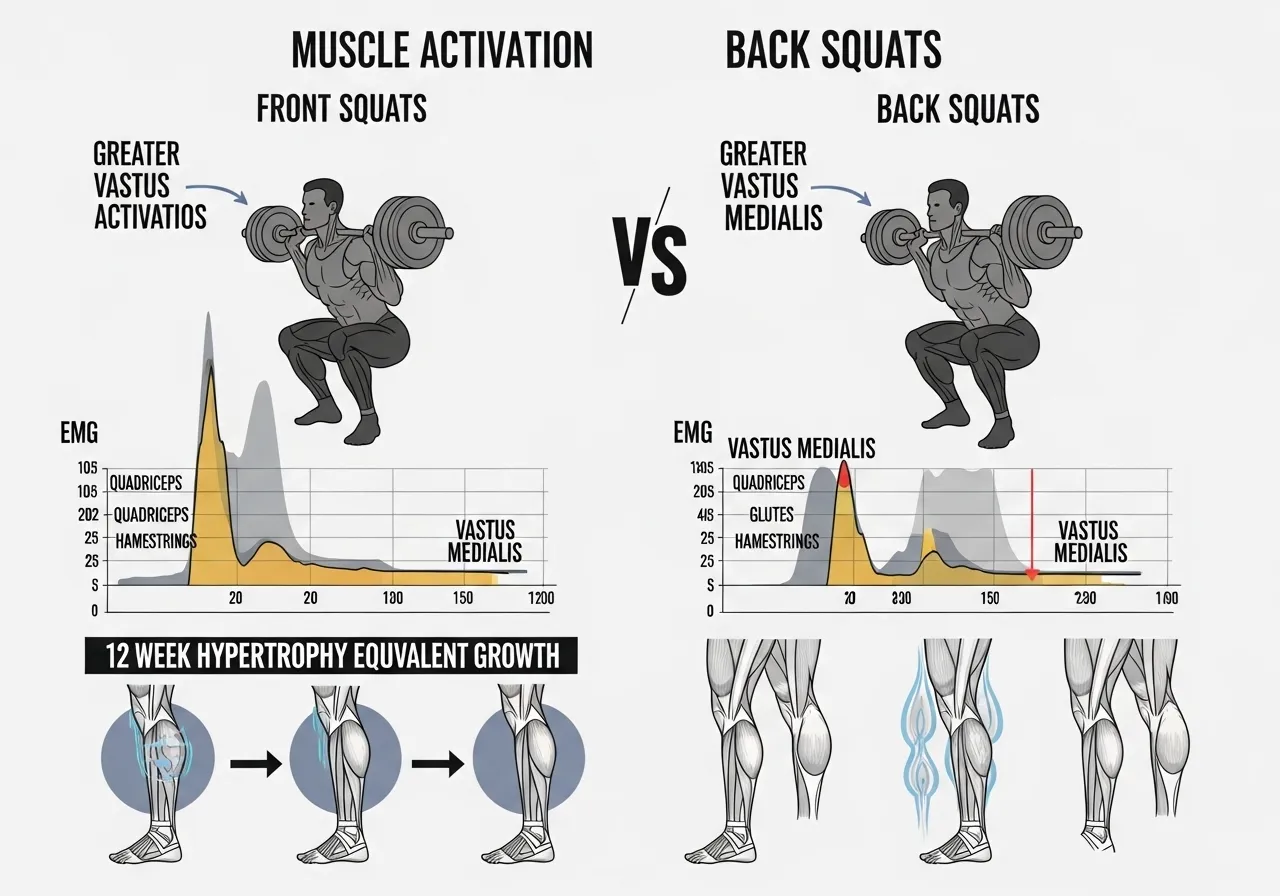
A study comparing kinematic and EMG activities during front and back squats at maximum loads found that vastus medialis electromyographic activity was significantly greater in the front squat compared to the back squat during the ascending phase and the whole movement, while semitendinosus activation was significantly greater in the back squat, with results suggesting the front squat may be preferred for knee extensor development and for preventing possible lumbar injuries during maximum loading.
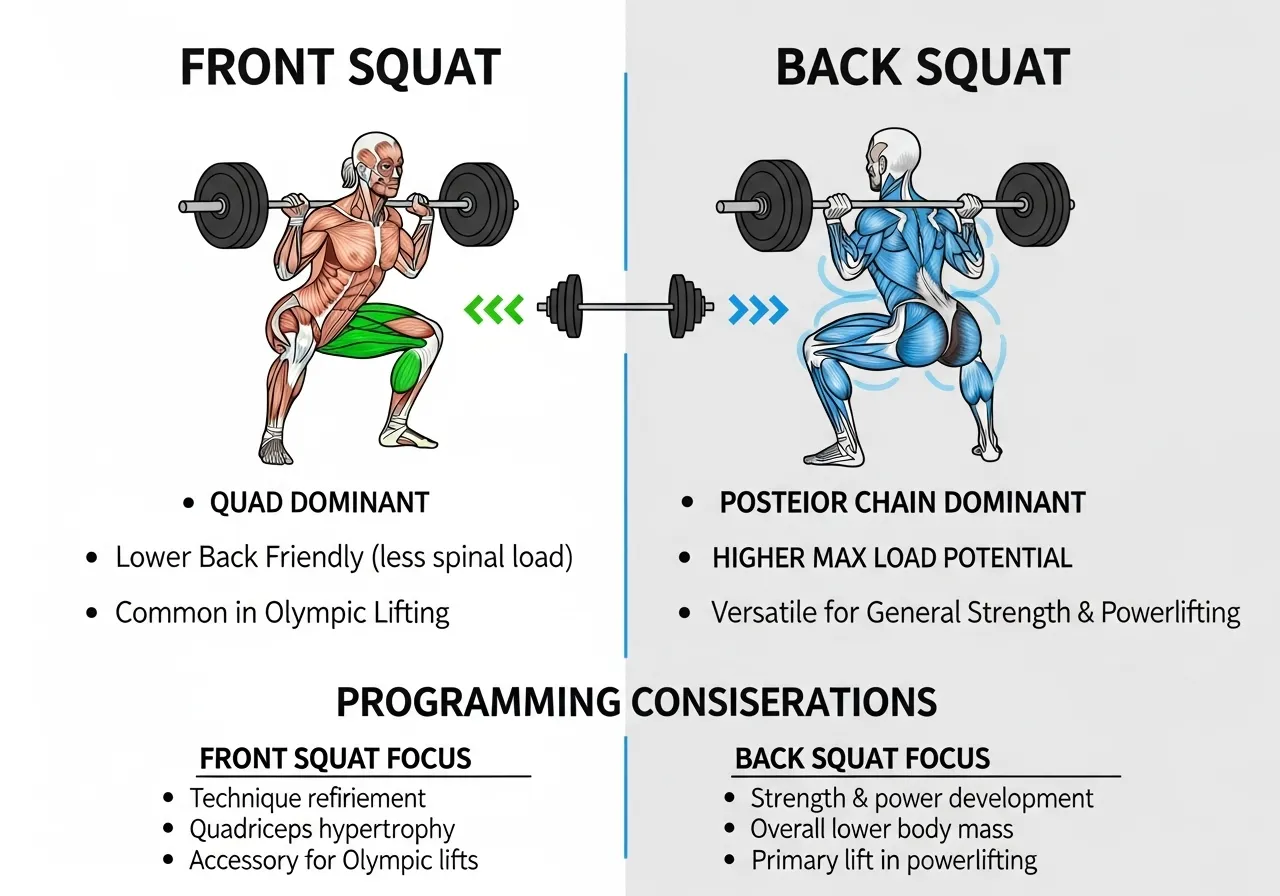
The front squat produces greater vastus medialis activation than the back squat at equivalent loads, despite typically requiring 20 to 25% less absolute weight. Per-rep quad stimulus at matched effort is higher in the front squat.
What Happens When Bar Position Changes
With the barbell on the front of the shoulders, the centre of mass shifts forward. This forces the torso to stay more vertical to keep the bar over the midfoot.
That torso position changes the joint moment distribution across the entire lower body. Front squat increases the knee moment and reduces the hip moment compared to the back squat.
In practical terms: the quads do more work proportionally. The glutes and hamstrings contribute less. The lower back erectors work less because the more upright torso reduces their moment arm.
This is not better or worse than the back squat. It is a different lower body stimulus that complements rather than replicates back squatting. For programming context on the back squat, the barbell back squat guide covers depth, bar position, and periodisation in full.
Squat Variations in Competitive Bodybuilders: EMG Across 5 Conditions
A study measuring EMG activity across five squat variations in competitive bodybuilders found that the front squat elicited significantly greater gluteus maximus and gluteus medius activation during the descending phase compared to all back squat variations, and produced greater rectus femoris activation than the full back squat during the ascending phase, demonstrating that the front squat generates a distinct and complementary muscle activation profile rather than simply being a lighter version of the back squat.
The front squat produces greater gluteus maximus and rectus femoris activation during specific movement phases than all back squat variations. It is a complete lower body stimulus with a different phase-by-phase recruitment pattern.
12-Week Hypertrophy Trial: Front vs Back Squat
A randomised controlled trial assigning 24 recreationally trained females to either a 12-week front squat or back squat protocol found that both squat variations elicited similar quadriceps hypertrophy at the proximal, middle, and distal regions of the lateral thigh, while back squat training produced greater improvements in non-specific dynamic strength testing at matched volume, indicating that front squat and back squat produce equivalent muscle growth despite the significant differences in absolute load used.
Front squat and back squat produce equivalent quadriceps hypertrophy over 12 weeks despite the front squat using significantly lower absolute loads. The upright torso and higher quad moment compensate for the load difference.
The Front Rack Position: Why Most People Struggle and How to Fix It
What the Rack Position Actually Requires
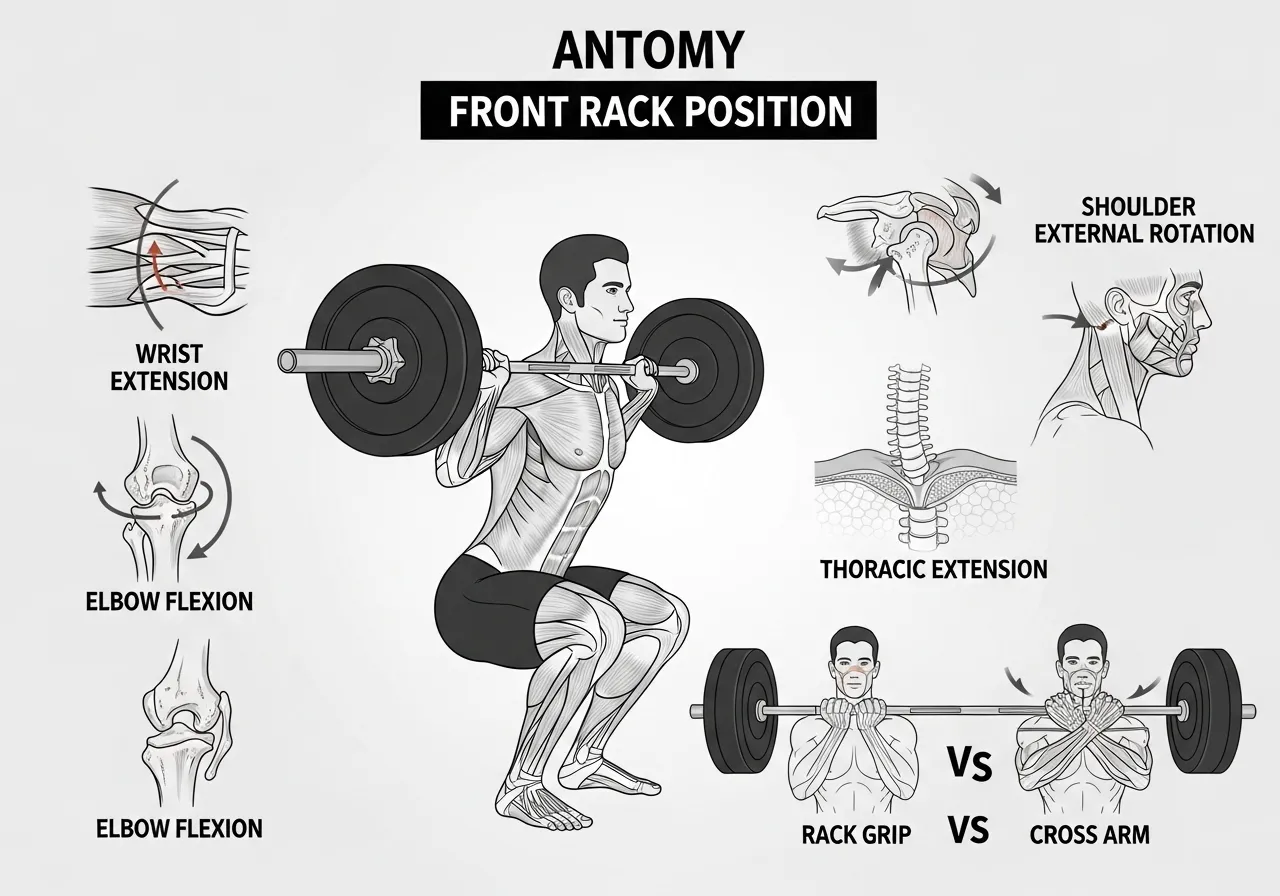
The front rack position requires simultaneous mobility across four structures that desk-based lifestyles routinely restrict:
- Wrist extension: The wrist must extend to approximately 70 to 80 degrees to let the bar rest on the shoulder shelf, not the hands. Restricted wrist extension forces the bar onto the fingers, loading the wrists under heavy weight and causing pain.
- Elbow flexion: Full elbow flexion without restriction allows the elbow to elevate to parallel with the floor. Tight bicep tendons directly limit elbow height.
- Shoulder external rotation: The shoulder must externally rotate and elevate simultaneously to create the shelf between the clavicle, front deltoid, and upper arm on which the bar rests.
- Thoracic extension: An upright torso throughout the squat requires thoracic extension. Kyphosis from desk-based work directly limits the ability to maintain the rack position as depth increases. The thoracic mobility guide covers the exercises that address this limitation directly.
Rack Grip vs Cross-Arm Grip
| Grip Type | Mobility Requirement | Stability | Best For |
|---|---|---|---|
| Rack grip (fingers under bar) | High wrist, shoulder, thoracic | Highest | Heavy loads, Olympic lifting carry-over |
| Cross-arm grip (arms crossed over bar) | Low, minimal wrist required | Moderate | Beginners, mobility-limited trainees |
The cross-arm grip eliminates the wrist extension requirement entirely. The arms cross over the bar and the hands press down from above to prevent it rolling forward.
This grip is a legitimate beginner option. It allows full focus on squat depth and torso position while mobility work proceeds separately. Most trainees transition to the rack grip within four to eight weeks of consistent mobility work.
Diagnosing Which Structure Limits Your Rack Position
Wrist test: Place your palm flat on a table with fingers pointing forward. Gently lift the forearm while keeping the palm down. If the wrist cannot reach 70 degrees of extension without discomfort, wrist mobility is the limiting factor. Fix with daily wrist circles, prayer stretch, and reverse prayer stretch before each session.
Elbow test: With no bar, bring your elbows to front rack height, parallel to the floor. If the elbows cannot reach parallel without significant effort, shoulder and lat flexibility limits elbow elevation.
If your elbow height is acceptable at the top of the squat but drops as depth increases, the limiting factor is thoracic extension range under load, not wrist or shoulder flexibility. Ankle dorsiflexion also plays a role. Restricted dorsiflexion forces heel rise, which forces forward lean, which collapses the rack position. The ankle mobility guide covers targeted dorsiflexion work that directly improves front squat depth.
Front Squat Technique: Phase by Phase
The front rack position requires wrist extension and shoulder external rotation under load. Individuals with active wrist impingement, distal radius fractures, or rotator cuff tears should obtain physiotherapy assessment before loading the front rack position. Any sharp wrist or elbow pain under the bar is a signal to stop and reassess mobility, not to continue through discomfort.
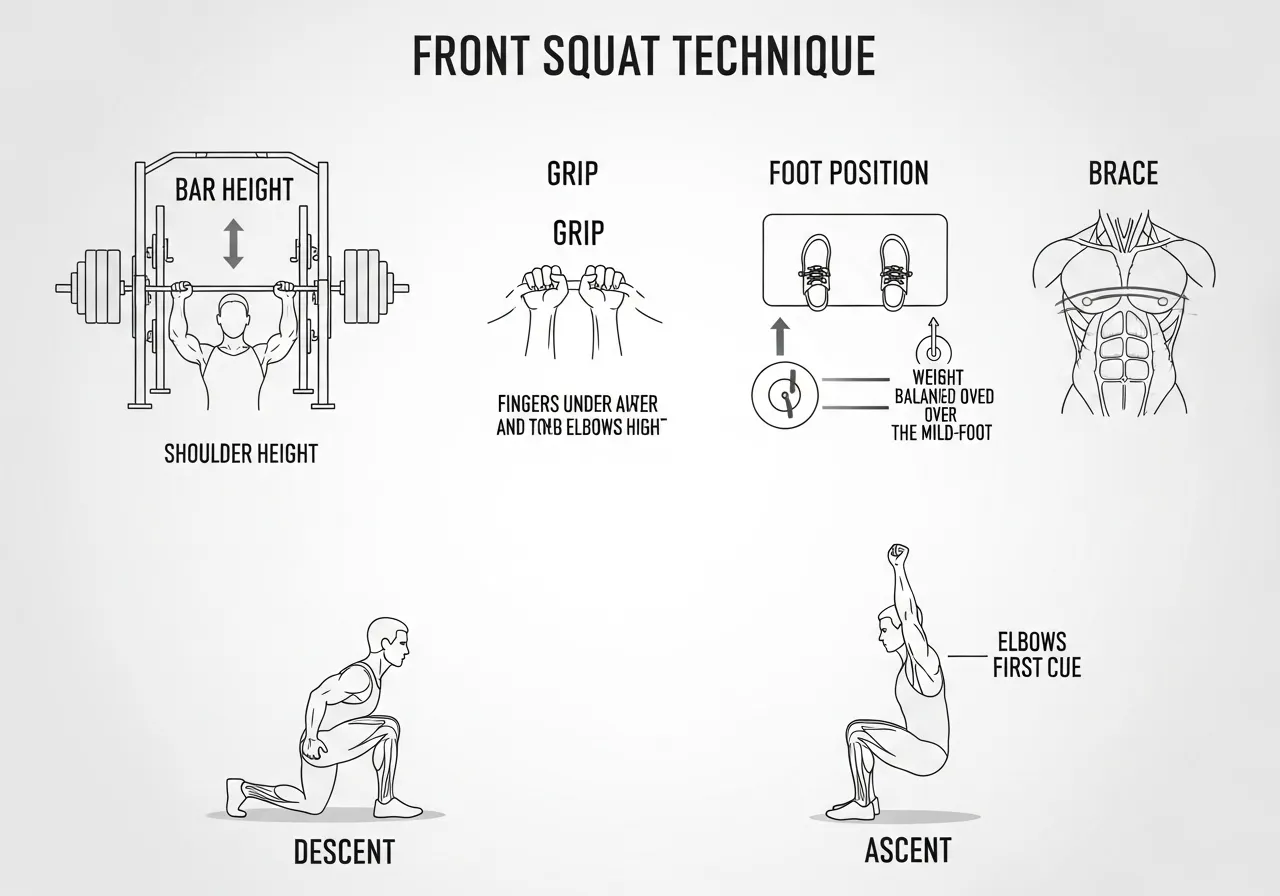
Setup: 4 Points Before the Bar Leaves the Rack
2. Grip and rack position: Walk under the bar and establish the rack position before lifting. Elbows up, bar sitting on the deltoid-clavicle shelf, not on the hands.
3. Foot position: Slightly wider than hip-width, toes pointed out 20 to 30 degrees. The front squat requires slightly more external rotation than the back squat to allow hip depth without posterior pelvic tilt at the bottom.
4. Brace: Full 360-degree core brace before stepping back. This creates intra-abdominal pressure that stabilises the lumbar spine throughout the set.
The Descent: 3 Things to Focus On Going Down
- Elbows stay up: As depth increases, the tendency is for the elbows to drop. Each degree of elbow drop shifts the bar forward off the shoulder shelf and onto the hands. Actively cue “elbows up and forward” throughout the descent.
- Knees track over the second toe: The knee should travel in the direction of the toes throughout the descent. Knee valgus collapse indicates hip abductor weakness.
- Heels stay flat: Ankle dorsiflexion is more critical in the front squat than the back squat because of the upright torso and forward knee drive. If the heels rise, temporary heel elevation on a plate maintains training stimulus while mobility work progresses.
The Ascent: Elbows First
The front squat ascent requires a different cue than the back squat. In the back squat, the primary drive cue is “chest up” or “push the floor away.”
In the front squat, the primary cue is “elbows up first.” When the elbows drop at the start of the ascent while the legs drive forcefully, the bar rolls forward, the torso follows, and the movement becomes a failed good-morning squat.
Leading the ascent with an active elbow elevation cue keeps the bar over the midfoot throughout the concentric phase.
Front Squat vs Back Squat: When to Use Each
The Case for Using Both
The front squat and back squat are not competing for the same training slot. They produce complementary lower body stimuli from a single movement pattern family.
Most trainees who add front squats to a back-squat-only programme see improvements in both lifts within eight weeks. The front squat’s thoracic and quad demands transfer to the back squat by developing the torso stiffness and quad strength the back squat also requires.
The back squat’s heavier absolute loads build the posterior chain that helps drive the front squat out of the hole. They make each other better.
When Front Squat Is the Better Choice
- Quad-dominant training blocks: When quad hypertrophy is the priority goal, the front squat’s higher vastus medialis activation and knee moment make it the more targeted quad developer at equivalent effort.
- Lower back sensitivity: The more upright torso reduces the erector spinae moment arm. Trainees whose lower back limits back squat performance often find the front squat allows higher quad intensity without the same lower back fatigue.
- Olympic lifting preparation: The front squat is the catch position for the clean. Training it directly develops the thoracic stability, rack position, and hip depth required for clean performance.
- Technical feedback: The front squat immediately punishes forward lean, heel rise, and elbow drop. It exposes squat technique weaknesses that the back squat allows you to compensate around.
When Back Squat Is the Better Choice
- Maximum absolute loading: Most trainees front squat 20 to 30% less than they back squat. For maximum strength development and spinal loading for bone density, the back squat allows heavier loads.
- Posterior chain emphasis: The greater hip moment and hamstring activation of the back squat makes it the superior choice when glute and hamstring development is the primary goal.
- Powerlifting competition: Competition requires the back squat. Specificity of training demands the primary focus remains on the competition movement.
Programming Both Together
For trainees who want to include both variations, two approaches work well.
The first places them on separate lower body days: front squat as the primary movement on one session, back squat on the other. Each receives full training priority without competing for neural resources.
The second uses front squat as the primary movement for 8-week blocks alternating with back squat as the primary movement. Each block builds specific strength and technique while maintaining the other movement as a secondary exercise.
The 4 Front Squat Errors That Stall Every Intermediate Lifter
Error 1: Using the Wrists as Primary Support
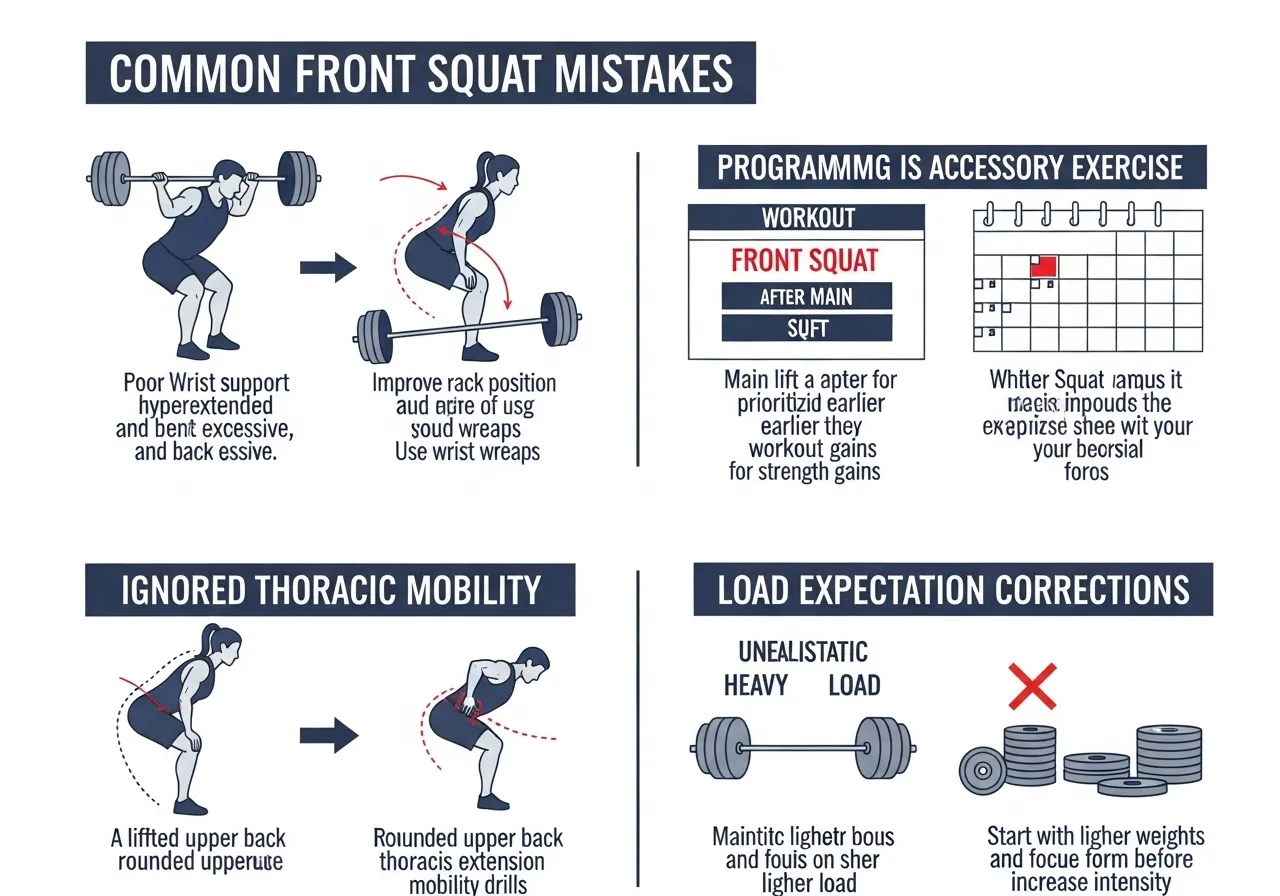
The most pervasive front squat error is allowing the bar to rest on the fingers and wrists rather than on the shoulder shelf. This happens because wrist mobility limits the rack position, or because the rack position was never properly taught.
The consequence: the wrists flex under load as weight increases, the bar drifts forward, and the set ends. Not because the legs failed, but because the wrist position collapsed.
The fix is not stronger wrists. It is establishing the shoulder shelf and releasing the grip. The bar should sit on the deltoid-clavicle shelf with the fingers providing directional guidance only.
A practical test: if the bar stays in position for 2 to 3 seconds with the hands released, the shelf is established. If it rolls forward immediately, the hands are doing structural work they should not be doing.
Error 2: Programming Front Squat as an Accessory
Most trainees who fail to develop the front squat place it at the end of a lower body session, after back squats, leg presses, and Romanian deadlifts, when legs and upper back are already fatigued.
In that state, the rack position collapses at loads that would be manageable when fresh. The trainee concludes front squats are not for them. They are not a poor fit. They are front squatting at the worst possible point in the session.
Front squats respond to being treated as a primary compound movement. Performed first in the session, with 3 to 4 minutes of rest between sets, and progressive loading across weeks, they produce steady adaptation. Placed last as an afterthought, they produce nothing.
Error 3: Ignoring Thoracic Mobility
Trainees who struggle with elbow height at depth are almost always restricted in thoracic extension rather than shoulder or wrist mobility.
The thoracic kyphosis from years of desk work physically prevents the upper back from extending enough to maintain an upright rack position as the hips descend below parallel.
No amount of wrist stretching corrects a thoracic problem. The test is simple: if elbow height is acceptable at the top but drops progressively as depth increases, the limiting factor is thoracic extension under load.
Five to eight minutes of thoracic mobility work before every front squat session produces measurable improvement within four to six weeks.
Error 4: Expecting Back Squat Loads
Trainees who move from back squatting to front squatting expect to front squat close to their back squat weight. When they discover they can only front squat 70 to 75% of their back squat 1RM, they interpret this as a weakness.
The load difference is structural, not personal. Starting at a load that allows technically perfect execution, typically 60 to 70% of back squat working weight, and building progressively from that point produces steady front squat strength development.
Attempting to bridge the gap rapidly by loading beyond technical capability consistently results in elbow drop and forward lean. At that point, the exercise is not training anything productively.
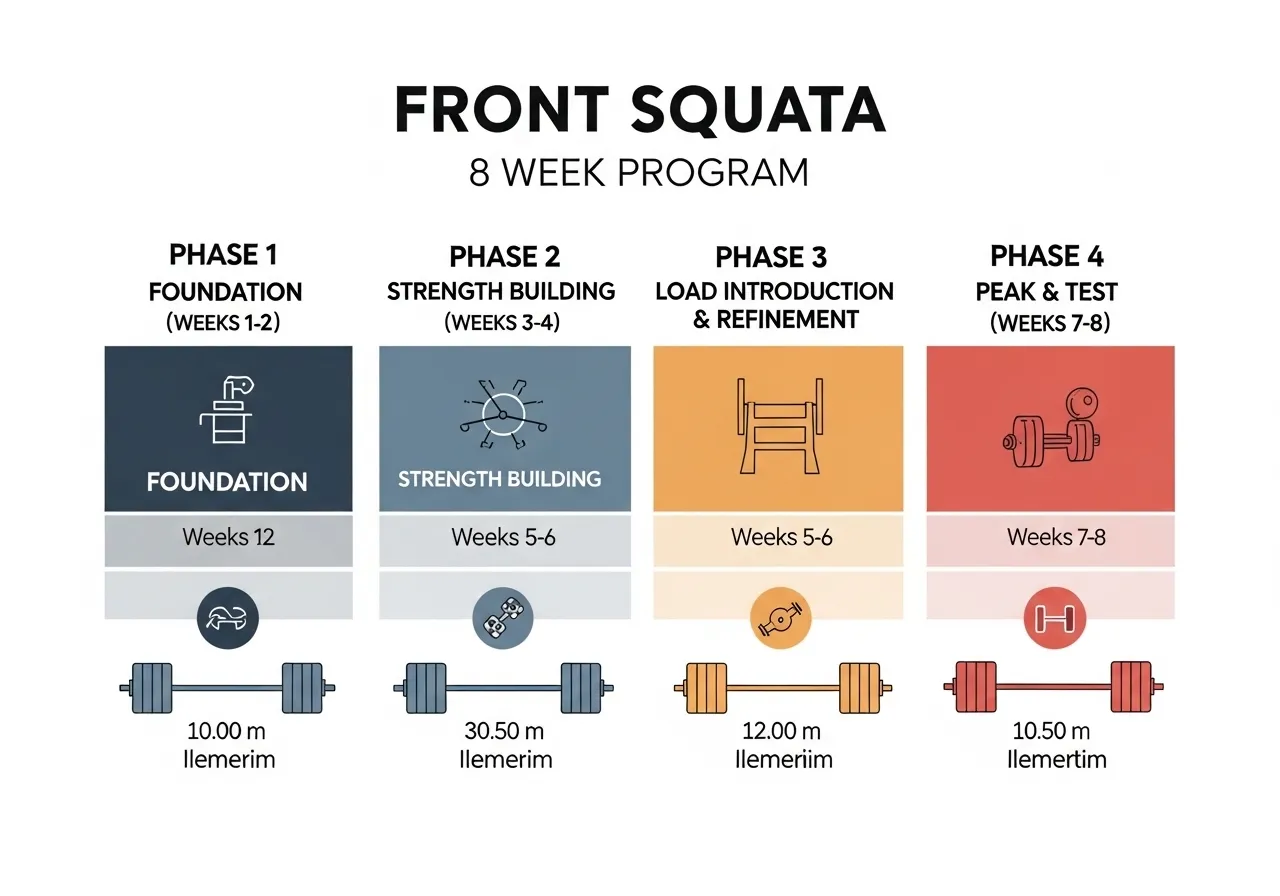
Front Squat 8-Week Progressive Loading Programme
📅 Phase 1: Weeks 1 to 2: Rack Position and Movement Pattern
- Front squat with empty bar or very light load: 4 sets of 5 reps
- Focus entirely on rack position quality and elbow height at depth
- Goblet squat 3 sets of 8 reps. This reinforces upright torso before the bar is added
- Wrist and thoracic mobility: 8 minutes pre-session
- Cross-arm grip acceptable if rack grip is not yet available
Focus: Establish rack position, elbow height, and depth without weight anxiety.
📅 Phase 2: Weeks 3 to 4: Load Introduction
- Front squat 4 sets of 5 reps at 50 to 60% of back squat 1RM
- Reject any rep where elbows drop or heels rise
- Pause front squat (2-second pause at bottom): 2 sets of 5 reps at lighter load
- Begin transitioning from cross-arm to rack grip at lighter loads if mobility allows
Focus: Establish load tolerance. The pause squat confirms whether the bottom position is structurally sound under load.
📅 Phase 3: Weeks 5 to 6: Strength Build
- Front squat 4 sets of 4 reps at 65 to 70% of back squat 1RM
- Front squat 1 back-off set of 8 reps at 55% for volume accumulation at a technique-friendly load
- Box front squat (descend to a low box): 3 sets of 5 reps. This teaches sitting back into depth
Focus: Increase load on primary sets. Back-off set maintains volume while the heavier sets develop strength.
📅 Phase 4: Weeks 7 to 8: Peak and Benchmark
- Front squat 4 sets of 3 reps at 72 to 75% of back squat 1RM
- Week 8: Work up to a 3RM front squat to establish a benchmark
- Expected outcome: 20 to 35% load increase from Phase 1 starting weight over 8 weeks
- Full rack grip established if mobility work was consistent throughout
Focus: Establish a working 3RM as the foundation for the next loading cycle.
Weekly Structure: Integrating Front Squat Into an Existing Programme
For trainees incorporating the front squat into an existing programme, a practical weekly split:
- Session A (Front Squat Primary): Front squat 4 sets of 4 to 5 reps, then Romanian deadlift 3 sets of 8, then walking lunges 3 sets of 10 each side
- Session B (Back Squat Primary): Back squat 4 sets of 4 to 5 reps, then leg press 3 sets of 10, then Nordic hamstring curl 3 sets of 6
This split allows both squat variations to receive full primary effort. It prevents direct competition between them for neural resources and covers both quad-dominant and posterior-chain-dominant stimulus within the same training week.
Is Learning the Front Squat Worth the Investment?
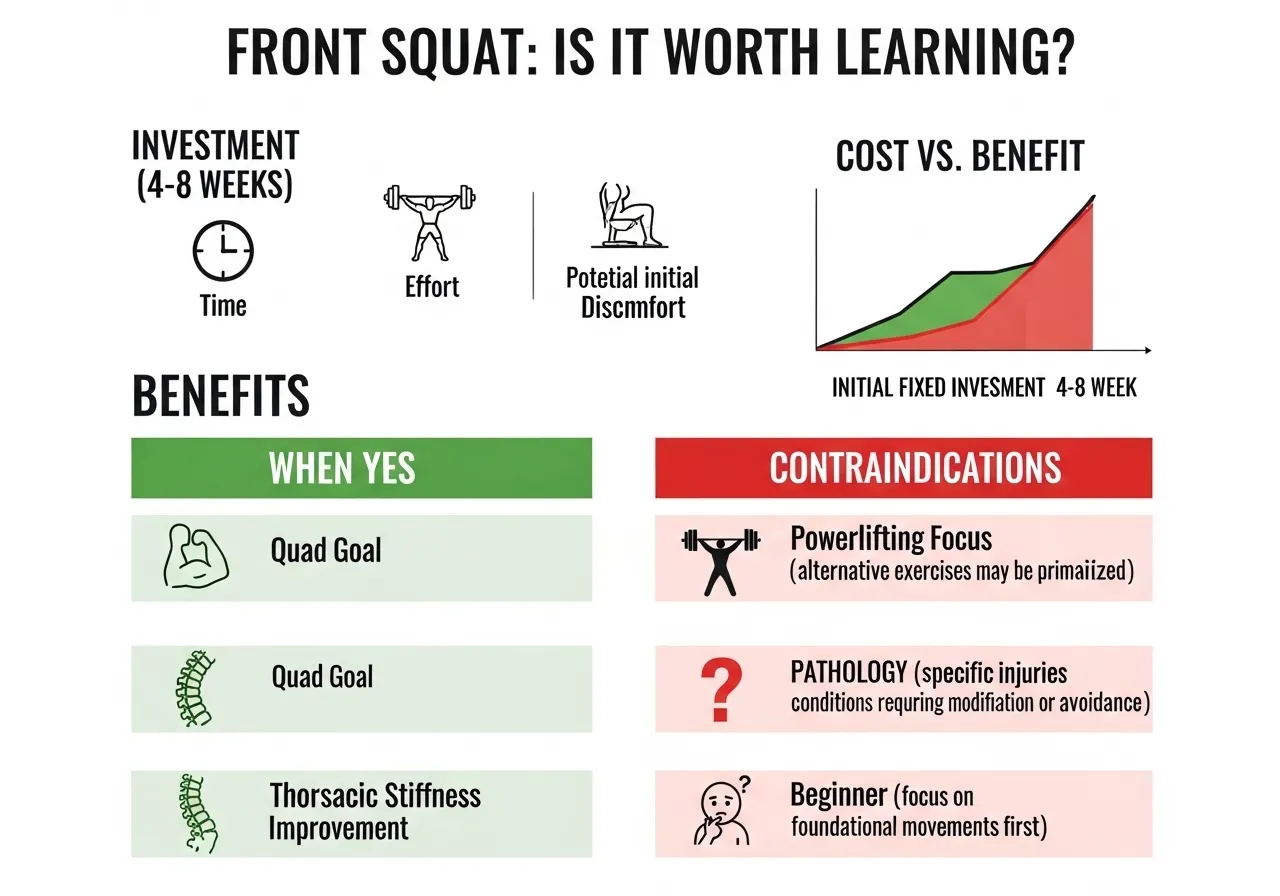
The Honest Cost-Benefit Analysis
Learning the front squat from scratch takes four to eight weeks of consistent practice before it becomes a productive strength exercise rather than a coordination challenge.
During that period, the front squat provides less training stimulus than back squatting at comfortable working loads. Mobility work and rack position development proceed simultaneously. The early weeks feel inefficient compared to back squatting at familiar loads.
What justifies that investment: the front squat develops specific quad and upper back qualities that back squatting alone does not maximise. It also acts as a technical quality filter that identifies movement compensations accumulated over years of back-squat-only training.
Trainees who front squat alongside back squatting consistently report that their back squat technique improves as a secondary benefit. Particularly upright torso maintenance and depth consistency.
When the Answer Is Yes
- Quad development is a specific goal
- Thoracic stiffness or forward lean limits back squat quality
- Olympic lifting or CrossFit is in the programme
- Lower back fatigue consistently limits back squat training volume
When the Answer Is No
- The primary goal is maximum powerlifting strength and all training time should serve competition movements
- Active wrist or shoulder pathology makes the rack position contraindicated
- Training history is less than six months and movement pattern foundations are still being established
Frequently Asked Questions About the Front Squat
How much should I front squat compared to my back squat?
Most trainees front squat 75 to 85% of their back squat 1RM once technique is well established.
Beginners to the front squat often start at 60 to 70% before technique and mobility improve. A gap below 75% after consistent front squat training usually indicates a rack position issue or an ankle and thoracic mobility limitation rather than a true strength deficit.
Should I use heel elevation for front squats?
Heel elevation, using a 2.5 to 5 cm plate under the heels or Olympic weightlifting shoes with a raised heel, is an appropriate short-term tool for trainees whose ankle dorsiflexion limits front squat depth.
It allows training at full depth while ankle mobility work proceeds. The goal is to reduce heel elevation progressively as mobility improves, not to use it indefinitely. For most trainees, four to eight weeks of daily ankle mobility work reduces the heel elevation needed by half.
My elbows keep dropping mid-set. How do I fix this?
Elbow drop mid-set has two main causes. First, thoracic fatigue: the erector spinae and thoracic extensors fatigue before the legs, causing the upper back to round and the elbows to fall as a consequence.
Second, the load is too heavy for current rack position strength. The upper body cannot maintain the rack position at the chosen weight. Fix by reducing load until the elbows stay parallel to the floor across all reps of all sets, then rebuild the load progressively.
Can the front squat replace the back squat entirely?
For general fitness and muscle development, yes. The front squat covers quad, glute, and upper back stimulus adequately when programmed correctly.
For powerlifting, no. The back squat allows heavier absolute loads and is the competition movement. For general athletic development, both together produce better results than either alone.
How often should I front squat per week?
Two sessions per week is optimal for most intermediate trainees developing front squat strength while allowing adequate recovery between sessions.
Beginners learning the movement can train it three times per week at lighter loads. The neuromuscular learning benefits of frequency outweigh recovery costs at loads below 70% of working capacity.
- Front squat produces greater vastus medialis activation than back squat at equivalent loads despite requiring 20 to 25% less absolute weight
- A 12-week RCT confirms front squat and back squat produce equivalent quadriceps hypertrophy despite the significant load difference
- The rack position requires wrist extension, elbow flexion, shoulder external rotation, and thoracic extension simultaneously. Address each separately before adding load.
- Lead every ascent with an active elbow elevation cue, not a leg drive cue, to prevent forward collapse
- Front squat and back squat produce complementary lower body stimuli. The most effective programmes include both.